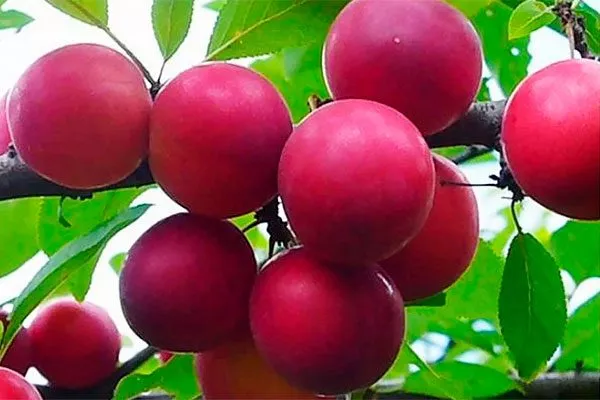
Cherry plum is a popular fruit tree, prized for its tasty and healthy fruits. To grow a new tree yourself, it's important to know how to propagate it properly. There are several methods, each with its own advantages and suited to different conditions and purposes. Let's look at the main methods, their advantages, and challenges.
Rules for propagating cherry plum by cuttings
Cherry plum is undemanding and takes root well in a new location. It can be propagated both by seed and vegetatively. The most popular method is rooting cuttings. This method preserves varietal characteristics, ensures vigorous growth, and ensures a high survival rate of seedlings.
When to take cuttings?
Fruit tree cuttings are taken after flowering. For cherry plums, green cuttings are taken in June or July, and semi-woody and woody shoots are taken in August. The optimal harvesting period is from early summer to late August, provided the plant has finished flowering.
Cuttings should not be taken during flowering, as they will not take root well and may reduce fruiting in mature plants. This procedure is best performed early in the morning or evening, out of direct sunlight. A dry, overcast day is ideal.
Pros and cons of the method
Suitable varieties of cherry plum
Unlike plum, cherry plums respond well to cuttings—especially green shoots, which root successfully in almost all varieties. However, woody cuttings are more difficult: not all varieties take root, and rooting requires more effort. Hybrid varieties also produce negative results.
Below are the varieties that root well and easily adapt to the climatic conditions of Russia:
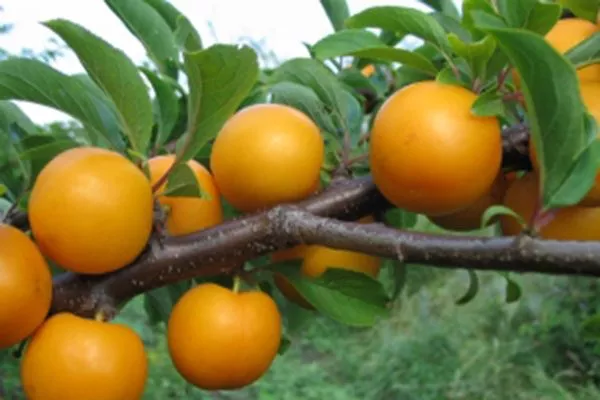
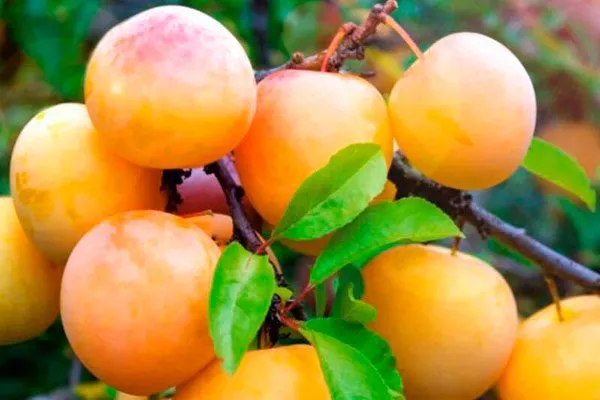
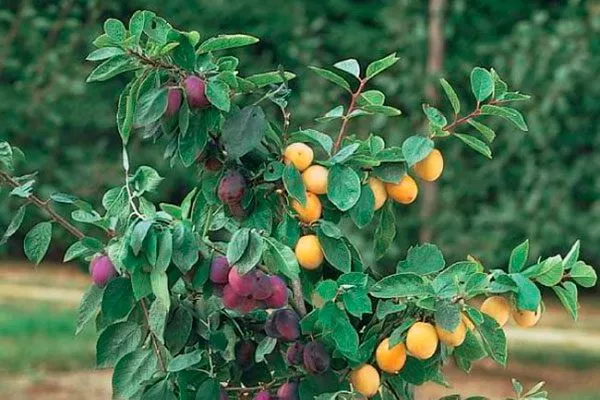
- Golden autumn. A high-yielding self-sterile variety. Bright yellow fruits weigh 15-20 g. The crop ripens in the second half of August and remains on the vine until the end of October. The flowers are frost-resistant down to -7°C.

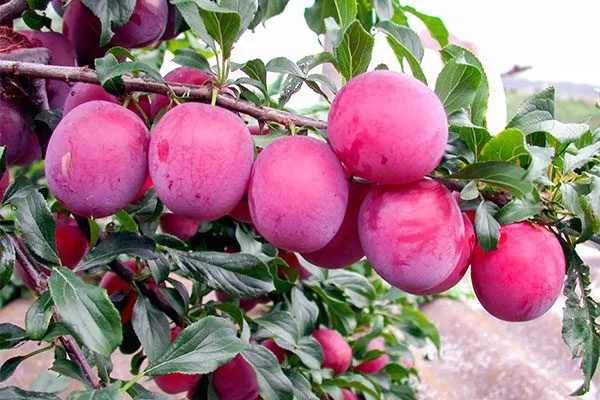
- Kuban Comet. A self-fertile cherry plum with large red fruits weighing up to 29 g. It has excellent flavor (rated 4.4-4.6 points). Frost-resistant, a single tree yields 10 to 50 kg of fruit.
- Nectarine aromatic. A variety with large, burgundy fruits weighing up to 52 g. The flesh is sweet, with a rich juice and nectarine aroma. It is distinguished by its high winter hardiness.
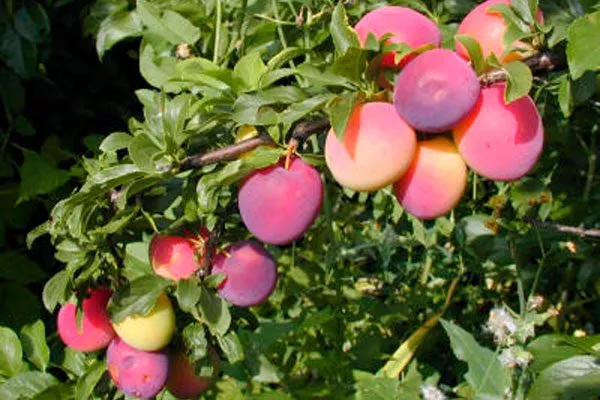
- Traveler. A self-sterile variety with fruits that are red on the outside and orange on the inside. The flesh has a banana-like flavor. The tree is frost- and disease-resistant.
- Apricot. A self-fertile variety with pinkish-orange fruits weighing approximately 26 g and reminiscent of apricots in flavor. It tolerates temperatures down to -35°C.
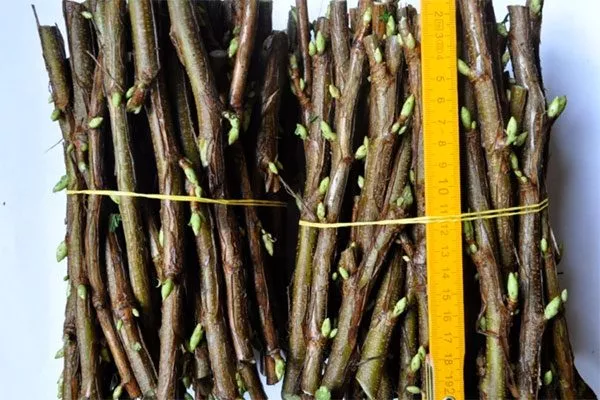
Selection and preparation of cuttings
Before you begin growing cherry plums from a branch, you need to carefully select the planting material. There are many options, each with its own characteristics and rooting requirements.
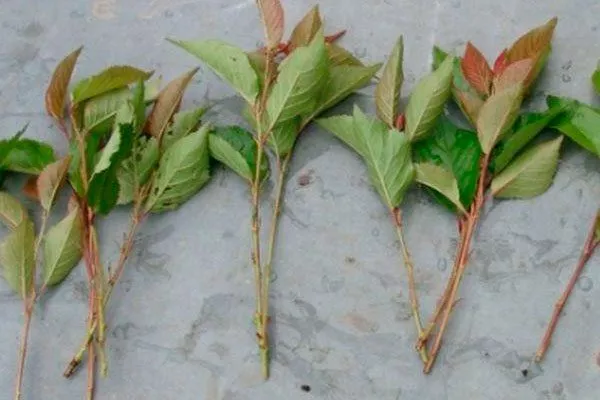
Greens
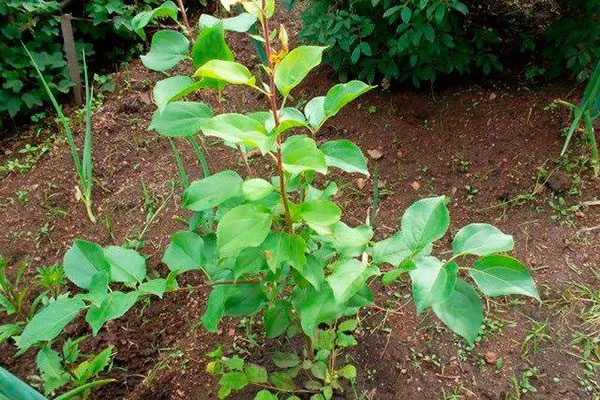
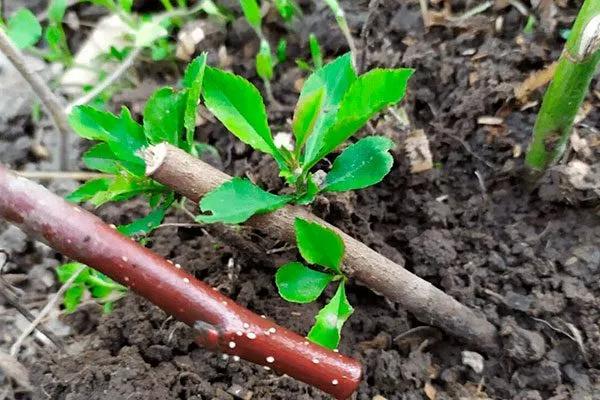
One of the most effective methods of propagating cherry plum is rooting green or semi-woody cuttings. The shoots form during the current season: they haven't yet become woody, but they are already quite strong, resilient, and flexible.

They can be identified by their reddish tint at the base and rich green coloration along their entire length. These cuttings quickly form roots and grow vigorously, with a fairly high survival rate.
For preparing planting material, choose the following trees:
- healthy;
- strong;
- consistently fruitful;
- tolerating drought and frost well.
The optimal time for harvesting green cuttings is from June 10 to the end of July, in the morning or evening hours, when the sun is not active.
Step-by-step instructions:
- The day before the procedure, thoroughly moisten the mother tree (at least 30 liters of water), and add a growth stimulator solution if desired.
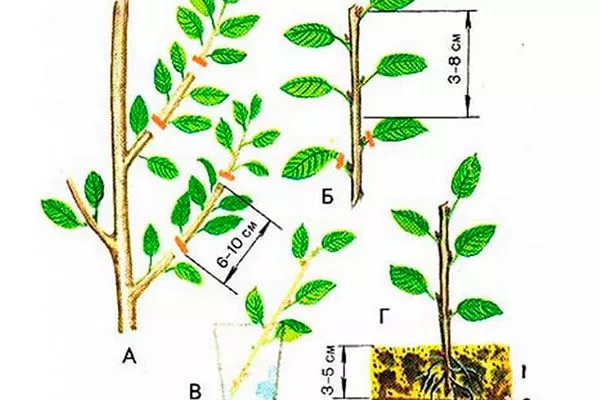
- On a cloudy day, cut shoots 25-30 cm long and at least pencil-thick. Immediately after cutting, place them in a container of clean water.
- Root each cutting so that 2-3 leaves remain at the top and a stem about 3 cm long at the bottom. Make the top cut straight, 0.5 cm from the bud, and the bottom cut at a 45° angle.
- Soak the cuttings for 30 minutes in a weak solution of potassium permanganate, then place them in a solution of a root formation stimulator (for example, Kornevin or Heteroauxin) for 24 hours.
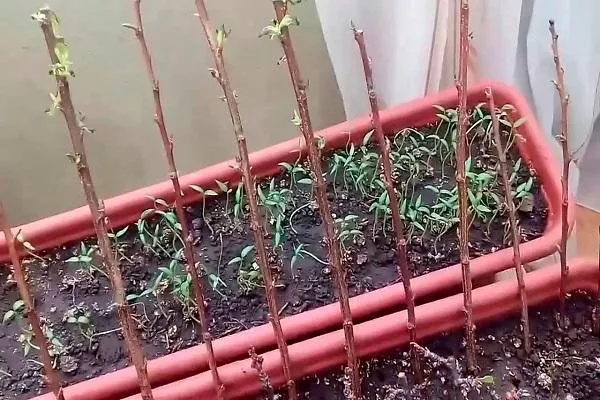
Stiffened
This method of propagation is less effective than using green shoots, but it is still used, especially when there is a need to prune excess branches. One-year-old shoots that have already developed mature bark are used.
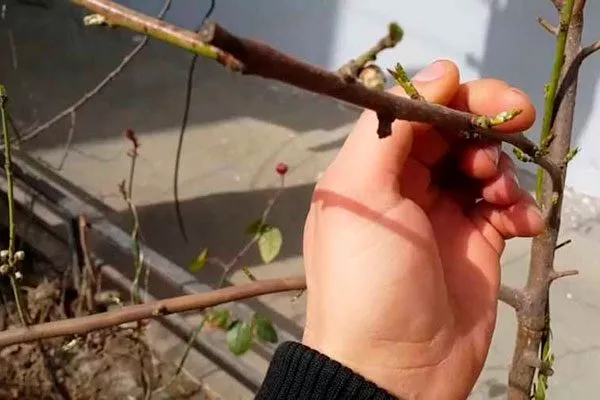
Basic requirements:
- The surface must be smooth, without cracks, stains or other defects.
- Harvesting should be done after the leaves have fallen, although cuttings can also be taken in the second half of August. It's especially convenient to use shoots that are subject to sanitary or formative pruning.
- Cuttings 20-30 cm long and 0.7-1.2 cm thick are suitable for rooting. If you plan to root in a greenhouse, you can use shorter cuttings – 5-10 cm, but it is important that each cutting has at least three internodes.
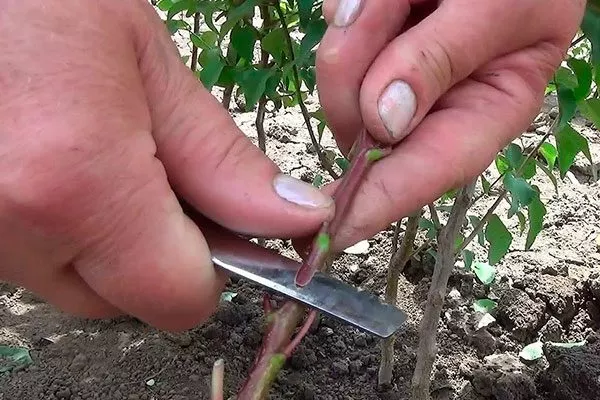
- When taking woody cuttings, make diagonal cuts at both the top and bottom. The best planting material comes from the bottom and middle portions of the shoot.
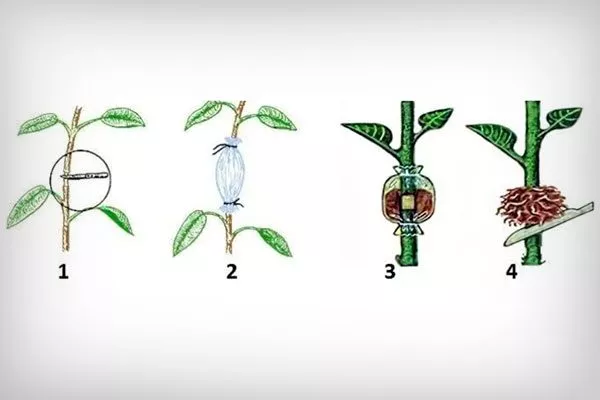
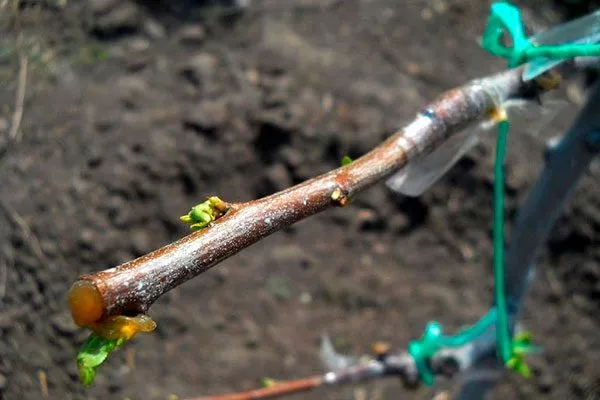
Air layering
This process involves forming roots directly on a branch that remains attached to the parent tree. Begin this process in May or early June, while growth and sap flow are active.
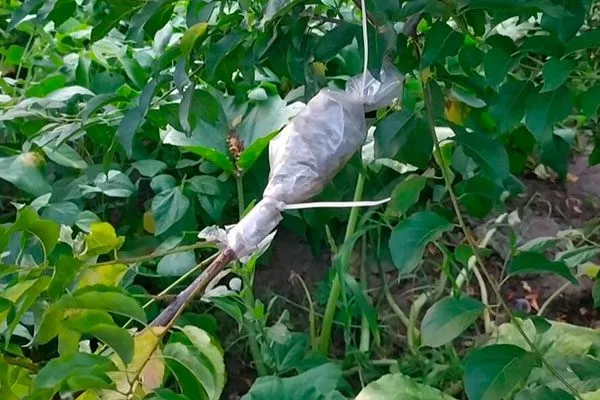
Air rooting procedure:
- Select a suitable branch – last year’s, straight, without branches, growths, spots, damage or signs of disease.
- Remove all lateral shoots on the selected branch, leaving no stumps.
- Make a ring cut in the bark at the bottom of the branch: two cuts in a circle at a distance of 1 cm from each other, removing the top layer of bark between them.
- Treat the cut with a rooting stimulator.
- Place a plastic bag over the branch, cutting a hole in the bottom first. Pull the branch through the hole so that the bottom edge of the bag is 10 cm below the cut, and secure it tightly with duct tape.
- Fill the bag with moist, nutritious soil—it should completely cover the cut area. Secure the top, shaping it into a bag, and poke a few holes in the plastic for ventilation.
- Once roots appear, lightly trim the top of the branch, gradually separating it from the mother plant. Remove the bag and cut the shoot completely just before planting.
You can root a branch by bending it to the ground. Secure the shoot with a staple, cover it with moist, fertile soil, water it regularly, loosen the soil, and fertilize as needed. The root system will form directly in the soil. After rooting, separate the shoot and replant.
Root shoots
Choose a young shoot located as far away from the main trunk as possible. The further it grows, the more likely it is to have developed its own root system.
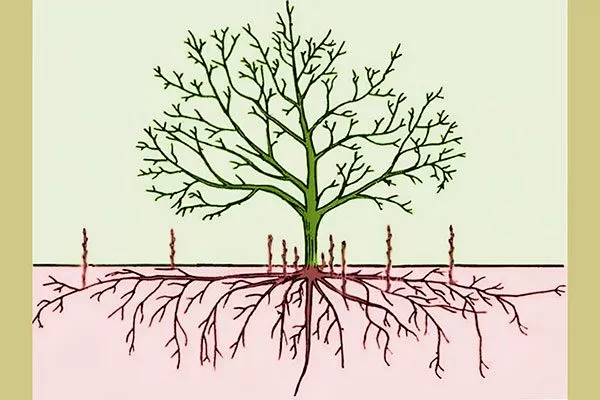
Throughout the summer, water the selected shoot regularly, loosen the soil, fertilize, and hill up the soil to stimulate root growth and development. By the end of August, carefully dig up the seedling and separate it from the main plant, being careful not to damage the root system.
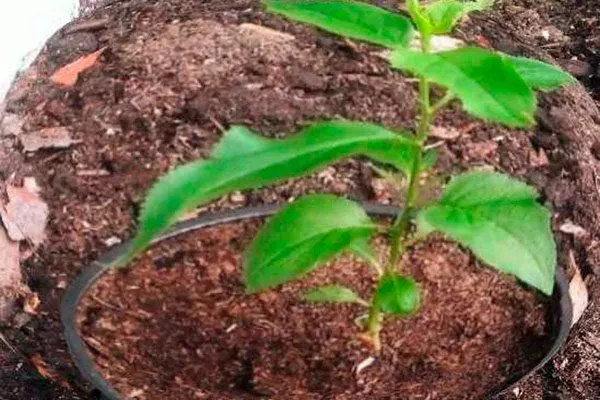
Rooting at home
Plant the cuttings in containers with moist, nutritious soil. Cover the container with a cut-down plastic bottle or bag to create a mini greenhouse.
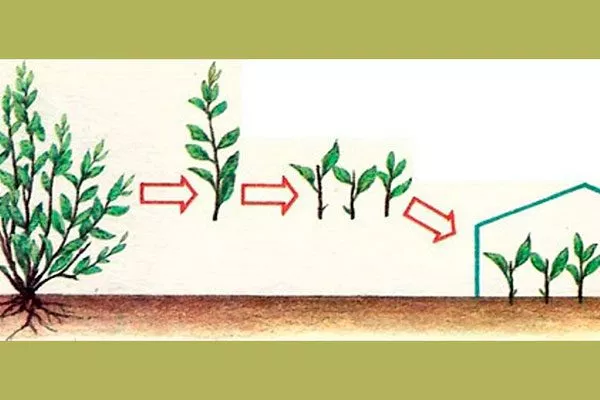
Next, follow the requirements:
- Keep the soil moist and apply the first fertilizer after a month.
- Once the roots appear, begin to open the cover slightly, gradually increasing the duration of ventilation.
Landing
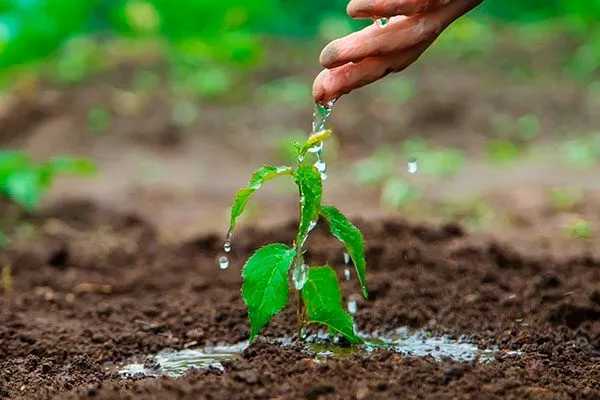
Summer cuttings can be planted in either fall or spring, but it's best to wait until the following spring. This will give the plant time to strengthen and adapt, and also prevent frost damage.
To plant cherry plum, choose a sunny and wind-protected location where the groundwater level is no closer than 1.5 m to the surface.
Step-by-step instructions:
- A month before planting, prepare the soil: clear it of weeds and plant debris, dig it up and water it with a hot solution of copper sulfate.
- Dig a planting hole 50 cm deep and 70 cm wide. Place a drainage layer of gravel, expanded clay, or fine crushed rock at the bottom. Mix the excavated soil with potassium chloride, humus, superphosphate, ammonium nitrate, and river sand.
- Return some of the fertile soil to the hole, forming a small mound in the center. Carefully place the seedling on it, spreading the roots evenly. Install a stake nearby to support the plant.
- Fill the hole with soil and compact it. Moisten the seedling generously with 20-30 liters of water. The root collar should be approximately 5 cm above the soil surface. Mulch the area around the trunk with hay, straw, peat, or humus to protect against diseases, pests, frost, and weeds.
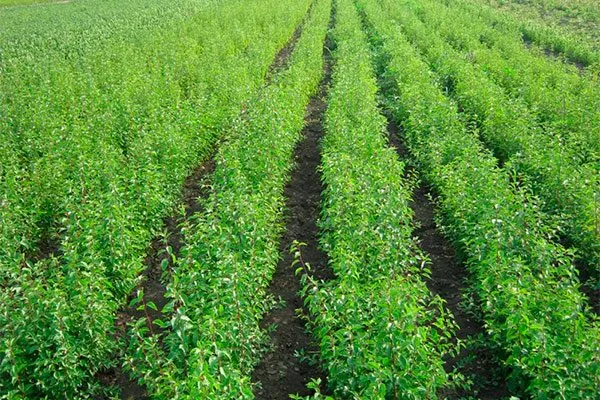
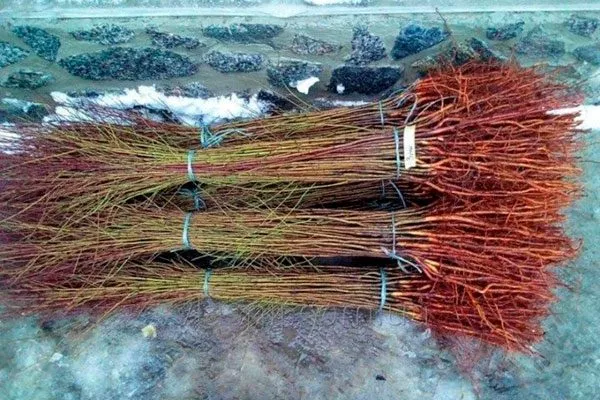
Features of cuttings depending on the type of cherry plum and region
Cherry plums establish themselves in new locations much more easily than plums. The main difficulties arise primarily with hybrids. If several attempts to root seedlings of a particular variety have been unsuccessful, propagation by grafting is recommended.
Typically, a cultivated scion is grafted onto a wild rootstock grown from a seed. This approach ensures a strong and resilient plant.
Cherry plum varieties differ in rooting speed:
- some form adventitious roots in about 2 weeks;
- others require at least a month.
When choosing a variety, it's important to consider the region's climate. Almost any variety is suitable in warmer regions, but heat- and drought-resistant varieties are preferable. For northern and central regions, early-ripening varieties with high frost resistance are best.
Further care
To ensure the crop takes root, thrives, and produces a bountiful harvest, it needs proper care. Follow these simple steps:
- During hot and dry summers, young plants need watering at least twice a month. Pour 20-30 liters of room-temperature water under each tree.
- To improve soil aeration and break up the soil crust, loosen the soil the day after watering or rain. Be sure to remove weeds from the tree trunk area.
- Do not fertilize the tree for the first three years after planting. After that, 2-4 applications of fertilizer per year are sufficient. Alternate mineral and organic fertilizers.
- Do not prune the crown during the first year after planting. Begin shaping the crown in the second year. Perform sanitary pruning annually in spring or fall, removing dry, damaged, weak branches, and root suckers.
- For better wintering, mulch the soil around the tree. Apply similar protection against diseases and pests in the summer. In the fall, clear the area around the tree of fallen leaves and plant debris.
- To reduce the risk of infection, treat with a solution of copper sulfate in the spring before flowering and in the fall after fruiting.

Tips from experienced gardeners
It's not recommended to place cherry plum cuttings in water for rooting, as they often rot and develop poor roots under such conditions. Many experienced gardeners believe that making angled cuts on the planting material is unnecessary.
Other useful tips:
- Before cutting, water the mother tree well, but do not fertilize it.
- If you can't root the cuttings right away, wrap them in a damp cloth and place them in a cool place – this way, the cuttings will last up to two weeks.
- Before use, be sure to disinfect the pruning shears by wiping them with alcohol or a light pink solution of potassium permanganate.
How to grow cherry plum from a seed at home?
Gardeners usually prefer the generative method for growing seedlings. You can grow cherry plums from seeds yourself, but it's important to follow certain guidelines.
Why is it better to propagate by seeds?
This is the most common way to increase the number of seedlings.
Preparatory work with planting material
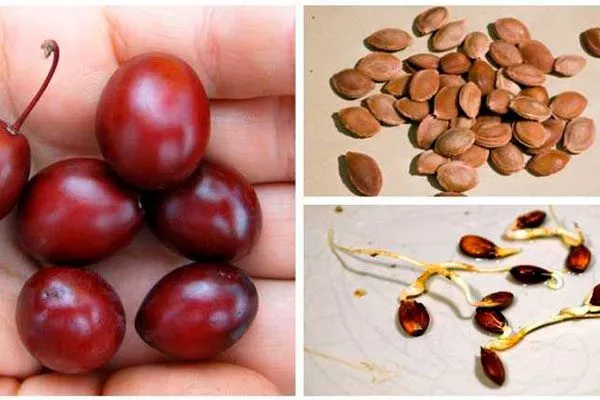
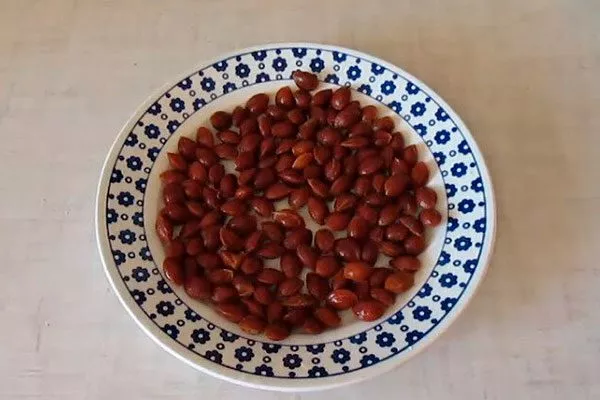
High-quality seeds are obtained only from fully ripe, undamaged fruits. It is recommended to select the sweetest fruits for planting.
Follow these steps:
- Carefully remove the seeds from the pulp and inspect them carefully – they should be of the correct shape.
- Soak in water to remove any remaining pulp that may interfere with germination.
Selecting the right container and soil
Plant each seed in a separate container, preferably a peat pot with drainage holes. Before planting, treat them with a special preparation to prevent disease.
For the planting substrate, use a general-purpose soil, but experienced gardeners prefer to prepare their own soil mixture. The optimal composition:
- 50% peat;
- 20% humus;
- 20% vermiculite;
- 10% sand.
Planting in separate containers
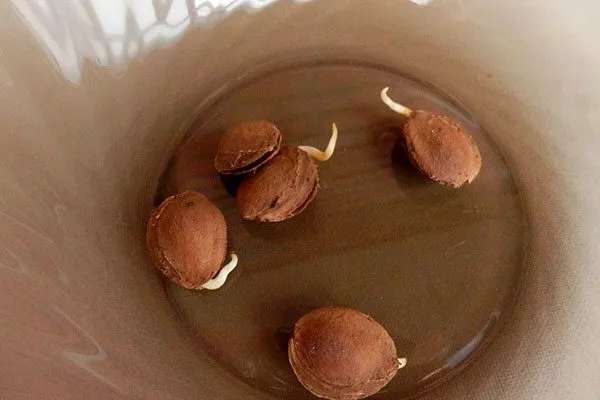
You can remove the seeds directly from the pits and germinate them before planting, skipping the hardening process. Place the seeds in damp cheesecloth and place them in a warm, dark place for a few days. During this time, a sprout should appear, after which you can begin planting.
Step-by-step algorithm:
- Fill the containers with soil.
- Plant the sprouted seeds.
- Cover them with soil and water well.
- Cover the containers with cling film.
Lift the film regularly to allow air to circulate and water the soil. Remove it as soon as sprouts appear.
Site preparation and transplantation to an open area
Plant cherry plum seedlings in the ground once they've grown and become strong enough. Prepare the soil 2-3 weeks before planting: dig, remove weeds, and add well-rotted manure. In the spring, plant the seedlings in the garden once the weather warms up.
Step-by-step instructions:
- Dig shallow holes.
- Place the seedlings together with the lump of soil in which they grew.
- Fill with soil and compact well.
- Water generously with warm water.
At night, cover young plants with plastic bottles and warm cloth. In regions with warm spring nights, you can skip the cover, but in cooler areas, it's best to use it at first.
Caring for seedlings
Water the plants daily in the evening with warm water, but reduce the frequency if there is frequent rainfall. The soil should be moist, but not overwatered or overdried.
Perform the following activities:
- During the period of active growth, feed with nitrogen-containing fertilizers.
- Apply complex mineral fertilizers several times a month.
- Once a week, when weeding, loosen the soil to provide oxygen access to the roots.
By vaccination
In areas with unstable climates, grafting cherry plum onto plum will produce a frost-resistant tree. A good harvest will be achieved within a year.
Why graft cherry plum?
Cherry plums are quite demanding when it comes to growing conditions, so they don't always produce abundant fruit. To ensure a large annual harvest of tasty and juicy fruits, it's recommended to graft cultivated cherry plum varieties onto plum trees, as they adapt well to a variety of climates.
Advantages and disadvantages
When to graft cherry plum?
The ideal time for spring grafting is the first sunny days, when the soil begins to warm up and the trees still have no leaves. In most regions of Russia, this period falls between late March and mid-April, but timing may vary depending on the climate:
- in the central zone usually the end of March - mid-April;
- in the south – March, and sometimes even February.
Summer grafting is primarily suitable for young plants 1-2 years old. It is used to re-graft wild seedlings or shoots in the garden. Fall grafting is less common because it is not always successful in central Russia. However, in the warmer climates of the southern regions, this method can be successful.

Selection and preparation of rootstock
For the rootstock, select a young plum tree 4-5 years old with a trunk at least 4 cm thick. Next, follow these steps:
- On the selected tree, find a healthy, undamaged branch and use sharp pruning shears or a saw to cut off more than half of the young shoot.
- Carefully clean the cut edges with a utility knife.
- In the middle of the stripped stump, make a deep longitudinal cut up to 5 cm long.
Selection and preparation of scion
From the sunny outer part of the cherry plum's crown, in the middle tier, select and cut a healthy, one-year-old shoot with mature wood. Follow these two steps:
- Cut off the top, preparing a cutting about 15 cm long.
- Use a knife to sharply trim the lower part of the handle on both sides, forming a wedge.

For grafting, it is best to use the middle part of the shoot.
Methods
There are several methods for grafting cherry plums, chosen depending on the plant's age, time of year, and growing goals. Each has its own characteristics.
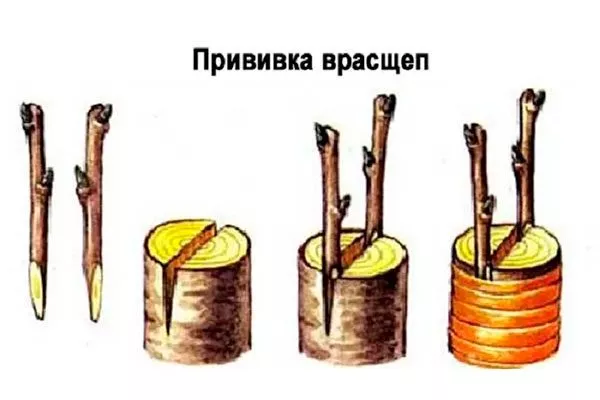
How to properly graft cherry plum into a cleft?
Prepare all necessary materials in advance and carefully follow each step to ensure the cutting takes root well. Now proceed to grafting:
- Insert the wedge scion firmly into the cleft (longitudinal cut) on the plum tree.
- Seal the edges of the grafting site with garden pitch.
- Wrap it tightly, then place a plastic bag over the grafted cutting, securing the ends with tape under the graft. This will protect it from the bright sun and help retain moisture.
- To prevent moisture from evaporating from the cut at the top of the cherry plum scion, cover it with garden pitch.
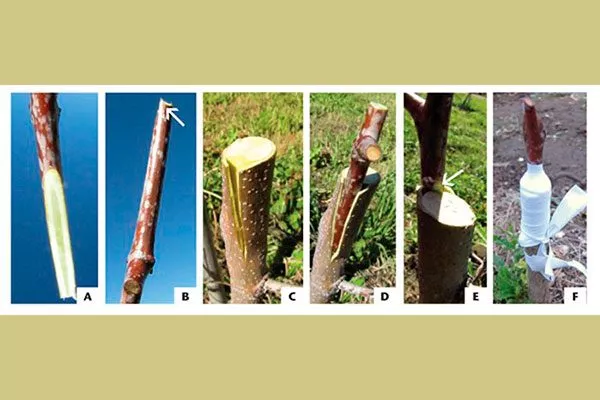
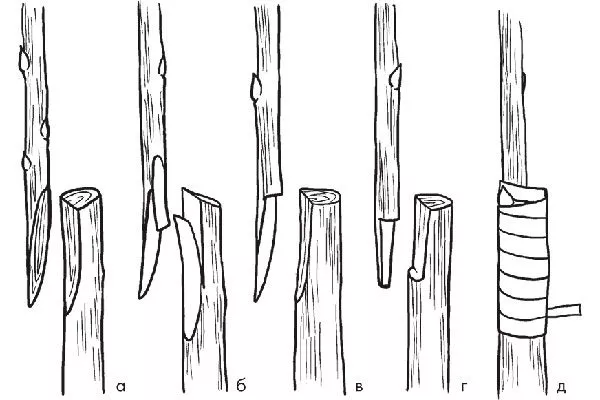
Grafting cherry plums under the bark – step-by-step instructions
On a young tree, select a healthy branch and cut it down to a stump using a pruning saw. Then, use pruning shears to remove any branches extending from the trunk.
Next steps:
- On the scion - a cutting cut in the fall and properly stored, make an oblique cut at an angle of about 30°, 3-4 cm long.
- In the center of the cut, make a split - the so-called “tongue”, which will help the graft take root better.
- On the side of the rootstock, carefully cut off the top layer of bark and make a “tongue” of the same size.
- Connect the scion to the rootstock so that the “tongues” interlock and the cambial layers of the plants coincide.
- Tie the grafting site with plastic tape and cover all cuts with garden pitch.
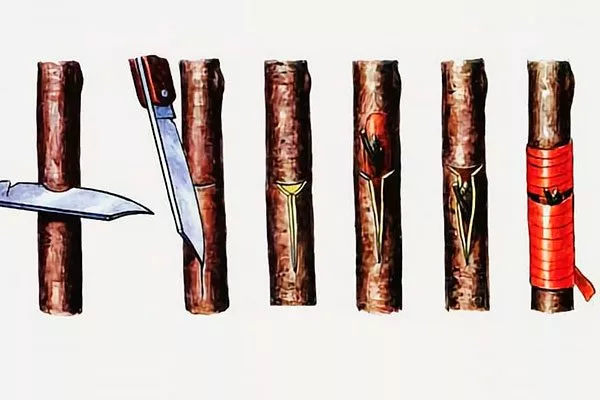
Copulation
This method is used for plum grafting when the rootstock and scion are approximately the same thickness. This method is fairly simple, but requires care and precision.
Step-by-step instructions:
- Make 3-4 cm long oblique cuts on the rootstock and scion.
- For better fusion, use improved copulation - make an additional cut (a "tongue") in the middle of the cut, which helps fix the parts together.
- Place the cuts tightly together, ensuring that the cambial layers are aligned precisely.
Wrap the grafting site with special grafting tape for secure fixation.
Budding
Perform this procedure in the summer during the period of active sap flow, when the bark peels off easily. This bud grafting method is convenient and economical.
Stages of the procedure:
- Make a T-shaped cut in the bark of the rootstock.
- Carefully lift the edges.
- From the cutting, cut out a shield with one developed bud - this will be the scion.
- Insert the shield under the bark of the rootstock, as if into a pocket, trying to completely cover it with bark.
Carefully wrap the grafting site so that the bud remains open and can develop.
Caring for grafted cherry plum
The survival of the scion, even with spring grafting, is assessed after 2-3 weeks, and sometimes even after a couple of months. Signs of a successful procedure include:
- the buds on the cuttings swell or begin to grow;
- the bark remains elastic and does not darken;
- the cut does not dry out or turn black.
Helpful tips:
- Provide moderate watering to keep the soil slightly moist, especially in hot weather.
- Two to three weeks after grafting, add a mild nitrogen fertilizer or compost to the tree's trunk area. This will stimulate growth without overloading the plant.
- Pruning should be done to balance growth and ensure branches develop in the desired direction. Remove shoots that compete with the scion, especially if they grow below the graft.
- Make sure the crown isn't too dense. The scion's growth should be upward and outward, toward the sun and air—this will ensure not only a beautiful shape but also full fruiting.
Common mistakes when grafting cherry plums
Grafting is a delicate process that requires precision and attention to detail. To achieve good results, it's important to understand and avoid common pitfalls:
- Incorrect date selection. Each region has its own optimal timing. Late spring grafting is unlikely to succeed. Grafting during the hottest summer months is also risky.
- Poor quality of cuts. Torn edges, wrinkled bark, dull pruning shears that don’t cut but crush the wood – all of this reduces the survival rate.
- Neglect of insulation of cuts. Leaving open wounds after grafting exposes the tree to the risk of drying out and becoming infected.
Which method is the best?
It's impossible to definitively determine which method of cherry plum propagation is optimal—each has its pros and cons. Seed propagation is the least commonly used due to its time-consuming nature: it can take 5-6 years or even longer before the tree begins to bear fruit.
Most often, gardeners choose to propagate by cuttings or grafting. However, cuttings are also not particularly fast—not all cuttings root successfully.
Propagating cherry plums is a process that requires attention and knowledge of the nuances of each method. Choosing the optimal method depends on your goals, resources, and the regional climate. Regardless of the chosen option, proper care and following recommendations will help you grow a strong tree that will yield fruit for many years to come.