A run is a convenient structure for running chickens, and you can build it yourself. To do so, you need to choose the right materials and location, and make the necessary calculations. You'll learn more about the different types of runs and what's needed to build each one in this article.
What is it used for?
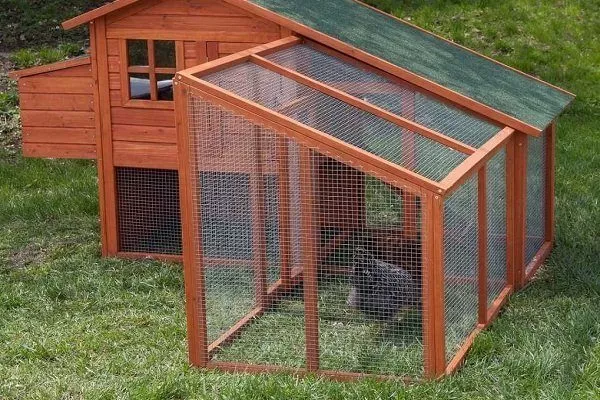
A run is a spacious enclosure where chickens can move freely during playtime. It ensures adequate air circulation and access to fresh grass, an essential source of vitamins in their diet.
Other features include:
- Protection. The walls of the pen are mostly made of mesh, which protects the birds from predators. It also prevents the hens from wandering outside their designated area, keeping them away from the garden plants.
- Freedom. Birds should not be kept in closed cages or coops for long periods of time; they need to move, breathe fresh air, and receive an optimal dose of vitamin D to stay healthy.
- Quality. Eggs from hens that can roam outdoors contain many more nutrients.
- Cost-effectiveness. Feed costs for chickens are reduced.
Design requirements
There are two main requirements that a pen must meet:
- Height. Chickens don't fly, but their wingspan is still large enough to clear a moderately tall fence. Therefore, ensure the height is at least 1.8 m for broilers and 2 m for domestic chickens. It's better to have the pen slightly higher than normal, rather than lower. If achieving the optimal height isn't possible, it's best to build a pen with a mesh top.
- Feeder. In the pen, chickens can freely feed on plants, bugs and worms, but still need to take care of installing a feeder With regular food to ensure the diet is enriched with all the nutrients. It's best to add a little gravel mixed with the feed or mash to the feeder. The quality of the feed must be constantly monitored, as it spoils faster when exposed to the elements.
Types
There are two main types of pens. Their main differences lie in their purpose and capacity.
| Name | Height | Material | Type |
|---|---|---|---|
| Mobile | 1.8 m | Wood/PVC | Summer |
| Stationary | 2 m | Metal/Wood | Year-round |
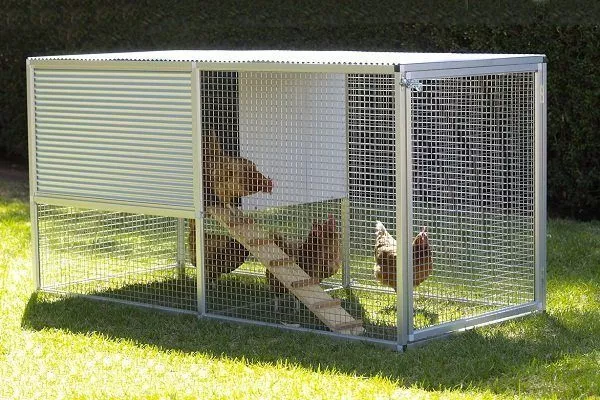
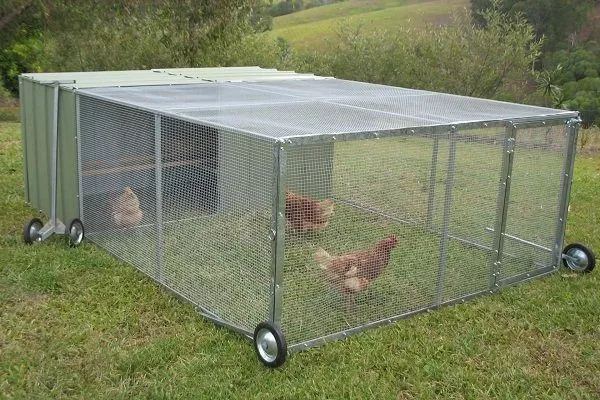
Mobile
The ideal time to use them is during the warm season, when there is a lot of green grass on the site.
The enclosure has the following parameters:
- Size. Portable pens are typically small and compact, allowing for easy transport. They are covered with a sturdy mesh top to keep the birds contained.
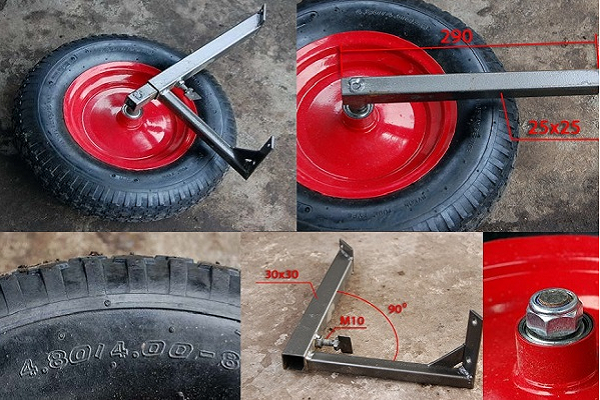
- Portability. These enclosures are equipped with handles or wheels. Wheeled enclosures are more convenient because they can be moved by one person.
- Equipment. A waterer and feeder are placed inside the pen. A canopy is placed on the side to protect the birds from the rain.
Benefits of use:
- Mobility. Once the chickens have run out of grass in the area, the run can be moved. This will ensure the birds always have a healthy supply of food.
- Simplicity. Typically, it takes less time and materials to build such enclosures.
Negative points:
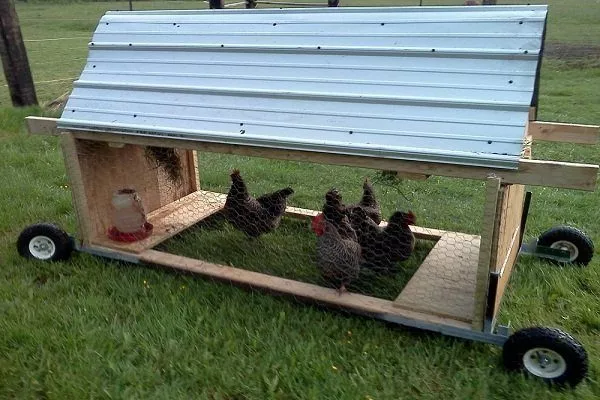
- Distance from the nest. In portable pens, chickens can only roam, but not lay eggs or sleep. Therefore, chicks and adult birds must be moved back to the coop in the evening. A solution is to build a small portable coop equipped with perches.
- Small size. Housing many chickens in such a pen is usually difficult, as there won't be enough space for them. And if the structure is made larger, it will become difficult to move.
Mobile pen
The mobile pen can be moved to a more favorable location at any time.
A feeder and a waterer must be placed inside the mobile pen.

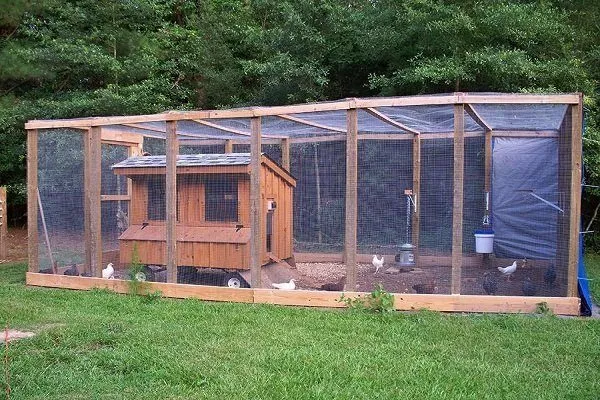
Stationary
They are used for walking birds throughout the year.
Peculiarities:
- Construction. Typically the pen is adjacent to the chicken coop so that the birds can freely enter it.
- Lack of canopy. Birds can hide in the chicken coop at any moment to wait out bad weather there.
- Shading. Part of the run should be shaded to protect the chickens from the bright sun. A tree with a lush crown can be planted in the area.
Advantages of a stationary enclosure:
- Large area. You can build a coop of any size. Typically, the size is based on the number of hens you'll house.
- Wind protection. On the north side, you can put up a wall instead of a net to prevent the chickens from getting sick from strong winds.
Cons:
- Risk of disease. If the pen is open at the top, wild birds may enter the area. They are carriers of diseases.
- Consumption. It takes more time and materials to build.
Stationary pen
A permanent pen is usually attached to the chicken coop.
A permanent pen is usually built without a canopy.

How to build?
The construction of a chicken coop takes place in 2 stages.
Preparatory work
Particular attention should be paid to preparation for construction.
Selection of materials
The choice of means for creating a structure largely depends on its type:
- Mobile. Lightweight materials are needed. 50 x 50 mm wooden beams are suitable. PVC pipes can be used, but they will be more expensive.
- Stationary. The most important thing is to ensure the strength and longevity of the structure. Therefore, it's best to use metal pipes and corners. Wood requires special treatment to protect it from rot.
The main element of the design is the mesh.
- ✓ Corrosion resistance: Choose galvanized mesh for durability.
- ✓ Mesh size: no more than 2 cm to protect against rodents and small predators.
- ✓ Material strength: metal mesh is preferable for protection from large predators.
The following requirements are imposed on it:
- Material. Mostly metal. Birds can get entangled in fabric mesh, which can cause injury.
- Small holes. Their diagonal size should be no more than 2 cm, otherwise rodents will easily penetrate into the enclosure.
In total, 5 types of mesh are used:
- Wire. It's often used, but it's not very reliable. Because of its low strength, the mesh is easily chewed through by predators. Larger openings can also allow chickens to escape. However, it's a good option for creating a top cover for a run, protecting chickens from predators.
- Reinforcement. A very strong mesh that provides good protection. However, it is also very rigid and difficult to work with. It is also somewhat more expensive.
- Galvanized. The mesh has fine mesh, is strong and durable. It requires no special treatment, as it is coated to protect against oxidation. It's easy to work with and install. It's the best option.
- Polymer. A good and inexpensive option. However, if the area is prone to rodent attacks, they will easily chew through it.
- Chain-link fencing. A durable mesh that will last for years. The only drawback is the mesh size, which is too large.
To build an open pen you will also need:
- hammer;
- Bulgarian;
- roulette;
- nippers;
- wire;
- hand drill;
- building level;
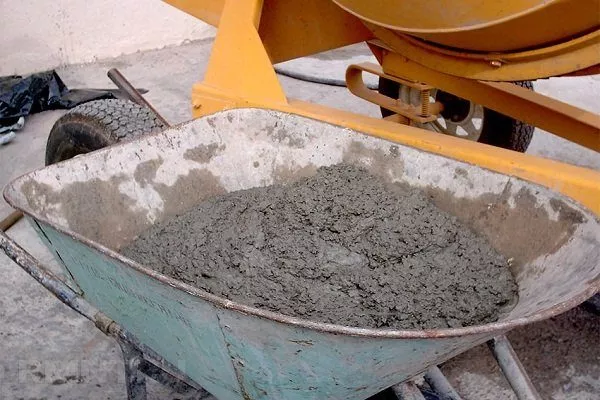
- concrete solution.
For an enclosure with a canopy:
- wire;
- bolts and nuts;
- polycarbonate;
- welding machine;
- drill;
- thermal washers.
Calculation of area
When calculating, keep in mind that ideally one chicken requires 2 square meters. Therefore, the optimal option would be to build a permanent pen of 20 square meters for 10 birds. A portable pen is usually built smaller, but it's still important to keep in mind that one bird will require at least 1 square meter.
Often, you have to base your decisions on the size of the property. Therefore, before building a pen, it's best to measure the area where you can accommodate the run. It's a good idea to draw a plan to indicate the main components of the run, calculate the width of the canopy, and the size of the coop if it's a permanent pen.
The shape of the enclosure doesn't matter. It can be square, rectangular, or even triangular, depending on the site's features.
Choosing a location
When building a portable enclosure, the location doesn't matter, as the structure will be constantly moving. A permanent enclosure, however, needs to be properly installed.
- Clearing the area of debris and vegetation.
- Removing the top 10-15 cm of soil to prevent dampness.
- Leveling the surface to avoid the formation of puddles.
Site requirements:
- Dryness. It is necessary to ensure that the place is protected from dampness.
- Environmentally friendly. It is better to place the aviary away from the roadway so that the birds do not breathe in exhaust fumes.
- Combination with a chicken coop. The pen should be located directly in front of the coop entrance. However, if this location is not possible, it can be placed to the side, behind, or connected by a manhole, ensuring free access for the birds.
- Privacy. Chickens don't particularly like the presence of people, as this can negatively impact egg production. Therefore, it's best to place the run in a quiet, secluded area.
- Warm. If the chicken coop is built correctly, placing it on the south side, closer to the entrance, will help protect the birds from the wind. Otherwise, additional insulation with corrugated metal or slate sheets will be necessary.
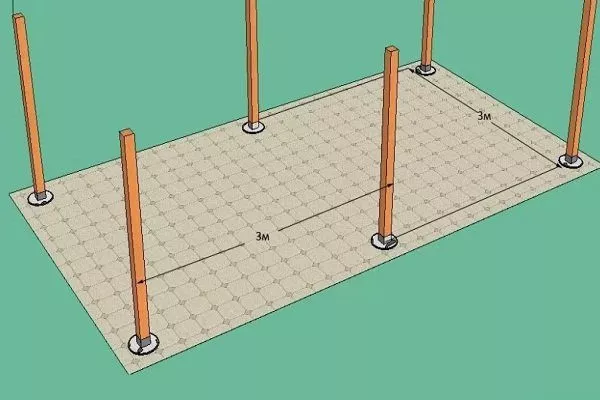
If building the pen at the same time as the chicken coop, it's best to raise the coop slightly above the run. This is done using wooden supports.
This solution has advantages:
- Saving space. Which is especially important in small areas.
- No need for a canopy. Birds can hide from the sun and bad weather under the chicken coop.
Before construction, the chosen location should be carefully prepared:
- remove trash, grass and stones;
- remove the top layer of turf by 10-15 cm;
- fill in holes and depressions to avoid the formation of puddles.
Construction
The construction features depend on the type of enclosure chosen.
Mobile
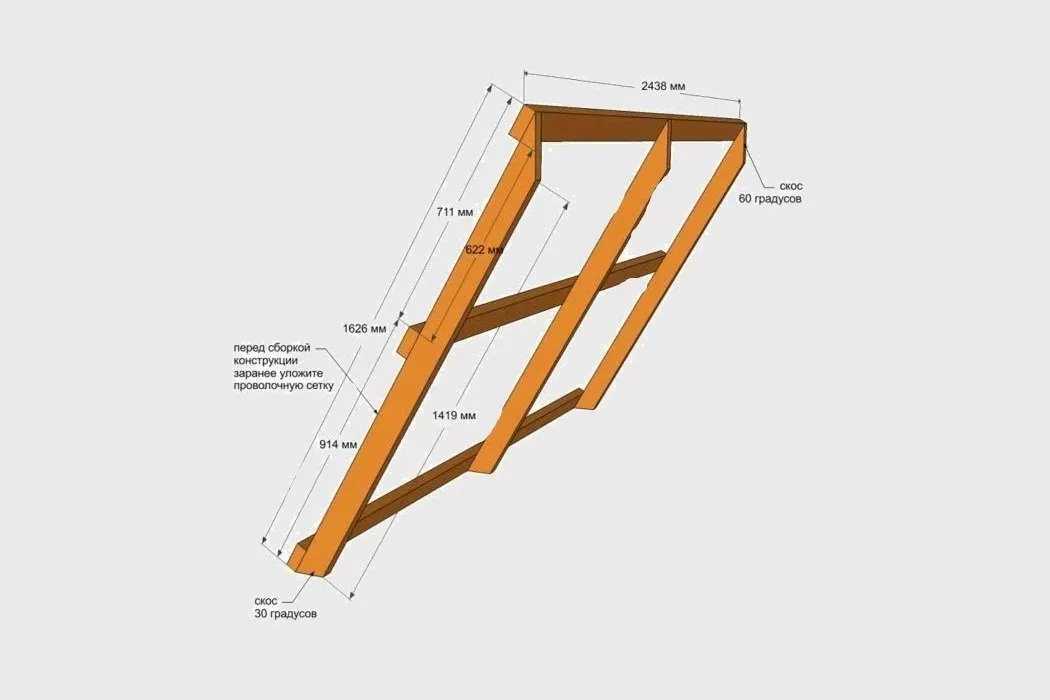
Let's consider an example of building a mobile pen in the shape of a pyramid with perches at the top.
Main stages:
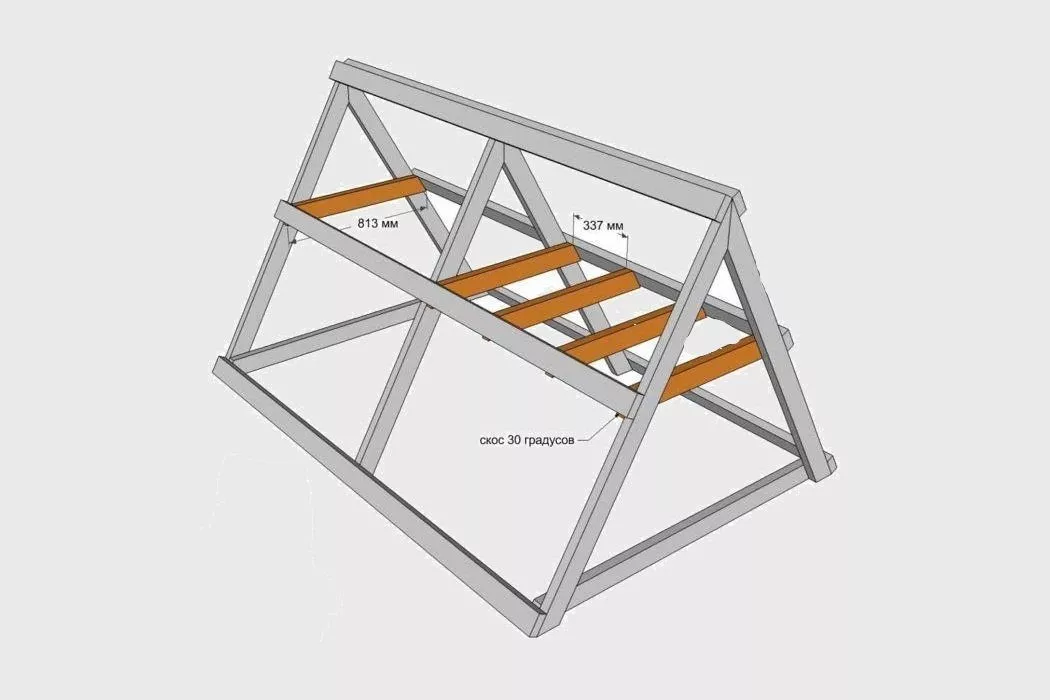
- Manufacturing of walls. Take three boards, each 244 cm long and three each 163 cm long. Cut the bottom ends of the shorter boards at a 30-degree angle and the top ends at a 60-degree angle. Assemble the wall by placing the long boards at equal distances. Secure the shorter boards at the top, bottom, and middle. Stretch mesh between the crossbars and secure with a stapler. Make the second wall in the same way.

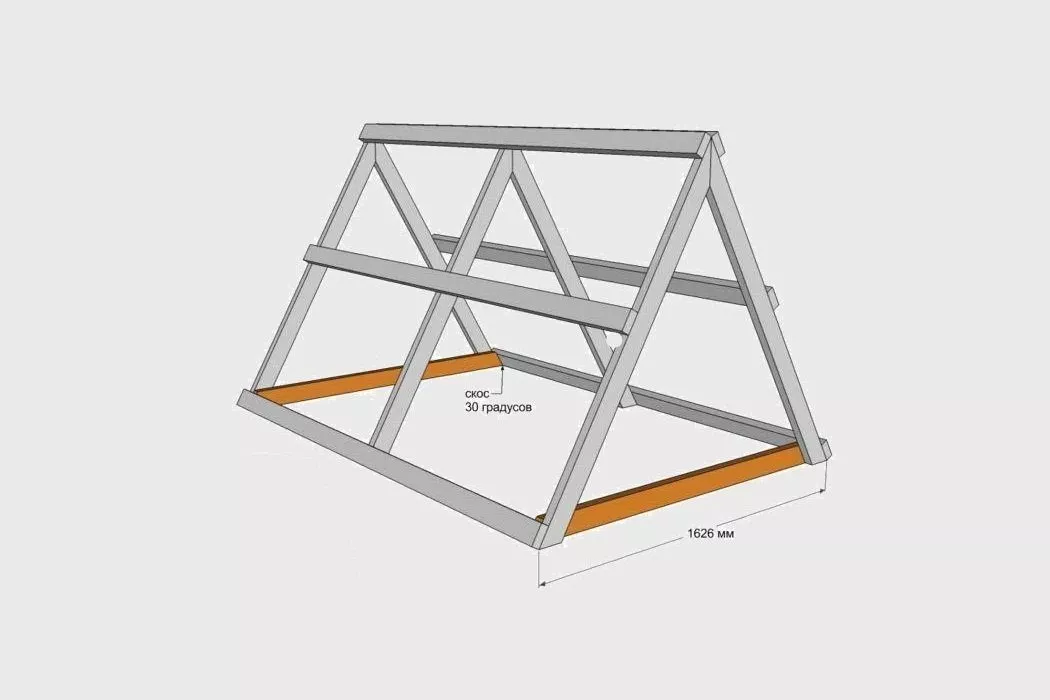
- Assembling the structure. Connect the two side walls at the top using screws. Install 163 cm cross boards between them at the bottom. Cut the boards at a 30-degree angle.
- Installation of spacers. Using nails, install 34 cm long spacers between the side walls. Cut the ends at a 30-degree angle. These will serve as perches.
- Plywood sheathing. Take the plywood sheets and secure them to the top of the structure. Nail them to the ridge cap with planks. Cover the bottom with wire mesh.
- Strengthening. To make the structure stronger, nail wooden planks over the plywood and mesh.
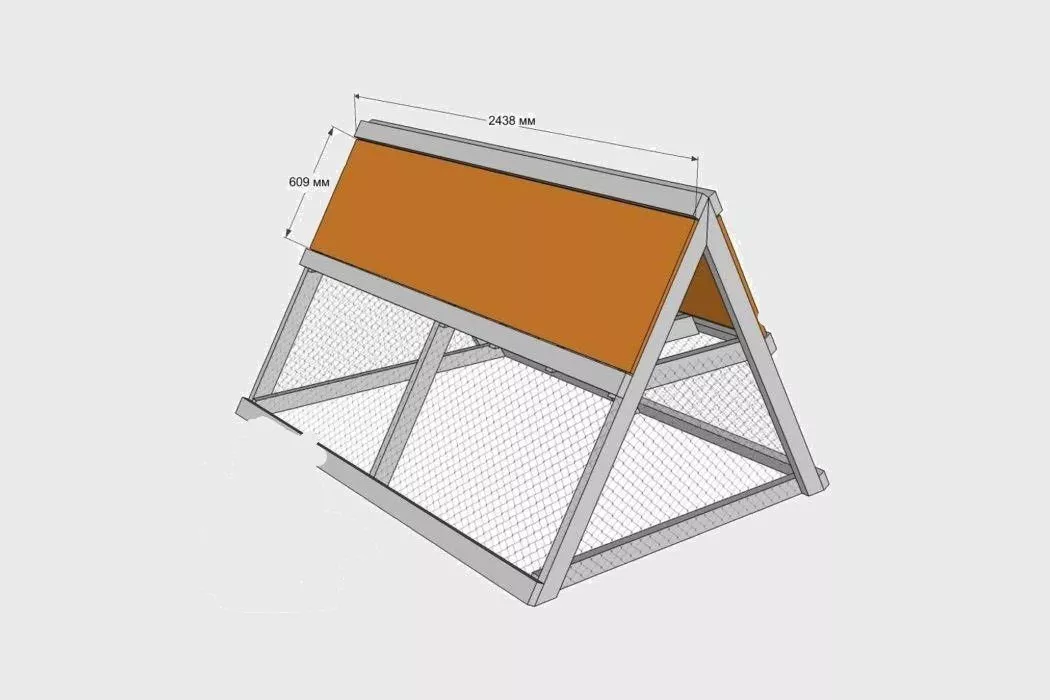
To allow the chickens to climb up to the perch, secure a board with small slats at the bottom of the pen.
Stationary open
Similar instruction:
- Marking. Measure the width of the coop you're building on each side. If you've done everything correctly, the distance between each mark and the coop wall will be the same.
- Space for the door. Its width can be 80-100 cm, depending on the build of the owners. The height starts at 99 cm. The space under the door should be separated by two supports on which it will be mounted.
- Additional markup. Mark the location around the perimeter where additional posts will be installed to secure the mesh. Mark every 1-3 meters.
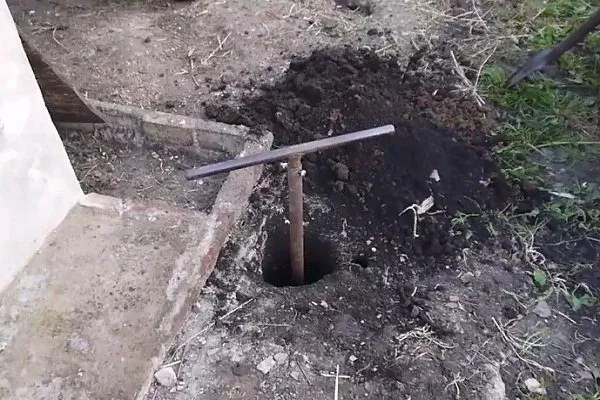
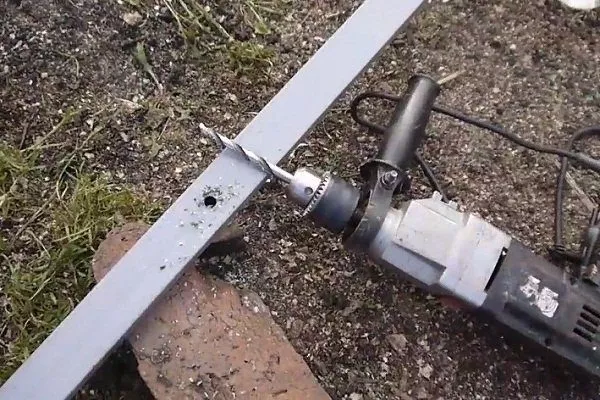
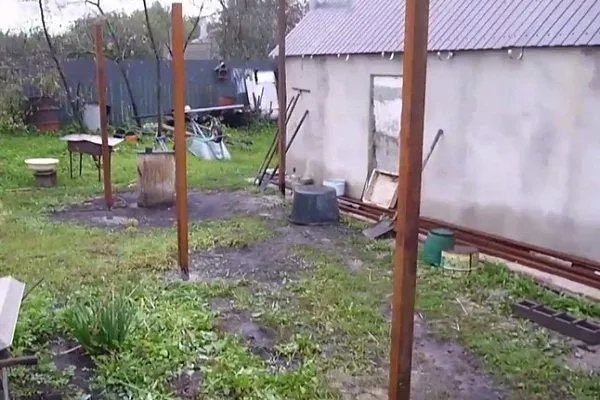
- Installation of pipes. To do this, drill a hole approximately 45 cm deep at each mark. The diameter should be the same as the pipes you'll be using. Drive pipes of the required length into the ground around the perimeter. They should be level and stable. To strengthen the pipes, fill the bottom with sand and pour concrete mix over them. Let the mix set for three days.
- Welding hooks. They are attached to the pipes. One is 15 cm above the ground, one is 15 cm below the top of the pipe, and one is in the middle.
- Preparing the mesh. Hang a beam on the wall; the edge of the mesh will be attached to it later. Then, using flexible wire or nails, stretch the mesh around the entire perimeter of the pen. Leave room for the door. Hooks are needed to tension the mesh. Remember, the posts should remain inside the enclosure, not outside.
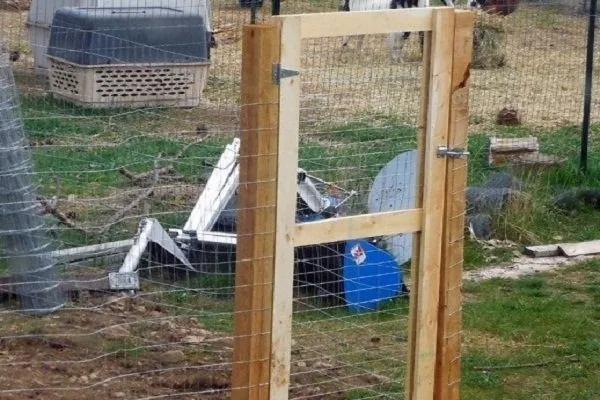
- Fastening the gate. The gate frame consists of several wooden beams or metal pipes welded together to form a rectangle. Mesh is stretched between them. The gate is secured with hinges.

If the soil is too loose, you should bury the bottom of the net underground to prevent birds from digging a hole underneath and escaping.
To ensure that the netting adheres more tightly to the ground and that its lower part does not injure the birds, you can install metal or wooden planks at the bottom between the posts.
Stationary with a canopy
The rules are as follows:
- Terrain marking. Using a measuring tape, mark 50 cm from the wall of the coop, then mark the width of the future run. Leave a 2 m gap between the support posts.
- Drilling holes. They should be about 1 m.
- Preparing columns. The supports closest to the wall should be higher than the roof, while the others should be 50 cm lower to allow for adequate rainwater drainage. Drill holes in the posts for the fastenings.
- Installing columns. As with building an open pen, you need to set the posts level and secure them with sand and concrete mortar.
- Strengthening. Install a metal profile along the entire height of the adjoining wall of the barn.
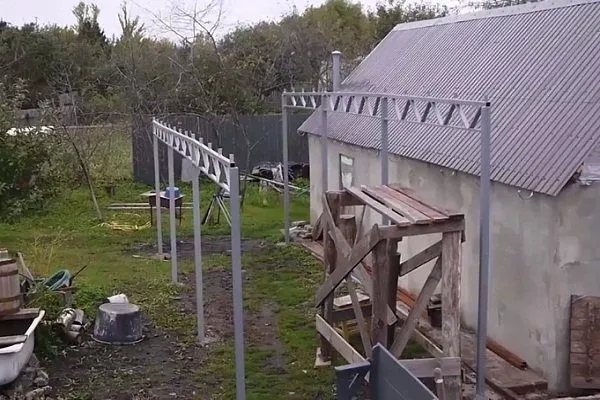
- Preparing fastenings for the canopy. Install a band of metal crossbars between the pipes. Below, create a similar band of pipes, but with a smaller cross-section. Install crossbars at an angle between the bands.
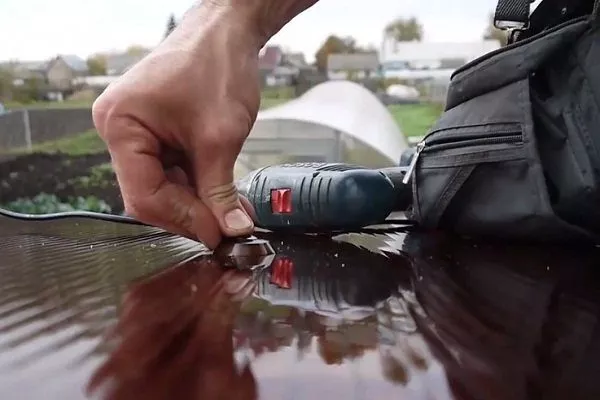
- Construction of a canopy. Place the rafters on top of the frame, ensuring they are aligned. Lay wooden planks on top of them. To protect the structure from rain, cover the roof with polycarbonate and reinforce it with thermal washers.
- Creating protection. Use wire to stretch a metal mesh around the perimeter. Leave space for a gate.

Finally, install the gate using hinges.
Keeping chickens
To ensure the birds' comfort in the enclosure, follow these rules:
- Cleansing. You can place basins filled with an ash solution in the pens. Birds love to bathe in them. This solution is also convenient for preening feathers.
- Replacing the perch. If you install several wooden stumps in the enclosure, the chickens will find it convenient to use them as perches.
- Comfort. During cold weather, it's uncomfortable for birds to walk on snow. Therefore, it's best to line the bottom of the pen with straw.
- Insulation. To keep chickens warm in an open run during cold weather, you can cover the walls with sheets of plastic, polycarbonate, or simple film. However, be sure they aren't too thin and won't tear in the wind.
Carrying out work:
- screw the slats to the supports around the perimeter of the pen;
- attach the insulation material to them using a stapler or screws;
- Secure the structure with another row of slats if it is made of film.
You can learn how to properly insulate a chicken coop for the winter using polyethylene by watching the video below:
The choice of pen design depends on the number of chickens and the purpose of the construction. For 10-20 birds in the summer, a portable pen is best, while a permanent one is best for year-round use. With proper preparation and following the instructions, you can easily build a comfortable chicken pen yourself.