Pheasants are exotic birds with a poorly developed brooding instinct. Experienced farmers resort to incubating pheasant eggs. This method allows the egg to develop independently of the female. Although not widely used, the procedure is simple and is almost identical to that used for hatching other domestic birds.
Timing and general rules for incubating pheasant eggs
The incubation period for pheasants should not exceed 25 days. Monitor humidity and temperature throughout the incubation period, and candling is recommended to remove any dead embryos.

This table fully describes the incubation schedule by day:
| Period | Days | Temperature conditions, degrees | Humidity, % | Turning (number of times per day) | Ventilation |
| 1 | 1-7 | 37.8-38.1 | 60-65 | 4 | No |
| 2 | 8-14 | 37.8-38.1 | 60-65 | 4-6 | No |
| 3 | 15-21 | 37.8-38.1 | 60-65 | 4-6 | 1-2 once a day for 15 minutes |
| 4 | 22-25 | 37.5-37.8 | 75-80 | not required | No |
The entire incubation process proceeds smoothly and is extremely stable. Only starting on the 22nd day are there some slight changes. To ensure uniform hatching, humidity is increased, while temperature is decreased.
Advantages and disadvantages
The advantages of incubation include the following:
- the process allows for a multiple increase in the brood;
- There is no need to keep a hen and spend time and energy caring for her.
The only downside is that artificially hatching pheasant eggs is a tedious task.
Selection and storage of eggs before laying
To ensure the best results from the incubation process, follow these simple principles for selecting eggs:
- Size. Eggs should be large and well-shaped. Chicks hatched from small eggs often have birth defects.
- Shell. The surface must be intact and smooth. Cracks, blood stains, and large pores are not allowed.
- Number of yolks. Eggs with two yolks are not viable.
- Color. The shell shouldn't be too light or too dark. The color directly affects the survival rate of future chicks.
Eggs with a single, centrally located yolk and an air cell at the blunt end are considered high-quality. Candling helps identify any imperfections.
- ✓ The air cell should be clearly visible and located at the blunt end of the egg.
- ✓ There should be one yolk, located in the center, without mixing with the protein.
Eggs collected within 3 days are best for incubation. Store them for no more than 15 days under the following conditions:
- the room should be dark and well ventilated;
- temperature – from +5 to +15 degrees;
- humidity level – not lower than 65% and not higher than 70%;
- The egg should stand upright, with the pointed end down.
Turn the eggs 1-2 times a day to prevent the yolk from sticking to one side. After 15 days of storage, they lose a quarter of their hatchability. If the eggs have been stored for 25 days or more, the chance of hatching is no more than 5%.
Preparing for bookmarking
Prepare your eggs properly. 90% of your success depends on it.
Cleansing from dirt
Don't wash the eggs to avoid damaging the protective membrane. If they are dirty, use a soft brush or damp cloth.
Disinfection
Before laying, place the eggs in a light pink solution of potassium permanganate. The temperature should not exceed 27-30°WITH. Place them on a towel and let them dry.
The following preparations are also used for disinfection:
- Bleach;
- Virkon-S;
- Formalin;
- Lysol;
- Ozone;
- Polydez;
- Bactericide.
How does the bookmarking take place?
To ensure the future generation is of high quality and that embryos do not die in the early stages, adhere to the following rules:
- Before placing the eggs incubation, warm them at room temperature for 3-5 hours or in warm water for 1-2 hours and dry.
- Clean the incubator and plug it in the day before setting the eggs. Allow it to warm up. During this time, monitor the humidity sensors (hygrometer) and thermometers. If they are malfunctioning, troubleshoot them.
- Mark the eggs on each side to ensure they are turned daily. If you have an automatic incubator with horizontal egg placement, marking is not necessary.
- Check your incubator for problems 48 hours before setting the eggs, not 24, to allow time to correct any potential problems.
- Use a high-quality thermometer and hygrometer to accurately monitor conditions inside the incubator.
When to turn over?
Turn the eggs to prevent the embryo from sticking to the shell. Sticking can lead to health problems and even death.
During the first week, turn the eggs 4 times a day. During the second and third weeks, turn them 4-6 times. Do this at approximately equal intervals.
If you have an automatic incubator, turning the eggs is no problem. Adjust the settings as needed and check periodically to ensure all the eggs have the same markings.
Translucence
Eggs are candled with a special device called an ovoscope. You can buy one or make one yourself. Alternatively, use a narrow flashlight with a bright beam. Some people use a phone with a flashlight.
How is ovoscopy performed:
- Prepare a container for discarded eggs.
- Place the egg on a candle or hold a flashlight near it. The room must be completely dark.
- Turn the egg slowly, examining it carefully.
- Discard dead or non-viable (depending on the period in which the candling is carried out) specimens.
When is ovoscopy performed:
- Perform the first ovoscopy before placing the eggs in the incubator to identify eggs that are unsuitable for incubation.
- The second candling occurs on the 7th or 8th day. This allows one to observe the well-developed circulatory system of the future chicks. At this time, any dead embryos are culled.
- Perform the third candling at the end of incubation. This will help identify eggs in which the embryos died after the second candling.
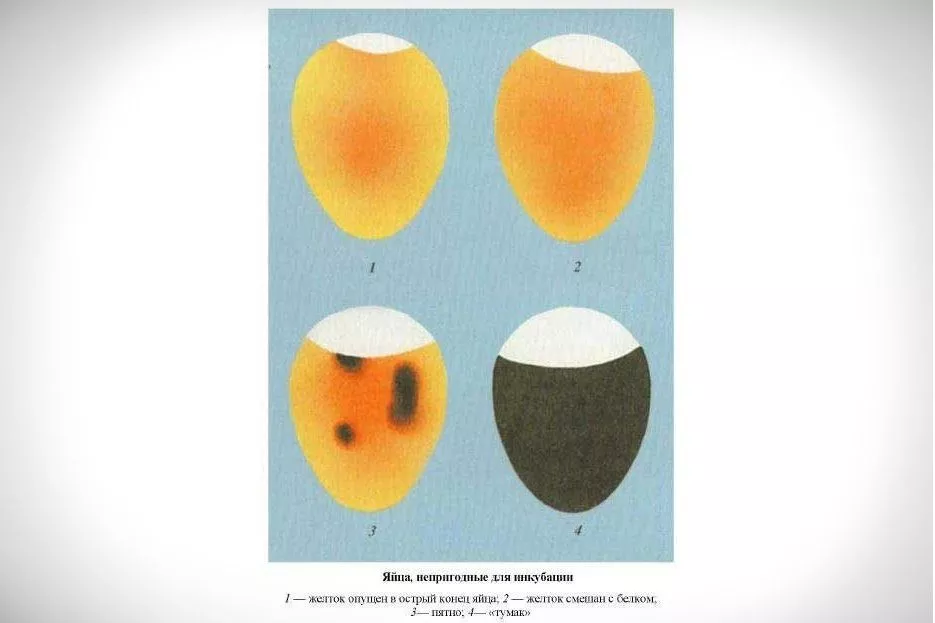
Eggs that are not suitable for incubation are shown below:
- 1 – the yolk should not be at the sharp end of the egg;
- 2 – mixing the yolk with the white is unacceptable;
- 3 – no stains should be visible;
- 4 – the so-called “thump” indicates that the egg is unsuitable.
It doesn't matter whether they're chicken, quail, or pheasant eggs. The candling principle is the same for all.
The video below clearly shows the difference between fertilized and unfertilized eggs:
Stages of embryonic development
The incubation process is divided into four periods:
- 1st period. First of all, the notochord (temporary spine) develops, the rudiments of blood vessels, organs of hearing and vision appear, and the heart begins to contract.
By mid-gestation, the embryos have a fully functioning circulatory system, and the rudiments of legs and wings appear. The thymus gland, stomach, and skeleton are formed.
In the final stages of the first period, the beak develops, and the circulatory system becomes fully functional. The sex of the future pheasant is also determined at this stage. - 2nd period. By the second stage, the skeleton has already completed its ossification, and the beak is almost completely keratinized. Feathers and claws are just beginning to appear. The eyelids completely cover the cornea. By the end of the second stage, down appears all over the body.
- 3rd period. Development is no longer as active as in the early stages. The claws become completely keratinized, and by day 19-20 of incubation, the chicks open their eyes.
- 4th period. This is the final stage of chick development. By this time, the internal organs are fully formed. Pulmonary respiration begins, the shells peck, and the pheasant chicks are born.
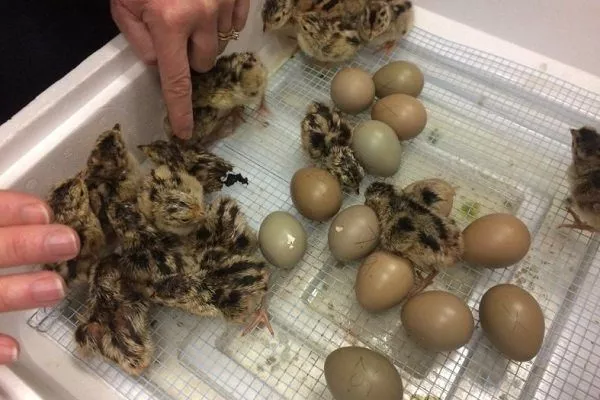
First steps after hatching
Keep the newborn chicks in the incubator for a little while longer. Make sure they dry off.
Rules for caring for newborn chicks:
- Move the chicks to a warm, draft-free location with good access to light. A regular box can be used as a shelter. The recommended number of chicks per square meter is 30. The area should be dry, clean, and regularly cleaned.
- The initial temperature is 32°C. From days 3 to 7, it's 30°C. Then, decrease the temperature by one degree every couple of days until it reaches 18-20°C.
- Provide two bowls for food and water. The water bowl should be shallow to prevent the chicks from drowning. Secure it or place pebbles on the bottom to prevent them from tipping it over.
Do not feed the chicks during the first half of the first day, but after 10-15 hours of life, be sure to give them medium-grained sand mixed with finely crushed charcoal sifted through a sieve to remove dust.
Starting from the second half of the second day, for 2-3 days, feed hard-boiled chicken egg whites, pressed through a sieve to form "sausages." Sprinkle this egg white with crushed wheat breadcrumbs. For the first month, feed the chicks 6 times a day.
The video shows hatched and already dried pheasant chicks:
Common mistakes
To ensure your expectations are met, avoid the following mistakes:
- low quality of parent stock;
- failure to comply with egg storage rules;
- the incubator was not run in test mode;
- overheating (hatching will begin prematurely);
- underheating (the chicks emerge late, developmental deviations are possible);
- low humidity levels lead to exhaustion and death;
- High humidity levels slow down or even stop development.
Types of incubators
When choosing an incubator, consider the number of chicks you plan to hatch. Different models are designed for different egg sizes and have their own additional features.
With manual flip
These are used when the number of eggs is small and are considered a budget option. With this type of incubator, you turn the eggs yourself at regular intervals to ensure even heating. Many breeders prefer the "Cinderella" model.
With mechanical revolution
They fall into the mid-price range and are more convenient to use, minimizing human intervention.
It simply involves pressing a lever or button after a certain amount of time, which causes the entire tray to flip. An example of this type of incubator is the "Ideal Brood Hen."
With automatic flip
It's the most convenient to use. Your time investment is minimized. This is the ideal option for hatching large batches of chicks, as the incubator eliminates the need to manually turn the eggs.
With automatic models, all you have to do is place the eggs in the incubation chamber, and the automatic mechanism does the rest. After a set time, it adjusts the eggs' position so they are heated evenly on all sides. A good automatic model is the "Blitz Norma."
How to choose the right incubator?
Before purchasing, please pay attention to the following:
- The number of chicks planned to hatch. It is better to choose a device with a large capacity, because some of the incubated eggs will be rejected.
- Power outages. To prevent the eggs from becoming too cold, the incubator must have an alternative power source.
- Reliability of sensors and controllers. In all incubator ratings, models with electronic components lead the reliability rankings. Electronics enable precise control of the required climatic conditions. The viability and normal development of embryos directly depend on the correct conditions.
- The method of heating the air is with a lamp or an electric heating element. The advantage of a built-in heating element is uniform air heating. It's also more reliable. The advantage of a lamp is that it's quick and easy to replace. Decide what's most important to you.
- How eggs turn over. An automatic egg turning system makes the breeder's work easier, but significantly increases the cost of the device.
This video explains in detail how to choose the right incubator for you:
Hatching pheasants in an incubator is a complex undertaking, requiring specific conditions and knowledge. The equipment and type of incubator also play a significant role. By strictly adhering to the basic principles and considering all necessary factors, you will ensure a good brood of healthy chicks.
We had a hard time choosing an incubator for pheasant eggs. We settled on an automatic egg turner, based on your recommendation. I'm so grateful for this article, because it contains all the necessary information—no need to jump from website to website reading and reading. Here it's all here, all in one place.