Wax is a useful beekeeping product used to make various folk remedies and home cosmetics. It is prepared by melting down wax foundation and old frames. This is done using a special device called a wax melter, but it is expensive. Beginner beekeepers can do without it by using other melting methods.
Preparation of raw materials
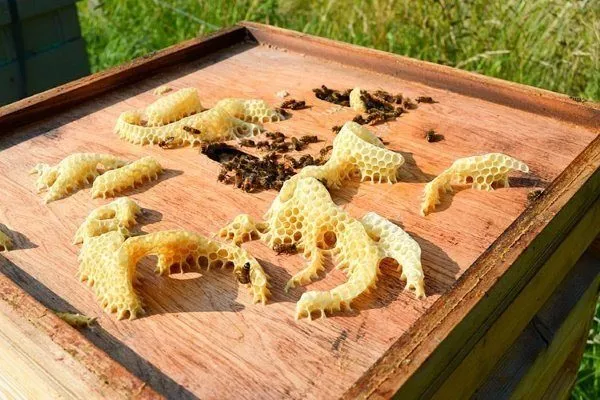
First, you need to prepare the raw materials from which the wax will be extracted. To do this, take old frames, wax cappings, and wax foundation. Clean the frames of wax and set them aside in a separate container. All raw materials for the wax can be ground into a fine powder.
Pour water over the prepared ingredients and let them sit for 3-4 hours. This will cause debris to float to the surface, making them easy to remove. Shake the ingredients periodically while they're soaked in liquid to flush out any unwanted residue.
After separating the waste from the raw materials, you can proceed directly to melting the wax.
Melting with water
The most common method for obtaining wax without a special apparatus is melting with water. This method is simple and allows you to clean contaminated wax and old wax foundation. Melting with water is also suitable if the product contains traces of mold.
The process of obtaining a high-quality final product is as follows:
- Prepare a deep container for melting. Stainless steel or aluminum is the preferred material. Iron, copper, or brass containers should not be used.
- The raw materials—wax foundation, old honeycomb, and wax cappings—are collected. They are placed in a container with warm water and left to soak for several days. Afterward, the water is replaced with clean water. The liquid should fill one-third of the container's volume.
- Place a bowl (or saucepan) with water and the raw material on the stove. Bring the mixture to a boil, then reduce the heat. The wax will begin to melt. The boiling time depends on the condition of the raw material: if it was moldy, the melting process will take at least 2 hours.
- Once the wax has completely melted, pour it into another container and filter it. Use a mesh filter. The poured wax is weighed down with a weight. It will drain into a clean container.
| Container material | Heating speed | Risk of oxidation | Recommendation |
|---|---|---|---|
| Stainless steel | Average | Short | The best choice |
| Aluminum | High | Average | Let's assume |
| Enameled steel | Low | Null | For small volumes |
| Cast iron | Very low | High | Forbidden |
The semi-finished product, filtered for the first time, is left to cool. After this has occurred, the resulting bar is cleaned of any debris accumulated at the bottom or top. After this, the product of the first melting must be re-melted until it becomes fluid. When a layer of fine particles accumulates on the surface, it is removed with a slotted spoon.
After this, the wax must cool. This will eventually form a bar that is resistant to temperature fluctuations and does not crack.
Melting in a jar
This method is simple and suitable for processing small quantities of bee wax. Melting the wax in a jar doesn't take much time.
To melt wax this way, you need:
- prepare a deep saucepan, a glass jar and molds for the final product;
- pour water into a saucepan (about 5-8 cm from the bottom) and put on the fire;
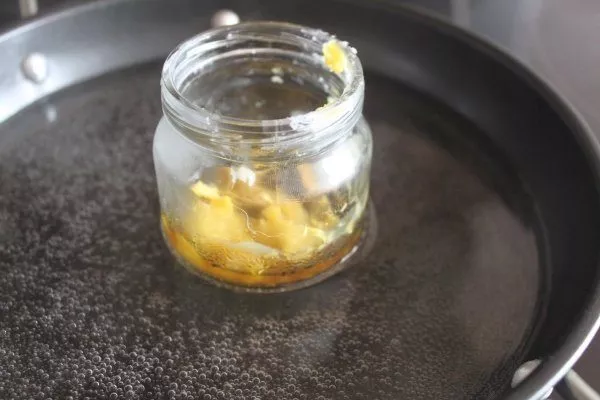
- Place cleaned and finely chopped honeycombs in a glass jar;
- When the water in the pan boils, place the jar with the raw material on the bottom: the product must be stirred constantly, so that the melting occurs evenly;
- When the mixture becomes liquid and acquires a uniform consistency, remove the container from the heat.
The final step is pouring the liquid wax into containers or molds. The final product should cool in a warm place for at least 24 hours. Refrigerate the wax for storage only after it has completely cooled.
In the microwave
You can also melt the material into wax in a microwave. This method allows you to process large quantities of product in small batches.
Grind or grate the ingredients and place them in a microwave-safe glass container. It's best to leave the container uncovered.
The melting time depends on the microwave's power: if it's 650W, the ingredients need to be heated for about a minute. At 850W, the time is reduced to 45 seconds, and at 1000W, to 40 seconds.
Water bath
Melting the components to produce pure wax can be done using a double boiler. This requires two aluminum or stainless steel containers of different diameters.
Pour a small amount of water (a third of the way) into the larger saucepan. Add the wax raw material, which should be cleaned of any impurities, to the smaller saucepan. Place the smaller container into the larger saucepan and set the larger saucepan over low heat.
As the water heats up, you need to make sure that it does not boil away and that the wax does not burn.
| Type of raw material | Melting time | Optimal water temperature | Yield of pure wax |
|---|---|---|---|
| Fresh cappings | 25-35 min | 92-95°C | 89-93% |
| Old honeycombs | 45-60 min | 88-90°C | 75-82% |
| Wax caps | 20-25 minutes | 94-96°C | 95-98% |
| Moldy raw materials | 90-120 min | 85-88°C | 65-70% |
Once the bee product has melted and boiled for a while, turn off the heat. Pour the liquid wax into a glass jar or prepared molds. It needs to cool gradually, so wrap the container in a thick towel.
This method of melting wax is simpler than the previous one, since it does not require two-stage melting.
Melting on a fire
Place the metal container you plan to melt the wax in over the fire. It should be large enough to hold a full bucket of water. Add the wax to the container. Leave some extra water, as the wax frames will boil and the water will bubble as they heat up.
When the mixture boils, you need to stir it regularly.
Quality Control Plan
- Check for the absence of metal objects in the raw materials
- Check the foam (it should be white, not brown)
- Measure the temperature of the mass (not higher than 102°C)
- Take a sample for smell (no burning)
- Conduct a hardness test after cooling.
Once the mixture has completely melted, stir it, remove any dirt, and let it cool. You can cool the mixture in the same container or pour it into another, clean one.
This video shows how wax is melted over a fire:
Melting in enamel containers
This method is suitable for beekeepers who need to process a large amount of raw material at once.
Two enameled containers, each with a capacity of 20 liters, serve as containers for storing ingredients.
The raw materials for subsequent wax preparation should be soaked in warm water, then crushed by hand or using a grater. Place the resulting mass in the first container and cover with a layer of gauze.
Pour clean water into a second enamel container and place it on the stove. Once the water begins to boil, place the other container containing the future wax mixture on top of this one.
The two pots should be tied together with rope and covered with a warm blanket or an unwanted outer garment. Do not remove them from the heat. It's important to ensure that clothing does not come into contact with the heating elements.
The container structure should remain on the fire for at least two hours. After this, remove the containers from the stove and leave them, without removing them or the insulation, for 12 hours. The material should become uniform and acquire a pleasant color.
It is strictly forbidden to remove clothing or blankets from the containers immediately after melting the mixture. Doing so will significantly degrade the quality of the final product.
This method is popular because it allows for the processing of large quantities of raw materials at once without any special preparation.
In a steamer
Another modern household appliance that can be used to melt wax is a double boiler. To melt wax using a double boiler, fill the bottom of the appliance with approximately 2-5 cm of water.
Next, take a bowl, place the wax components in it, and place it in the double boiler. Depending on the power of the device and the amount of wax, this process can take anywhere from a few minutes to an hour. The device must not be left unattended: liquid must be added to the double boiler during melting.
Once the wax has become liquid, it needs to be poured into molds.
This video will show you how to melt wax in the cheapest juicer:
Solar wax burners
You can make your own solar-powered wax burner. It can be installed in your apiary or yard.
A solar-powered wax melter is a wooden or sheet metal box topped with a double-glazed frame. A stainless steel baking tray and a metal trough are placed inside this structure at a 40-degree angle.
A small amount of water is added to the trough—this will facilitate the removal of the final product from the container. Finely chopped wax components are placed on a baking sheet under a glass cover. When the glass heats up, the components melt. The liquid wax flows into the trough through the grate on the baking sheet.
| Parameter | Morning hours | Noon | Evening hours |
|---|---|---|---|
| Melting efficiency | 30-40% | 100% | 15-20% |
| Optimal tilt angle | 50° | 40° | 60° |
| Recommended layer thickness | 1.5 cm | 2 cm | 1 cm |
| Temperature inside the chamber | 65-70°C | 85-95°C | 55-60°C |
Wax obtained in this way is much more valuable because it melts naturally under the influence of direct sunlight.
In a wax melter made from an old washing machine
If you have an old, unusable washing machine, you can make a wax melter yourself. The machine body must be empty, meaning all the parts must be removed. The machine body and drum should be left behind.
The water poured into the drum needs to be heated, so appropriate wiring is needed. A flue gas vent and a channel for draining melted wax should be installed in the drum body.
Making such a device will require effort and certain skills, but it will be cheaper than purchasing a wax melter.
Using leftovers
After wax melting, byproducts remain. This is usually called sludge—particles of debris stuck together by the wax.
This residue is called merva. It can be ground and added to the soil. Merva increases the soil's fertility.
Even if a beekeeper doesn't have wax melter at their apiary, they can still produce wax at home using available materials. Depending on the volume of wax and availability, it can be melted in a double boiler, a fire, or in the sun, as well as in a microwave, steamer, or juicer.