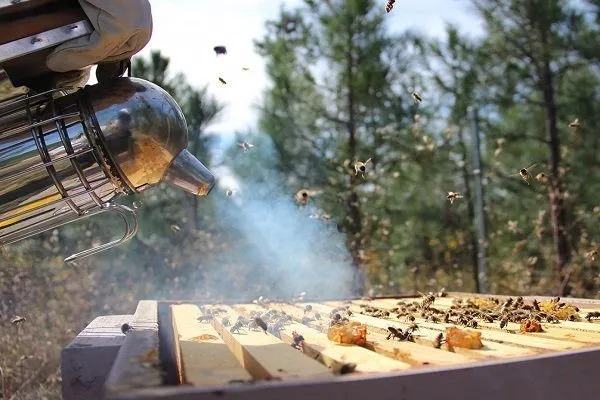
A bee smoker is one of the most important and essential tools for a beekeeper. It's used by beekeepers every time they visit their beekeeping area. Its main purpose is to fumigate the bees by releasing smoke. It inhibits the vital processes of the honey plants, allowing the beekeeper to continue their work unimpeded.
What is a bee smoker?
The idea of repelling bees with smoke in order to utilize their waste products first came to humans in Ancient Egypt. In ancient times, a primitive torch with a flame was used for this purpose.
Later, a more complex design was devised. It consisted of a clay vessel with two holes at the edges. Fuel was placed inside, lit, and the bee nest was fumigated.
In 1870, a beekeeper named Hamet in America improved the device. The invention involved the use of bellows to facilitate the work process. The design was heavy.
Thirteen years later, beekeepers were already using a versatile piece of equipment reminiscent of a modern smoker. It was also developed by an American beekeeper (Quinbee).

Over the course of the development of civilizations, the smoker was reworked and improved many times, and with the advent of progress, new models were invented.
Uninformed people believe that smoke calms insects. This is not true. It irritates them. The smoker's action is based on the following natural instincts:
- bees are afraid of smoke, which makes them panic;
- Honey bees begin to actively fill their crops with honey, which leads to clumsiness and slow movements.
A smoker is necessary for beekeepers to immobilize insects in various situations:
- when cleaning "houses";
- when moving to clean hives for disinfection and fumigation of the bee room with medical means against diseases.
Equipment design
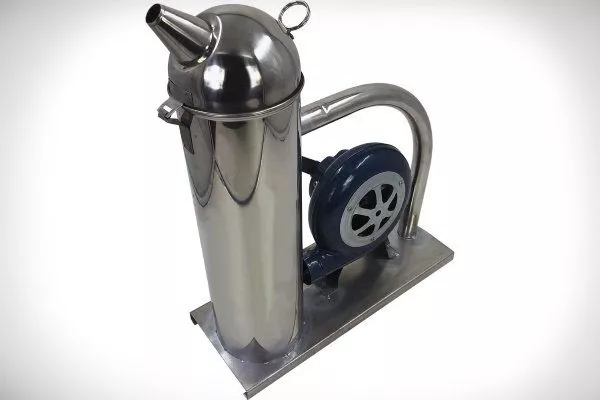
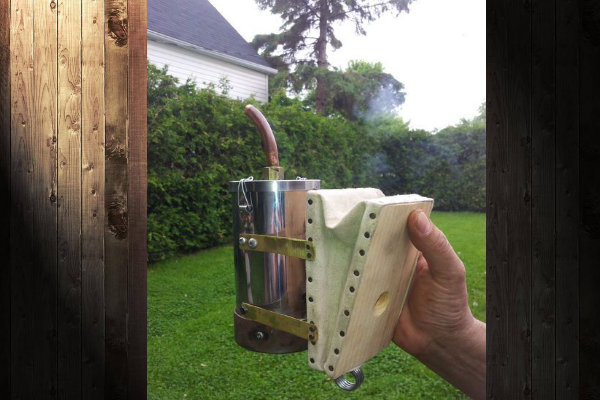
The simplest modern design consists of a metal base with a spout. Fuel is placed inside. Air is supplied through the bulb (not only by bellows but also by fans), causing smoke to emerge from the spout.
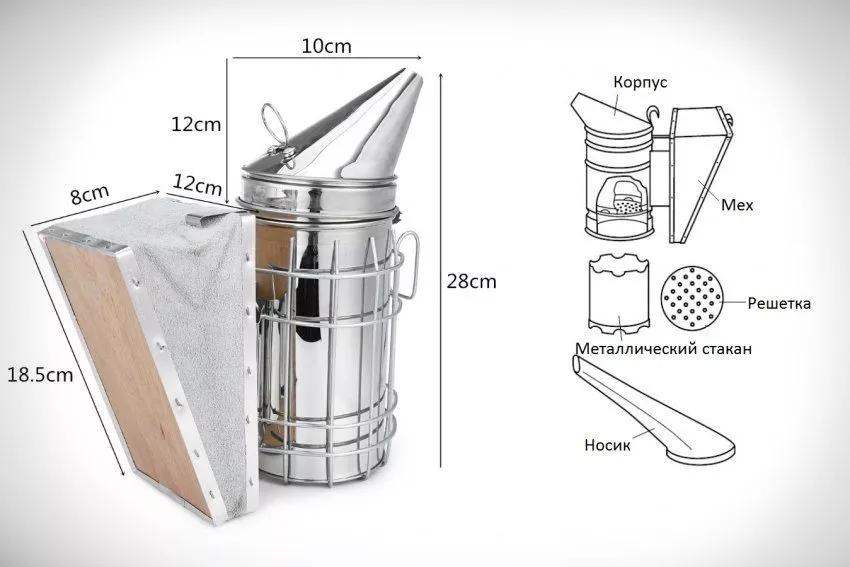
The production apparatus (purchased in a specialized store) consists of the following elements:
- two-layer body;
- a glass located inside, with a perforated bottom;
- air supply system;
- spout;
- lid.
Smokers are made from stainless steel, including black steel, copper, galvanized steel, and stainless steel. The most expensive models are made from copper. Steel options are the most acceptable.
Types of smokers
There are three main types of bee smokers: manual, mechanical, and electric. Each type has its own characteristics, advantages, and disadvantages. These should be taken into account when purchasing or making one at home.
General characteristics of fumigation equipment types:
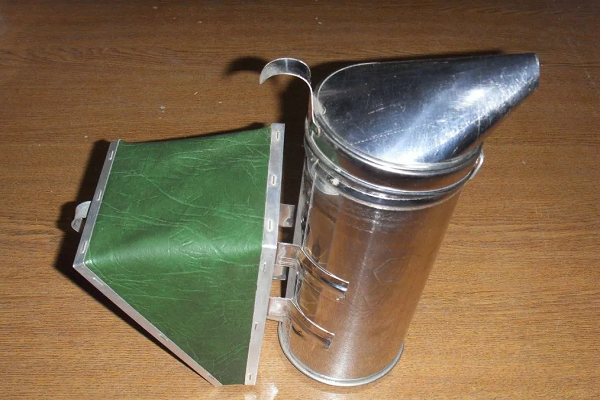
- Regular manual. These models deliver air by pressing a bellows. They are the most affordable and easy to make yourself. They are lightweight and require no energy input.

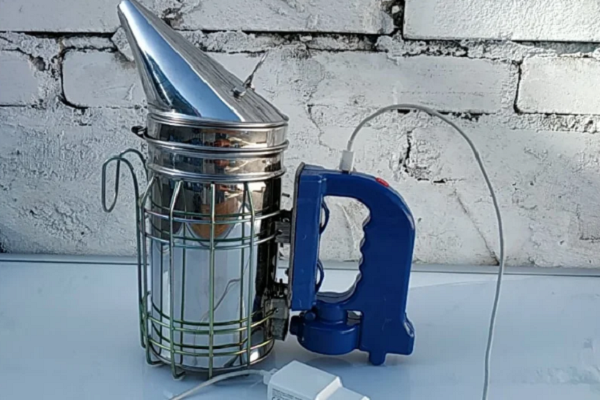
- Electric. It's considered the most convenient to use, as it only requires a power source or a rechargeable battery. Unlike the previous version, these models feature ventilated mechanisms (500 rpm) and smoke release controls.
Despite the convenience, beekeepers note two main drawbacks: high cost and difficulty in repair. Often, they have to resort to professional services.
- Mechanical. This unit is based on blades, driven by a winding key. It is considered a compromise between the two designs described above.
Features: The smoke intensity is adjusted with a lever, and the bottom can be unscrewed for cleaning and lubricating the elements. Another advantage is the moderate price. A disadvantage is that the blades sometimes break.
What to fill the smoker with?
A bee smoke atomizer can be filled with absolutely any material—paper, eggshells, dry grass, hay, straw, pine branches, pine cones, firewood, leaves, sawdust, hessian fabric, etc.
Experienced beekeepers recommend paying attention to the following natural fuel:
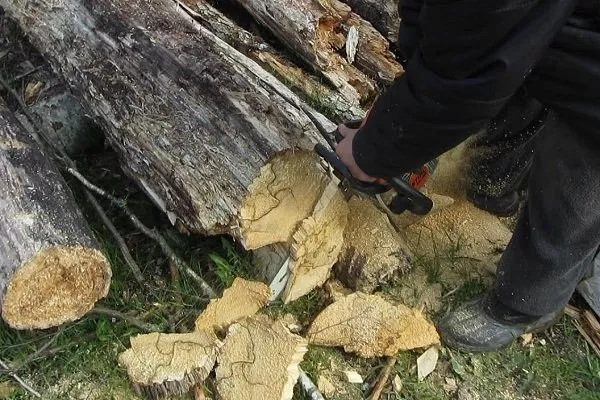
- rotten trees, old stumps, dry manure, rotted wood - these materials do not harm insects, but burn out too quickly;
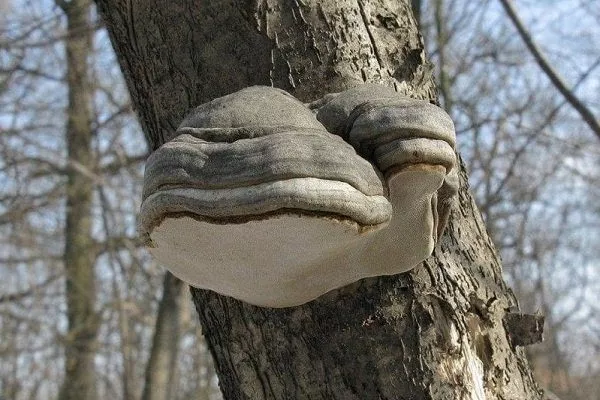
- tinder fungus (mushroom) - it ignites well and smolders for a very long time, but it is difficult to find (unless you live near a forest where there are a lot of trees);
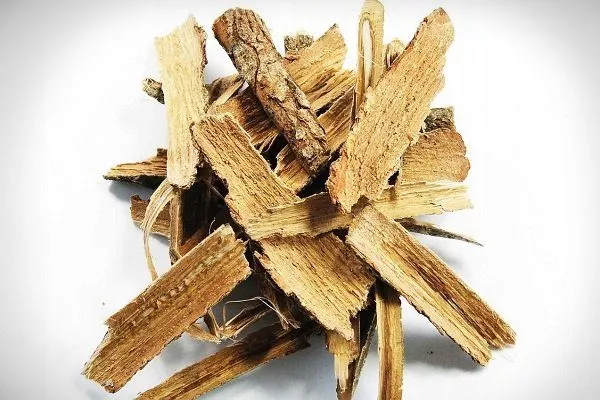
- Oak bark is a great option because it doesn't burn, but smolders.
How to light?
Once you've selected the kindling material, you should learn the lighting process. A hand smoker is the easiest way to start a fire: simply light the fuel and press on the bellows. As air enters the smoker, smoke will begin to emit.
The mechanical version works similarly. However, you also need to wind the device and install the regulator.
Lighting an electric smoker is much more difficult (at first glance). Here's how to do it correctly:
- Detach the ash collector.
- Light a fire in the combustion glass, having first placed fuel inside.
- Turn on the device.
- When smoke begins to flow, fill the loading container and close the lid.
- Place the fuel for the ash pit and light a fire there.
- Connect the fan.
You can visually familiarize yourself with the rules for lighting an electric smoker by watching the video:
Operating principle and rules of use
The operating principle of any smoker is based on igniting the fuel, supplying air, and directing smoke toward the hives. Since fire is involved, fire safety regulations must be followed. This technique includes the following:
- Before use, check the device for proper operation - if there is damage to the housing, fire may appear in an unexpected place, which will lead to a burn;
- It is strictly forbidden to light cigarettes while using the device;
- remove flammable objects and substances;
- take into account the wind direction - stand with your back to the air flow, otherwise all the smoke will blow into your face;
- Before opening the hive, blow some smoke into the entrance;
- When working directly in the nest area, ensure that the smoke spreads superficially, not pointwise;
- do not make any sudden movements near bees;
- fumigate the frames one by one (while treating one, cover the others with canvas);
- If the smoke is produced in a closed area (in a pavilion), do not forget to turn on the ventilation system.
DIY smoker
Experienced beekeepers prefer to build their own smokers. Even a novice with some construction and design experience can easily construct the device.
Before starting work, you'll need to purchase or find suitable materials and parts. Prepare all necessary equipment.
Tools and materials
The choice of materials and tools largely depends on the intended design. However, there are universal mechanical models. To make them, you need:
- scissors and a hacksaw for metal;
- hammer drill;
- hammer and drill bit;
- knife and nippers;
- anvil;
- a stainless steel stand in the form of a container (any large tin can, etc.);
- dense material, leather or leatherette (for furs);
- ship nails;
- self-tapping screws;
- brass sheet, copper pipe, etc.;
- copper rivets or nuts and bolts;
- pine boards - 2 units, size 0.5 x 9 x 15 cm;
- a tin can (from candy, etc.) - to create the bottom (diameter - 2-3 mm larger than the stand);
- metal mesh;
- spring.
- ✓ The optimal diameter of the spout hole is 1.5 cm to ensure sufficient smoke flow.
- ✓ The recommended length of the spout tube is at least 10 cm for easy direction of smoke.
Step-by-step manufacturing instructions
Making a bee smoker requires a step-by-step process. Please note the following steps:
- Prepare a stand-up jar (if it has plastic parts, remove them). Cut it to a height of 17 to 20 cm.
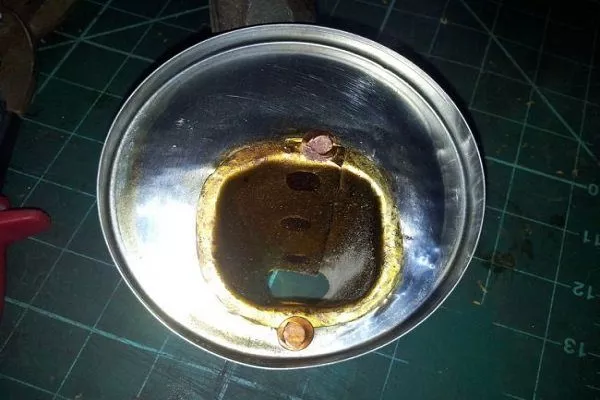
- Make the bottom from the smaller can and insert the pipe. For added strength, secure the pieces together with screws.
- Now, using wire cutters, cut out a circle equal to the diameter of the pipe. This piece will leave space between the combustion chamber and the bottom. Attach the mesh with screws or bolts. Install the grate.
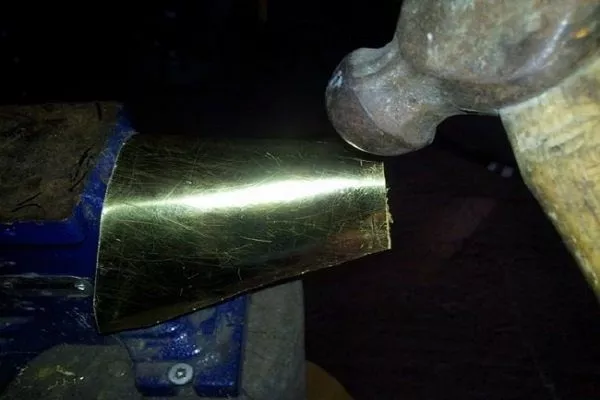
- Make a spout from sheet metal. Cut a rectangle of the desired size (depending on individual measurements) and bend it into a funnel shape. Rivet the seams.
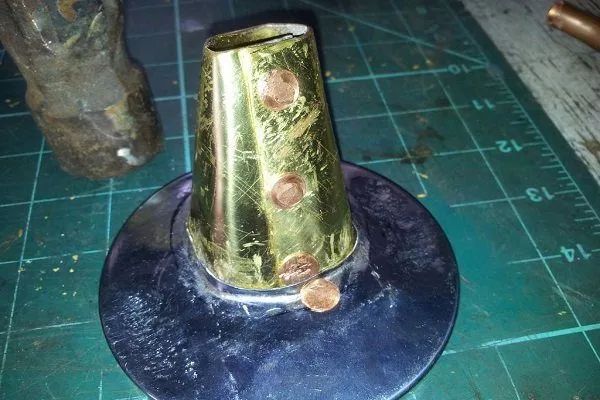
- Find a small metal base (like a candy box lid or a toilet brush holder) and cut a hole in it the same diameter as the funnel on the larger end. Insert the funnel, bend its ends toward the inside of the lid, and rivet it shut.
- Attach the funnel to the lid with snap clips. Clean all edges.
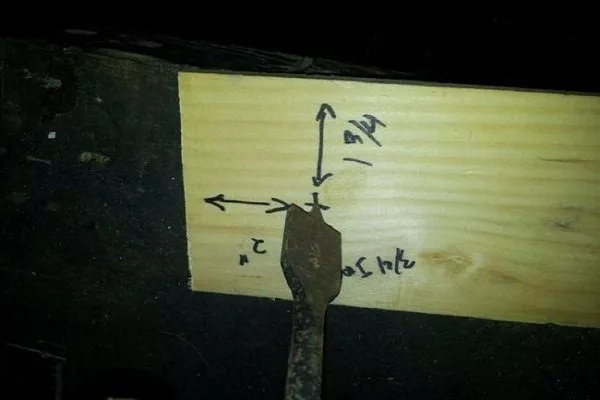
- In one of the boards, drill a hole with a diameter of 1.5 cm, stepping back 5 cm from the edge.
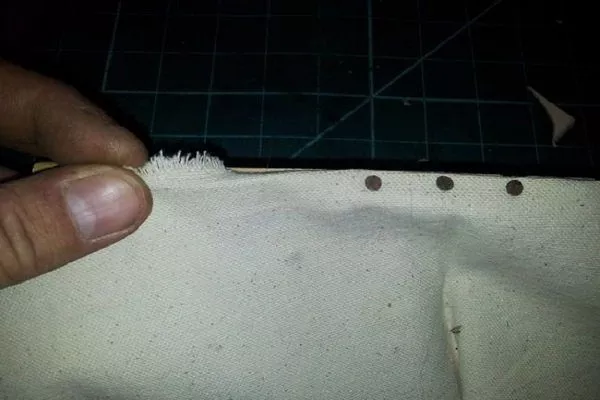
- Nail a pre-cut piece of thick fabric or leather. This piece acts as a one-way valve and a lid on the inside.
- In another board, make a hole 1.2 cm in diameter, 3.8 cm from the edge. Insert a handle (any suitable part can be used for this purpose) into the hole.
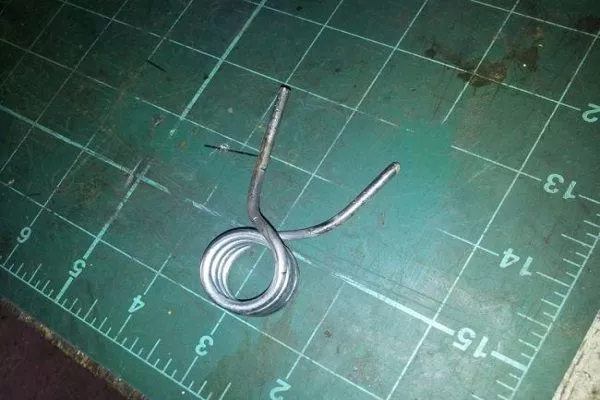
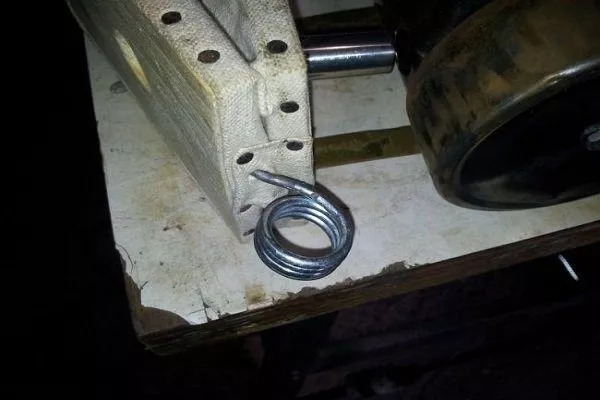
- Cut 4-5 coils from the spring. Straighten 1 coil on each side.
- Attach the leather to another board.
- Make holes in the boards (on different sides) the same diameter as the spring. Insert them into the boards with different ends.
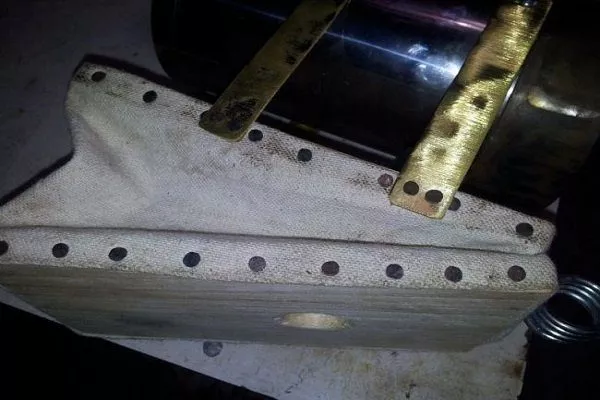
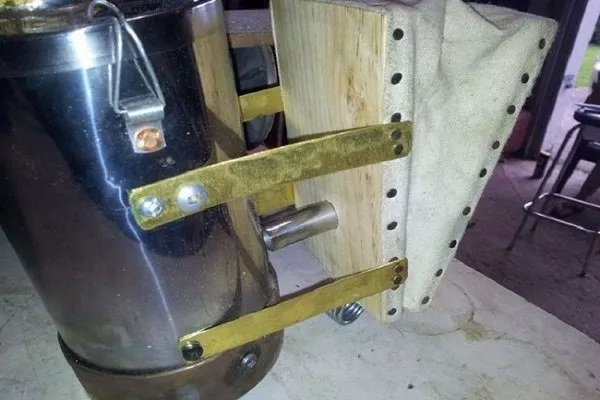
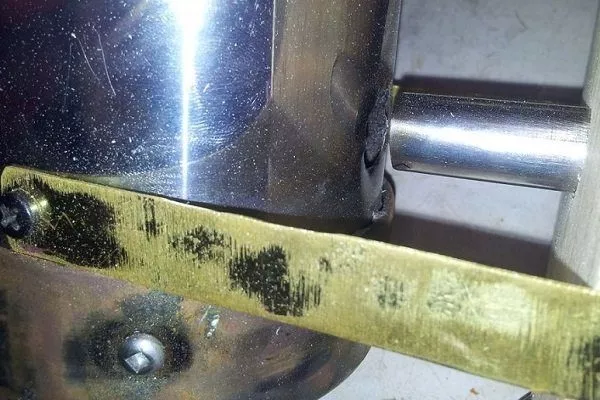
- Secure the frame and fur with metal strips so that there is at least 3.5–4 cm between them.
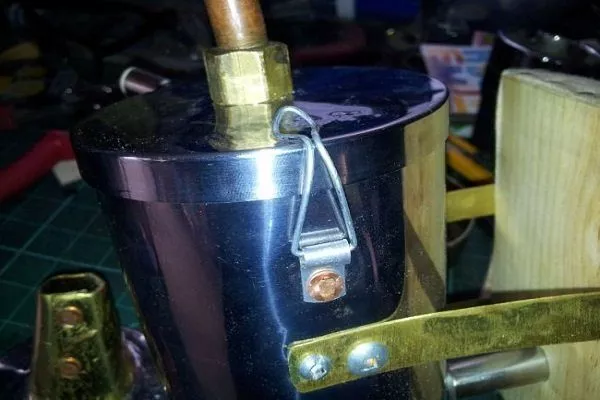
- Make a hole in the smoker to accommodate the pipe. Insert and connect all the components together.
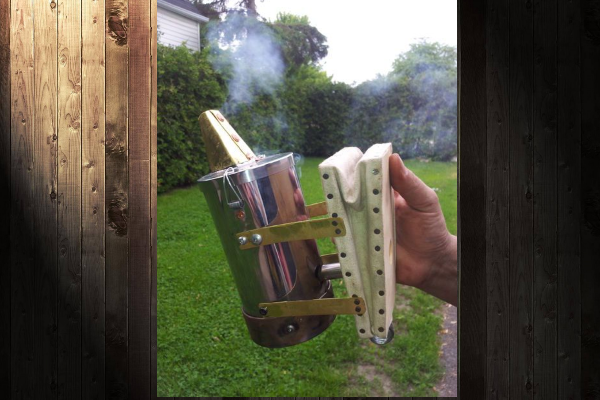
- Close the lid and check the functionality.

There's also a simpler way to make a smoker—using an old teapot. Watch the video for instructions:
Which equipment to choose?
Time-strapped beekeepers and young beekeepers prefer to buy bee smokers. Specialty stores and specialized websites offer a wide selection of domestic and European smokers.
Each beekeeper decides for themselves which type of smoker to use. However, when choosing, the following criteria should be followed:
- Quality of material. It must be durable (it will have to withstand high temperatures) and stainless, since metal corrosion during burning will have a negative effect on honey plants.
- Manufacturer. Experienced beekeepers buy only from trusted manufacturers. They produce high-quality products, offer a warranty, include detailed instructions, etc.
- Type of construction. The choice largely depends on the beekeeper's ease of use and the size of the apiary. The more hives, the more often the smoker will need to be used, and therefore the more effort required. For larger beekeeping operations, electric models are better.
- Purchased or homemade option. Not everyone has a talent for construction. If you're unsure about how to build a device yourself, it's better to buy one.
- Price. There are budget and expensive models in each smoker category. Manual smokers are the cheapest, mechanical smokers are mid-priced, and electric smokers are the most expensive. But even within each category, prices vary, most often depending on the manufacturer.
Building your own will also require some expense if you don't have the right materials and tools on hand. But here, the time and effort involved are what counts.
Tips from experienced beekeepers
To avoid mistakes, follow these basic rules for using a smoker. Be sure to heed the advice of experienced beekeepers:
- Use the device only when necessary. Don't frighten or anger the bees unnecessarily.
- Distractions from the fumigation process are not a reason to extinguish the smoke diffuser. Place the device on one side (it will not go out and will not emit excessive smoke).
- During the event, carefully monitor the honey plants' reactions. Don't let them get too spooked. Reduce the flow.
- Do not touch the frames or hive structure with a hot appliance.
- Initially, blow twice. Then wait until the bees calm down, and then begin blowing more fully.
- To prevent insects from crawling out/flying out during fumigation, open the cover 2 frames at a time.
- If you need to find the queen, reduce the amount of smoke blown into the hive. Otherwise, she'll hide in one of the corners.
A smoker is a simple device to use. However, safety precautions must be observed when lighting and fumigating. Making your own equipment also requires knowledge of construction rules. Using a defective smoker reduces its effectiveness on bees, often resulting in attacks on the beekeeper.