A hive diaphragm is also called a partition, divider, or insert board. It plays a specific role in the organization of the hive. You can buy a diaphragm or make one yourself. There are several variations of this design, and installing one is easy.
What is a diaphragm in a hive and what is its role?
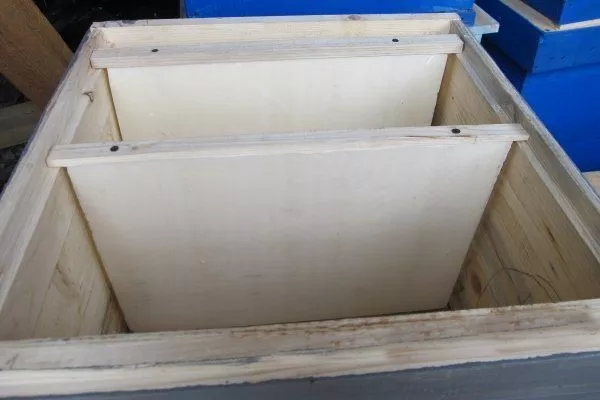
The diaphragm is a plywood board. Its height and length correspond to the internal dimensions of the hive (body). In addition to the main body, the diaphragm also includes a top bar. This corresponds to the frame dimensions for a specific hive. On the sides are end bars, also called "ends." This design is the simplest, but the diaphragm can be constructed in other ways.
A hive insert board is used to isolate the bee nest in the free space inside the hive. A diaphragm also allows the hive to be divided into compartments. It is necessary to use it when the bee colony does not occupy the entire hive.
Once honey extraction is complete, the diaphragm can be used to separate the extracted combs from the bees. This ensures the raw material dries. Unsealed frames with low honey content can also be separated. These can then be used to replenish winter food supplies.
To suspend the diaphragm, folds are used – the principle is the same as with standard hive frames. The inserted hive board is 15 mm thick. A passage for the bees must be left underneath the board.
It is recommended to use 1-2 of these boards in each hive. They are necessary when introducing a young colony to the hive. This device is also needed for wintering, when the hive is short on frames. In this case, the diaphragm allows you to separate the side spaces of the hive and insulate them.
Making a diaphragm for a hive yourself
To make a hive insert board yourself, you need to select the right materials. You'll need plywood or suitable 10mm wood and beams. The frame should be a standard size – 43.5 x 30 cm. The top beam is 47 cm long, 2.5 cm wide, and 2 cm thick. The bottom and side beams are the same width, 1 cm thick. It's best to use a stapler for fastening, as nails or screws can split the thin material.
The wood used to make the diaphragm must be light and dry. Softwood should be used.
The end beams are the same height as the main board. The top beam extends slightly beyond its edges to ensure the diaphragm is secured in place within the hive.
If it is necessary to make a diaphragm as insulation, then after completing the main work, the following manipulations are also required:
- select a thick piece of insulation - the piece should be exactly the same size as the inside of the frame;
- cut a piece of plywood that matches the external dimensions of the diaphragm - this is necessary to protect the insulating material from bees;
- secure the plywood with a construction stapler – it should fit tightly and not slide;
- Place a strip of insulation along the border of the frame to eliminate gaps on the diaphragm; also use a stapler for fastening.
- ✓ The thickness of the foam rubber must be at least 20 mm for effective insulation.
- ✓ The foam must have a density of at least 25 kg/m³ to prevent damage by bees.
Foam rubber or polystyrene can be used as insulation for the partition. The hive diaphragm must be of high quality. Every detail must be processed. The beams must be smooth (planed), and all chips and roughness must be removed.
The resulting structure should fit easily into the hive, yet remain snug. If the diaphragm is used during wintering, any gaps or cracks will allow cold air to penetrate.
This video explains how to make a diaphragm for insulation with foam:
Installation
The diaphragm is installed vertically in the hive. There are no special features to this procedure. If the hive has a lower frame, the diaphragm will fit snugly against the lower frame thanks to the insulation—this tight fit is the primary purpose of insulation. If there is no lower frame, a small space will remain below. This opening is essential for worker bees.
If the diaphragm is made without insulation, side cushions can be used for wintering. The size of such insulation should be sufficient to completely cover the entire space. Regular reeds can be used. Dried stems are used for insulation, and panicles are used to stuff the top cushions.
A diaphragm is a multifunctional partition for a hive. It can be used for a variety of purposes, including separating some of the bees and providing winter insulation. It's easy to make your own—the materials are simple and readily available.