A horse bridle is designed to simplify the process of controlling the animal (slowing down, stopping completely, turning it, etc.). It is placed on the head and is considered part of the horse's harness. It is also known as a headband. It is sold in specialty stores, but you can also make your own.
Description and purpose
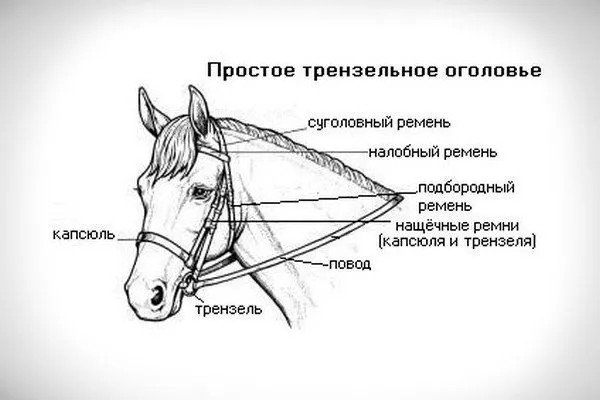
A bridle allows for close contact between the horse and rider. This is achieved by rods inserted into the mouth and connected to the bit. The bridle is attached to the metal or rubber rods via rings.
When the rider tightens the straps, the horse experiences pain, so in an attempt to get rid of it, it turns in the direction from which the tension is coming.
The device is made from various materials – leather, synthetics, etc., and is a set of several elements:
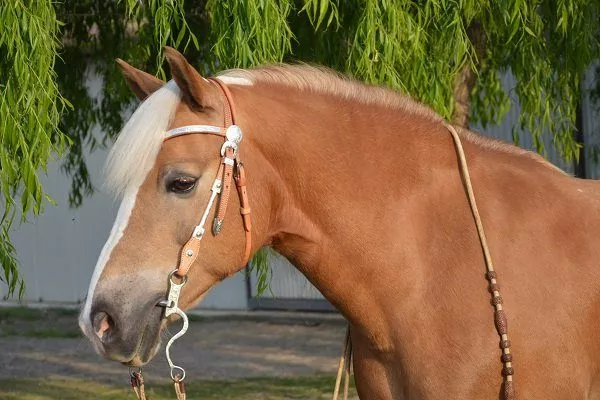
- Neck or head strap. Located on the back of the head, directly behind the ears, it serves to secure the bridle to the horse's head and is therefore considered the base.
- Cheek straps. There are two of them, running from the poll to the bit rings. They help hold the bit in the mouth. Choosing the right length is important, as it determines the position of the bit.
- Chin strap. Located under the ganache, it attaches to the headband on both sides. Its purpose is to hold the bridle in place. Not available on all models.
- Head strap. Commonly known as a forehead band, it attaches to the neck strap on both sides behind the ears. It serves no function, so it's used primarily as a decoration.
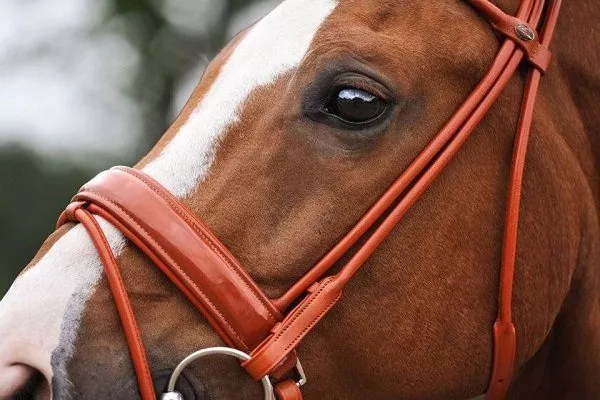
- Capsule. This is a strap designed to restrict the horse's mouth movement, preventing it from escaping the pressure of the bit. The noseband must not be overtightened, otherwise the horse will be unable to chew properly.
Optimally, there is enough space between the snorer and the capsule for two male fingers to fit freely. - Belt-reinforcement. The reins are attached to the bit on both sides and are used by the rider to control the horse.
- Snaffle bit or bit. This is a metal structure consisting of two (called a "nine") or three (called an "eight") moving parts. The bit is placed on the toothless edges of the jaw to apply pressure.
Types of bridles
There are many different horse bridle models. Each type has its own characteristics, requirements, and components. They also differ in their intended purpose. These parameters influence the functionality of the device.
| Name | Bridle type | Presence of a capsule | Material |
|---|---|---|---|
| Snaffle | English | Yes | Leather/synthetics |
| Mouthpiece | Standard | Yes | Leather |
| Cowboy | Single-ear/slit | No | Thin belts |
| For walks | Intermediate | No | Leather/synthetics |
| For runs | Simple | No | Leather |
| Hackamore | Without a bit | No | Rawhide |
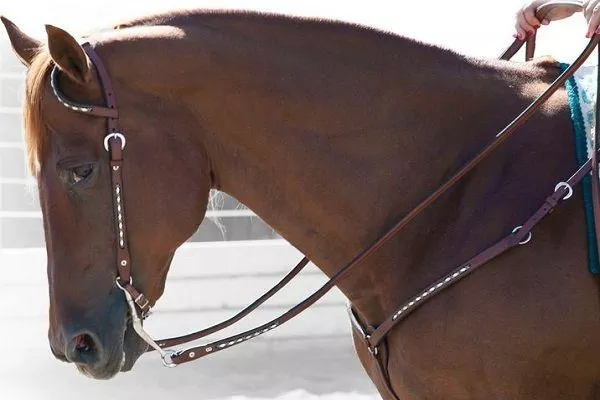
Snaffle
The headpiece is considered the English style and is the most popular among riders. Unlike other types, it requires the use of iron, rubber, or plastic bits instead of the traditional bit.
What it consists of:
- snaffle;
- capsule;
- straps - head strap, chin strap, cheek strap.
Recommended for riders who feel confident in the saddle.
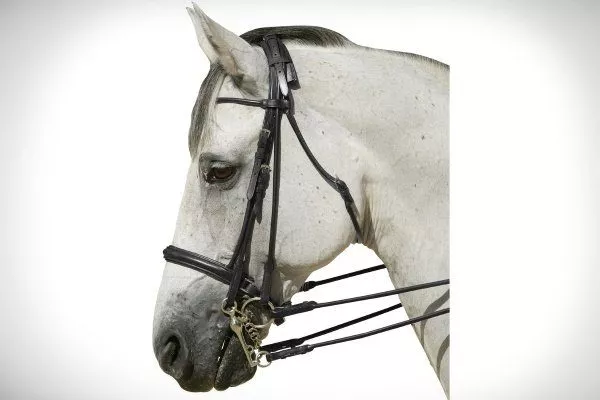
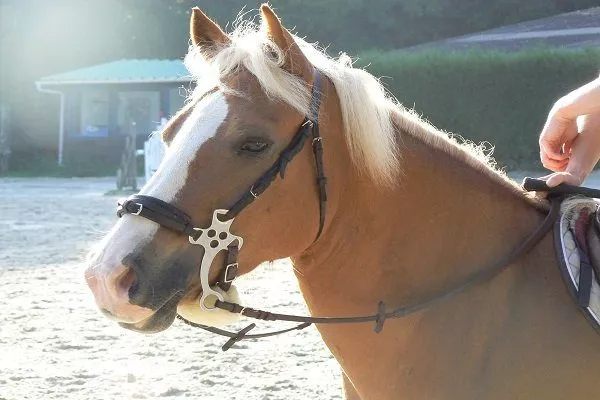
Mouthpiece
It differs from other bridle types by the addition of an additional bit—a curb bit—which increases control over the horse. The other components are standard. A snaffle bit and a noseband are required.
Most often used during horse racing and show events, reviews.
Cowboy
Another popular model, made from thin three-strap straps. This type is divided into two subtypes:
- one-eared – there are separate loops that are put on the horse’s ears;
- slit - the occipital strap is wide and has slits for the ears.
A distinctive feature is the absence of a noseband and several separate reins. Models are also available with a mouthpiece or snaffle bit.
For walks
Used for long, relaxing horse rides. Its main advantage is its simplicity and ease of use, allowing for effortless feeding and watering of the horse, as the bit is simply removed from the horse's mouth.
For runs
The endurance bridle's primary purpose is to quickly unbridle the horse, so it features side-pull neck straps. The neck straps and reins are attached separately. This bridle is considered easy to handle and maneuver, and it doesn't put undue pressure on the horse.
The special feature is that if you unfasten the bit, the bridle transforms into a halter.
Hackamore
It consists of a standard set, but without the bit and noseband. The metal piece replaces the nosepiece, creating pressure on the muzzle, bridge of the nose, and chin. It is made of rawhide. It is intended for experienced riders, but is also used for horses with dental and oral problems.
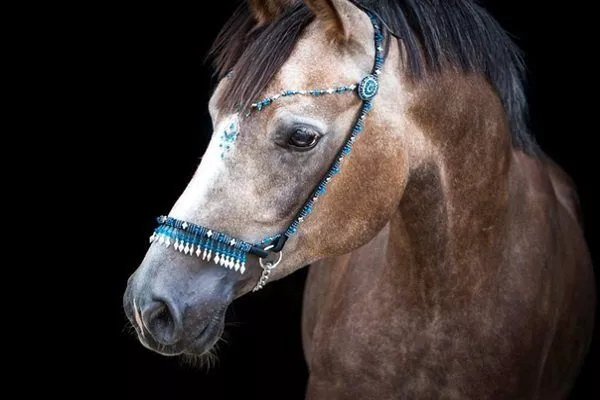
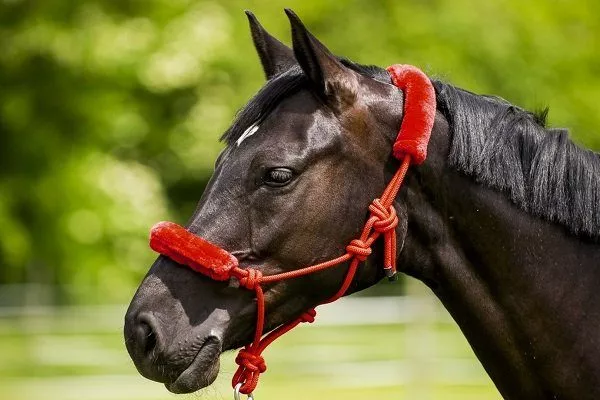
Halter
The device is identical to a bridle, but differs in its simplicity and lightness of construction. A halter is used for veterinary visits, washing/grooming the horse, and other activities that require the horse to be harnessed for a short period of time. It is made from ordinary rope, which can be braided by hand.
There are some nuances that are worth paying special attention to:
- keep the reins close to the head and taut, otherwise the animal will not feel that it is under the control of the owner;
- always stand on the left side of the horse;
- when moving, walk in step with your horse;
- The halter consists of a cheek strap, a headband, a chin strap, a noseband, and a buckle.
How to make a bridle with your own hands?
Making a horse bridle is a simple process. Even a novice horse breeder can handle it. The key is to strictly adhere to the dimensions, prepare the materials, learn how to braid a halter, and follow the instructions.
Measurement Features
The first thing a stable owner should know when making a bridle is how to accurately determine the size, as each horse has its own dimensions. Measurements are taken from the horse's head. A few centimeters are added to each measurement:
- forehead width – +10 cm;
- chin width – +3 cm;
- distance from the ear to the corners of the mouth (across the cheek) – +10 cm;
- distance from the corner of the mouth to the back of the head – +10 cm.
To learn how to choose the right bridle and bit, watch the video:
Tools and materials
The straps are made of genuine leather or synthetic material. Experienced horse breeders prefer the former, as synthetic materials can chafe and cause irritation, especially in hot weather.
- ✓ Genuine leather is preferable to synthetic leather due to its better breathability and durability.
- ✓ For hot climates, choose leather with perforations for improved ventilation.
- ✓ Make sure the material does not contain harmful chemicals that may irritate the horse's skin.
What you will need besides 7 belts:
- velour or fleece fabric;
- needle and awl;
- threads; rings for connecting belts in the amount of 5 pcs.;
- sewing machine;
- tailor's scissors.
Weaving a halter
Halters are typically made from nylon threads or regular twine. They are woven using a knotted method (knots are spaced 5 cm apart, one above the other). Before making a halter, be sure to measure your horse's head.
Halter weaving pattern:
- Measure approximately 2.5 m from the rope. All dimensions depend on the horse's parameters.
- Tie a regular knot. Measure about 22-23 cm back from it and tie another knot.
- Lay the twine on the table with the long end on top and the short end on the bottom. Tie them together and fold them into a wave shape, then transfer the portion with the two knots across the wave shape.
- Separate the double ring on the left and overlap one circle on top of the other, forming a cross. Tuck the short branch on the right under the knot, carefully holding the structure in place.
- Cross the long branch over the short and top lines of the knot. Pull it out. Now bring the long rope to the left loop and pass it through the underside so that it comes out of the second ring. Pull it tight.
- Pass the short thread under the top right ring.
- Grasp both strings with your left hand and the right loop with your right. Turn over, pull tight, and make a knot.
- Shorten the loops on the left side and give the ring on the right the desired size.
- Tie a knot on the long branch, making it half the size of the snout loop. Thread the end of the short rope through this knot.
- Turn it over. Take the bottom branch and make a loop to the knot. Take the other end of the thread and thread it through this loop, creating a knot within the knot. Tighten the structure.
- Make a knot with a loop on one rope along the length of the bridge. Make another knot within the knot.
- Thread the end of the long string through the knot made in the first step, the one at the bridge of your nose. Tie another knot in the loop here. Thread the same string through the other first knot and repeat the process.
- Check that all dimensions are correct.
- Take the short branch and thread it through the edge knot of the long one. Straighten the structure, secure it, and turn it over. Form a knot in the loop again.
- Align the remaining ends and cut the longer one to match the shorter one.
The halter is ready. Watch our video to learn how to braid it (with all the details and step-by-step instructions):
Instructions for making a bridle
To make a horse bridle, cut 7 straps, leaving a seam allowance of about 2-3 cm. Follow these instructions:
- Double-stitch the thin material straps. Sew the rest in a single layer.
- Take the cervical strap. Attach a carabiner or ring buckle to the top of the left side to secure the bridle.
- Lay out the bottom strap and attach the ring where it meets the sling strap. This is where the ring should connect to the tie (or cord, leash).
- Attach a buckle to the capsule belt that will adjust the snare.
- Connect all the belts with rings.
- Sew fleece or velour fabric onto the inside of the occipital and shoulder straps.
A simplified DIY horse bridle – watch the video:
How to put it on correctly?
The correct positioning of the bridle on a horse determines its behavior and ease of control. If the horse has never been harnessed, proceed with particular caution – remain calm, avoid sudden movements, shouting, and the like.
There is a pattern for putting on a bridle that is simple and quick:
- Stand to the left side of the horse.
- With one hand, grasp the animal's nose, slowly pull the bridle with the other, and throw the reins over its back. Hold on to the neck strap fastener with one hand.
- Insert the bit into the toothless end of the horse's mouth. The bridle will lift up, then place the headband on, tucking it behind the ears.
- If the elements become twisted, untangle them immediately.
- Now fasten the chin strap.
After you place the bridle on your horse, be sure to check the accuracy of all parts and adjust them if necessary. Pay attention to the following details:
- browband – in a normal state it fits smoothly, does not press on the horse’s forehead, and is located at least 5 cm, maximum 10 cm below the start of the ears;
- the ears should “look” upwards, the bangs should lie in the correct position;
- the distance between the chin strap and the neck should be 4 human fingers (check only when the horse’s head is lowered);
- the distance between the nose and the capsule is 2, maximum 3 fingers;
- The bit should be positioned so that there are 2 wrinkles in each corner of the mouth.
To learn how to properly put on and adjust a bridle, watch our video:
How to care for a bridle?
To ensure your bridle lasts a long time and stays clean (which is essential for your horse's health), follow these maintenance guidelines. They are as follows:
- After each wearing, wash metal parts thoroughly;
- It is enough to wipe the belts with a damp sponge and then with a dry soft cloth;
- disinfect the bridle at least once a week - you can spray it with an antiseptic liquid;
- If the belts are clogged with dust, you can simply clean it out with a stiff brush;
- To maintain strength and elasticity, lubricate leather elements with glycerin or glycerin soap 1-2 times a week;
- After processing (cleaning), place the ammunition in a ventilated area or hang it outside under a canopy.
- ✓ Use special leather care products to maintain its elasticity and prevent cracking.
- ✓ Store the bridle in a dry, ventilated place, avoiding direct sunlight.
- ✓ Regularly check all metal parts for corrosion and replace if necessary.
Problems and their solutions
A horse breeder's primary goal is to create the most comfortable conditions possible for the horse while wearing and putting on the bridle. This is achieved by taking precise measurements of the horse and purchasing or tailoring the bridle to its head size.
You need to be prepared for the fact that in the first few days the animal will feel discomfort (if the bridle is put on for the first time), but over time the horse will get used to it.
What problems may arise and how to solve them:
- chafing on the skin – use natural and soft fabrics for the bridle, be sure to insert a lining under the rough leather of the straps;
- the horse is out of control – replace or adjust the device (it is large);
- the reins fall out of my hands – not enough length;
- the horse kicks and shakes its head – the head strap is too tight, loosen it.
Where can I buy a ready-made bridle?
Ready-made bridles are sold in specialized equestrian tack stores, at horse farms (some owners also specialize in making horse harnesses), and online. If you'd like to order a custom or exclusive bridle, contact a saddler (master tailor).
The price depends on the bridle's materials, the seller's markup, the manufacturer's nominal price, and the model. Prices range from 950 to 9,500 rubles.
Reviews
When purchasing a bridle for your horse, be sure to measure its head first, adjust all straps after putting it on, and most importantly, remain calm to prevent the horse from spooking or kicking. When sewing your own bridle, use only high-quality materials—genuine leather, durable snap hooks, and rings.