Equipping a barn with a special feeder for goats is important, as these animals tug at their feed while eating, dropping it, and then trampling it with their hooves. However, they won't pick up hay or feed from the ground—they're too squeamish. Therefore, it's important to choose the right design based on various parameters.
Purpose
Goats are the cleanest and most fastidious of all ungulates. To maintain their health, it's essential to feed them high-quality, clean, and varied feed.
For this reason, feeders of various designs have been developed, ideal for all types of food. They are also needed for other purposes:
- reducing feed costs (if feed is lost, the remains have to be thrown away);
- preservation in fresh form;
- protection from dirt and dust;
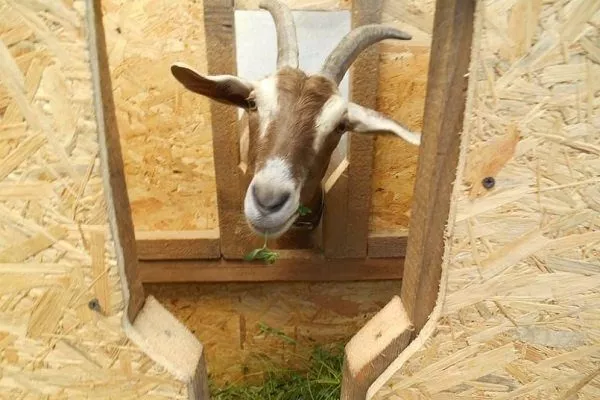
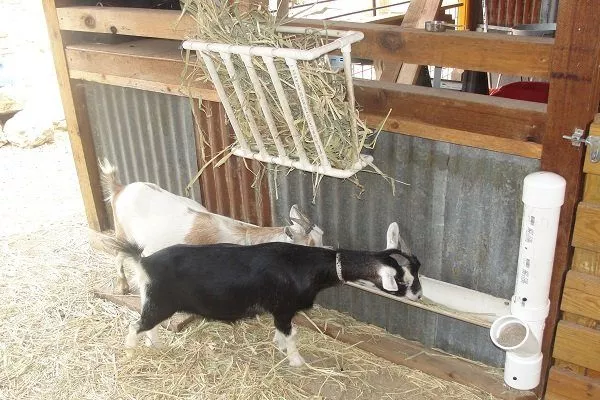
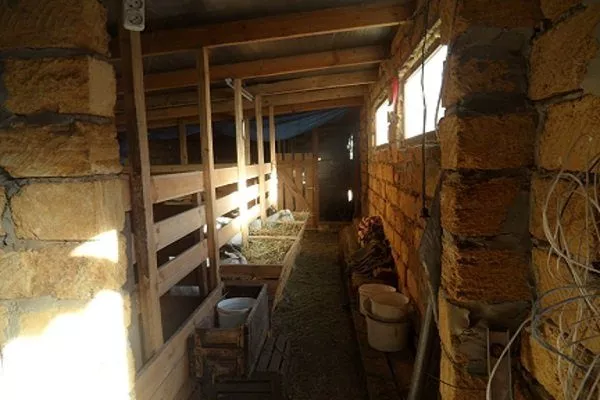
- saving space in the goat house (for this purpose, the manger is placed outside through a hole in the wall).
A properly designed and installed device will provide maximum comfort not only for the goats while eating, but also for the person cleaning the pen.
Requirements for feeders
The rules for using goat feeders depend on various factors—the type of food they're intended for, the best way to store the feed, the animal's comfort level, and, most importantly, safety. Feeders can be purchased at any specialty store or market, but experienced farmers prefer to make their own.
Preservation of feed
The feeder design must securely hold the feed from all sides—this is the key to ensuring its safety. Otherwise, the farmer will suffer losses, as the feed mixed with manure is unfit for consumption.
However, young kids can also eat food from the floor, which can lead to infectious diseases. To preserve feed, keep the following in mind:
- If it is not possible to make a new feeder, place a wide trough under it where the leftovers will fall;
- make a two-tiered nursery;
- the body must be solid, but with holes equal to the size of the goat's head so that it can easily fit inside;
- The height of the “dining room” for adults varies from 130 to 150 cm, for kids – 50-70 cm.
Attach the feeder to the walls of the barn so that the goats cannot knock it over while playing or feeding.
Simplicity of design
The simpler the model, the easier it is to make at home, which will further save money, time, and effort. A simple design is easier to maintain—clean, clean, and repair. Hanging crates in the form of a box are used for this purpose.
Safety
When setting up a pen, a farmer must adhere to animal safety regulations. This is especially true for feeding equipment, as heads can get stuck in crevices, sharp edges can scratch, etc.
Therefore, calculate the size of the holes correctly and follow the basic safety requirements:
- Provide each goat with an individual feeder. If this is not possible, then a maximum of 2 animals should eat from one structure;
- do not make the slits too wide - animals can squeeze through with their legs stuck, but they should not be too narrow either, so the distance between the head and the top/bottom of the slit on each side should be 4-6 cm;
- the width of the hole depends on the spread of the horns;
- If the barn contains both adults and young individuals, make a feeder with a keyhole-shaped opening - the gap at the top level is much wider than at the bottom;
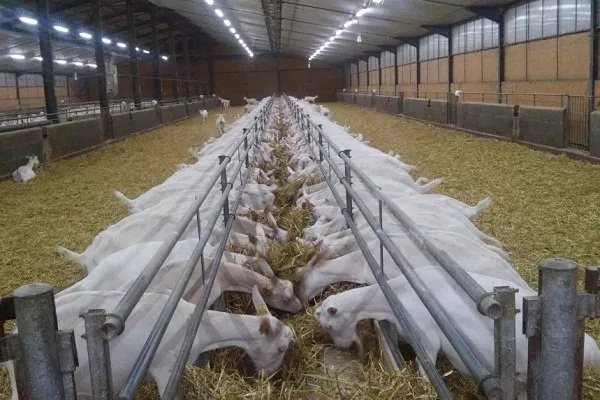
- the optimal arrangement of the mangers is in one row, so that each animal can freely approach its food;
- The structure must not contain protruding nails, sharp corners, large chips, etc.
Since goats chew on wood, avoid painting or varnishing it. This will cause poisoning.
Type of feed
Each type of feed requires a specific type of feeder. For example, grain will spill out into bins with large gaps, while hay will get stuck in bin structures, clogging the pipes.
There are several main categories depending on the food for goats:
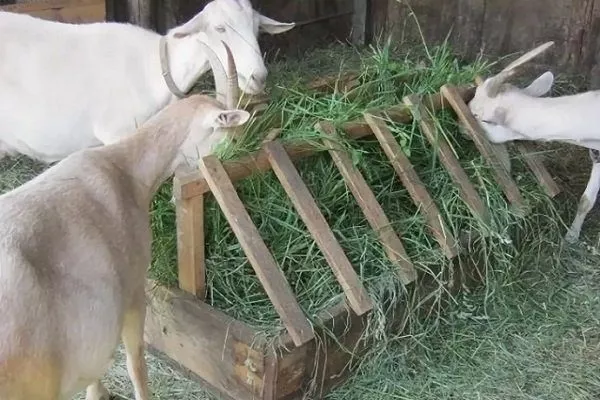
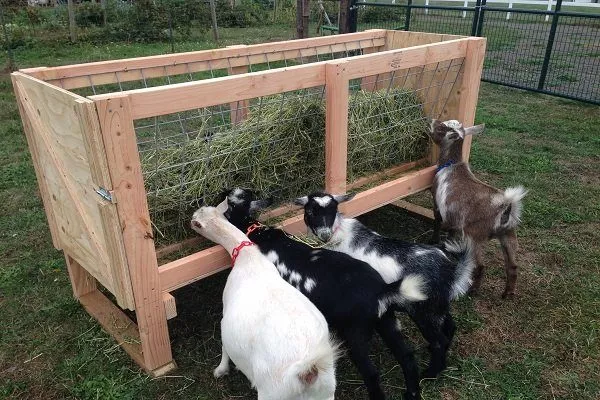
- For hay. The structure is large (the size depends on the weight of the bales) and open, with bars and crossbars. They are positioned so that the animal can easily reach the hay but cannot climb inside. Ideal options include French-style hay pens and regular mangers.

- For grass. The most common type is a floor-standing structure with a crossbar on top. The main requirement is secure attachment to the floor to prevent tipping.
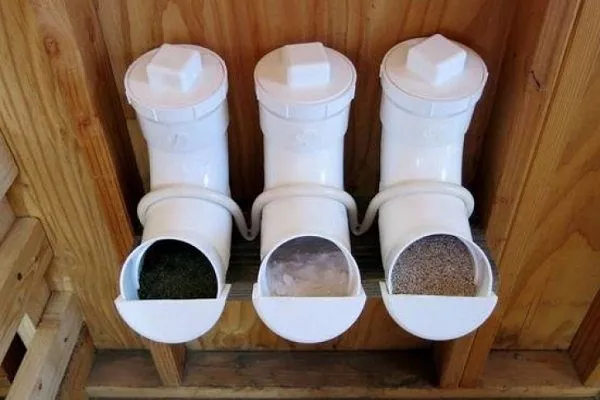
- Grain, compound feed. Loose feed should be stored in closed hopper feeders made of PVC pipes. The feed is fed from the top of the pipe, then moves downward.
Main types and their diagrams
Goat feeders are divided into groups based on mobility indicators:
- stationary – they cannot be moved from their place, as they are fixed to the surface of the barn (wall/floor);
- mobile – easy to move during cleaning/rearrangement;
- folding - those that can be folded or attached to the wall if necessary.
Feeder manufacturing techniques vary, but there are a number of nuances that are essential for all types of feeders:
- the length for young animals is up to 20 cm, for adults up to 40 cm;
- height from the floor to the tank – about 50 cm;
- the height of the entire structure is 100-150 cm;
- The distance between the crossbars is 8-10 cm for kids up to 6 months old, and 20-25 cm for goats.
- ✓ For adult goats, the distance between the crossbars should be 20-25 cm, for kids – 8-10 cm.
- ✓ The height of the feeder from the floor to the tank should be about 50 cm for the convenience of the animals.
Materials and tools
To make a goat feeder yourself, you don't need a lot of experience; just carefully study the diagram, the sequence of steps, and prepare the necessary materials and tools.
- ✓ The wood must not be treated with chemicals to avoid animal poisoning.
- ✓ Metal elements must be galvanized or coated with an anti-corrosion compound for durability.
What you will need:
- Warp. It is made from wooden boards, beams, plywood, metal sheets, plastic, barrels, PVC pipes.
- Crossbars. For these, stock up on wooden slats, chain-link fencing, hoses, or other suitable materials at hand.
- Fasteners. Use nails, screws, self-tapping screws, corners.
- Tools. You may need a wood (or metal) hacksaw, a welding machine, a hammer, pliers, a screwdriver, a drill, a chisel, a plane, and a jigsaw.
- Auxiliary means. These are pencils, crayons, felt-tip pens or markers, and a tape measure for measuring.
Nursery type
This is the simplest design, most often used in homes. It requires wooden elements or metal reinforcement. There are a huge number of wooden models available—it all depends on the craftsman's imagination.
Classic version
Standard nurseries are manufactured in four stages: frame, base, top, and assembly. Here's a classic diagram with dimensions:
Step-by-step instructions:
- Start with the bottom frame. Take the widest boards—8 of them—and mark them. These will be the length and width dimensions.
- Use the blocks for the legs - cut them to the required size (from the floor to the top of the feeder).
- Connect the frame - nail 4 boards around the perimeter.
- Make the bottom - knock together several boards into one panel the width and length of the frame or cut one out of plywood.
- Nail the bottom to the base.
- Connect 4 more boards to the frame at the very top.
- Prepare a few more slats that will act as crossbars.
- Nail it to the base vertically.
The manger is used for hay and grass.
From reinforcement
Metal structures have several advantages: they're heavy, so there's no need for weights, and they're stable, durable, and strong. However, welding skills are required for their manufacture.
What you will need:
- galvanized sheets – thickness 2 mm;
- metal rods – diameter 18 mm;
- pipes – diameter 12 mm;
- reinforcement – thickness 8 mm.
Assembly and welding in order:
- Make a frame.
- Cut out the legs (use rods).
- Prepare the side walls and base from galvanized sheets.
- Weld the grates.
The assembly option, starting from the bottom and ending at the top, is considered optimal.
Despite the many advantages, rebar nurseries also have many disadvantages:
- protruding metal parts are very difficult to round off, so sharp elements remain, which violates safety;
- complexity of work.
Drawing of metal structures:
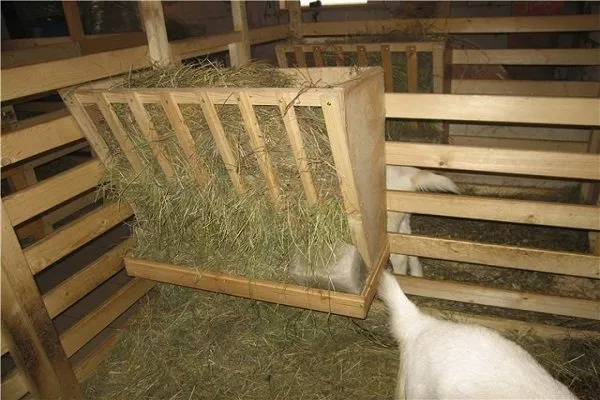
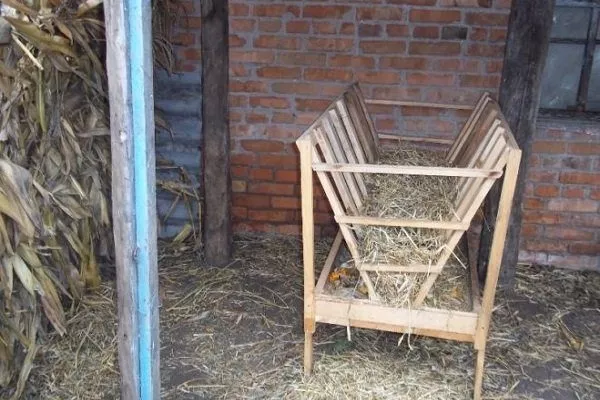
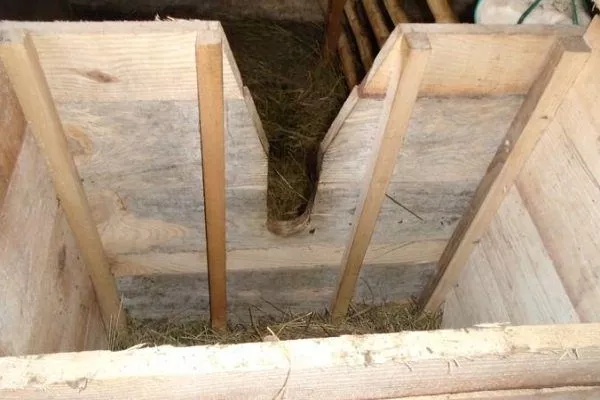
French
French artisans have developed their own unique method for making bird feeders that are popular worldwide. Advantages:
- ergonomics;
- cost-effectiveness – although the hay falls on the floor, it remains in the feeder, so there is no feed loss;
- convenience for goats;
- versatility (suitable for hay and bulk feed).
There's also a downside: there's no lid, so goats can jump over the top. To prevent this, experts recommend two solutions: adding a roof or increasing the height of the structure.
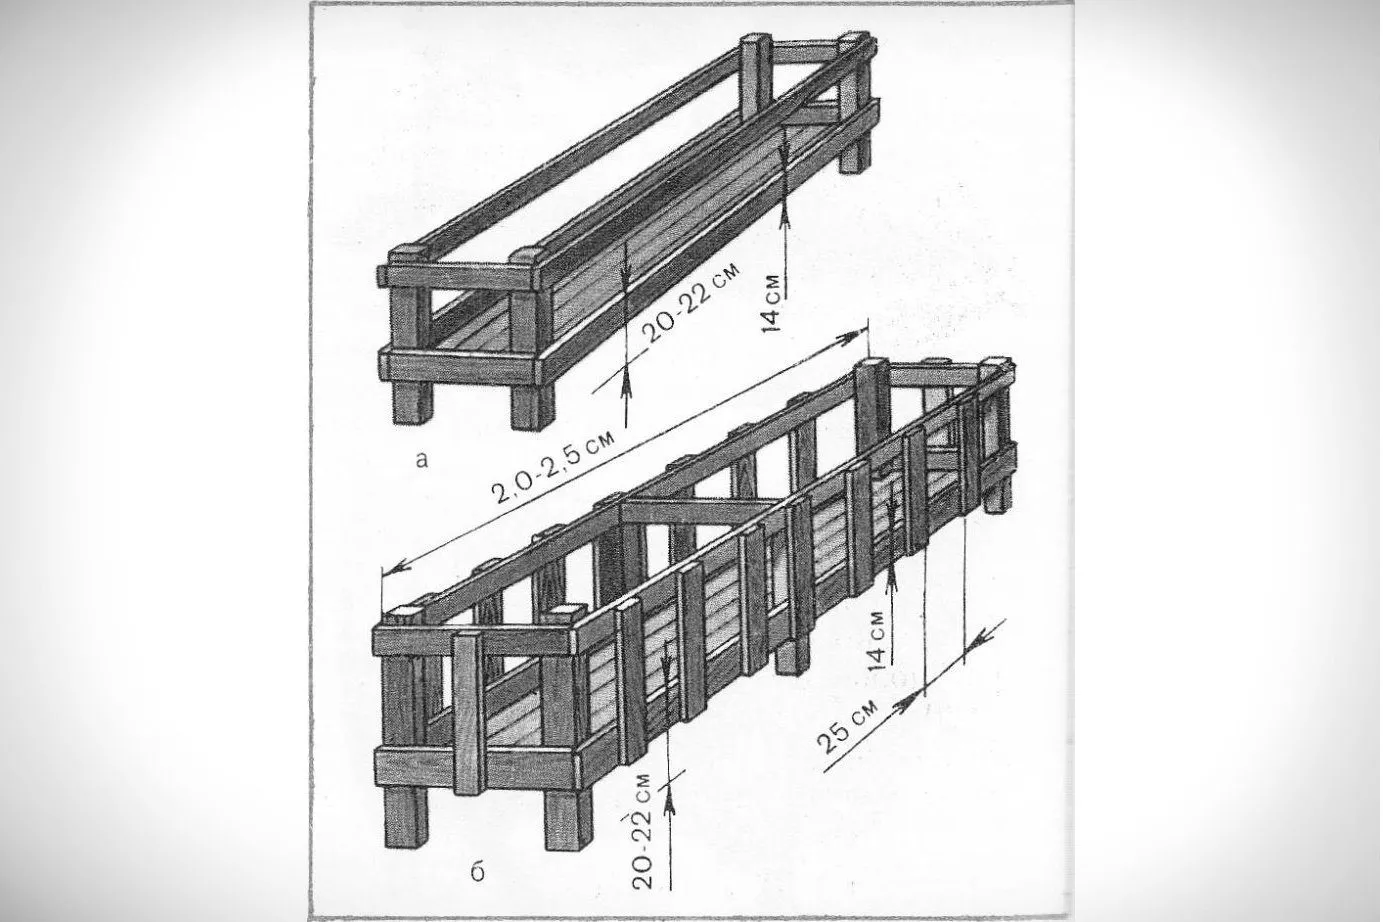
Made of wood. Step-by-step instructions:
- Build a box to the desired size. Any material will do—planks, chipboard, plywood, etc.
- Cut legs from the timber. There should be two of them, as they will be nailed across the width of the frame. The height should be no more than 15 cm (to allow the goats to reach food from the bottom).
- In the walls along the length (back and front), cut out holes suitable for the size of the goats' heads.
- Treat all elements to ensure there are no splinters or anything else left.
- Connect all the elements.
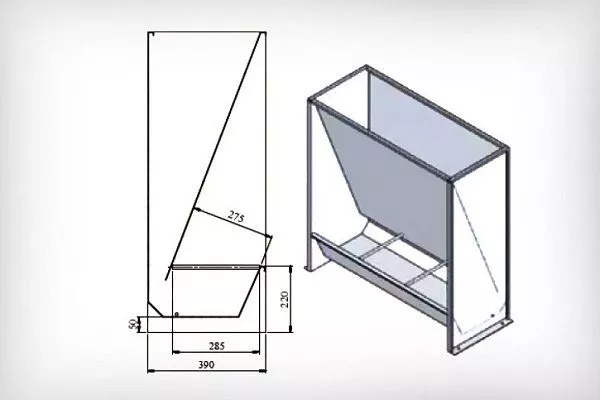
A schematic diagram with precise dimensions, from which it is not recommended to deviate (with the exception of height):
The design optimizes the livestock workers' workload, and the feeder is repositionable. But most importantly, it accommodates a large amount of feed at once, eliminating the need to perform this labor-intensive task two or three times a day.
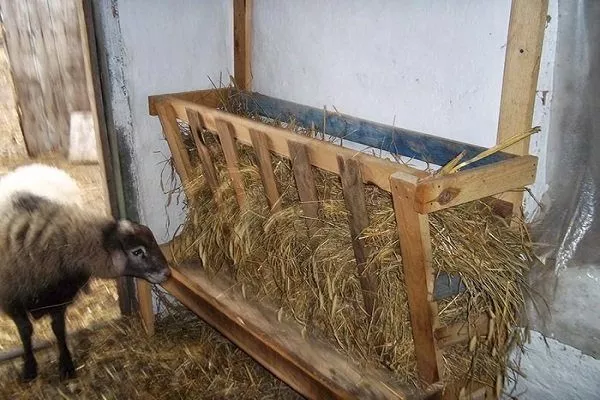
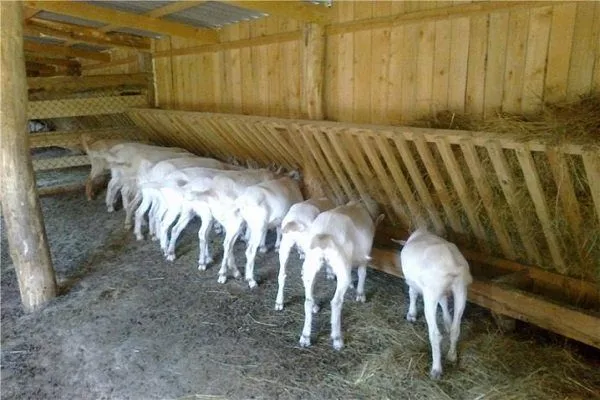
Suspended
This model is considered common and simplified. It is used for straw and hay. It can be placed on barn walls, gates, partitions, and other vertical structures. It is cost-effective and easy to manufacture, requiring only one or three walls.
How to make it:
- Prepare beams, slats, fasteners and tools.
- Attach a beam to the wall with the following dimensions: 40 cm long and 50 mm in cross-section. If using a plank, the thickness should be 35-40 mm and the width 10 cm. The distance from the floor to the bottom tier of the feeder should be 20-25 cm.
- Step back 80 cm from the bottom beam. Nail another board horizontally.
- Connect with vertical bars on the sides.
- Nail a block to the bottom, middle and top sections on each side so that they are parallel to the floor and point forward.
- Connect the top boards with a block as well. Nail slats to it, extending vertically down to the bottom element attached to the wall.
There are other options:
- corner - just nail boards to the sides of the corner and connect them to the finished structure (made from slats, a playpen, metal rods, an old bed, etc.);
- mesh - chain-link - just attach a piece to the wall;
- barrel - make windows in it.

A significant drawback is feed loss, as it spills onto the floor. Alternatively, you can install a clean trough underneath.
From a plastic barrel
Old plastic barrels make excellent feeders, but they must be non-toxic. Avoid using barrels that once held fuels and lubricants. If you have a barrel that once held glue, paint, or other materials, clean it thoroughly before use (using special cleaners or laundry soap).
Horizontal
A structure installed horizontally always has longitudinal cuts.
Manufacturing rules:
- Place the container on its side and mark the height of the cut (from 5 to 15 cm from the bend that tapers off.
- Draw a line with a marker and cut it off along the entire length with a jigsaw. This will be the top where the food is placed. Don't throw away the remaining part—it can be used as a lid, for example, if you install the structure outdoors.
- Measure 3-4 spots on both sides for the windows. Draw the holes with a marker and cut them out.
- Make small holes in the bottom to drain water (just in case).
- Sand all cuts.
- Make a wooden frame in which the barrel will be installed.
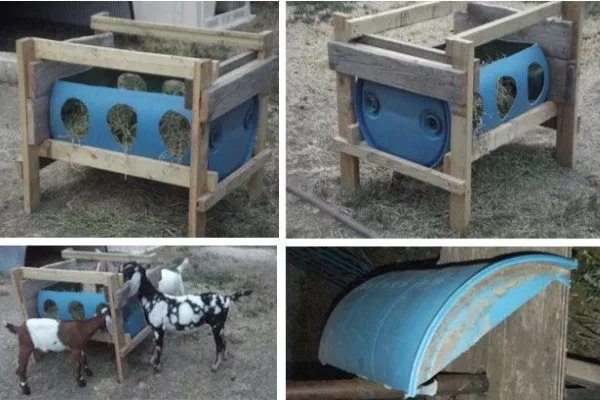
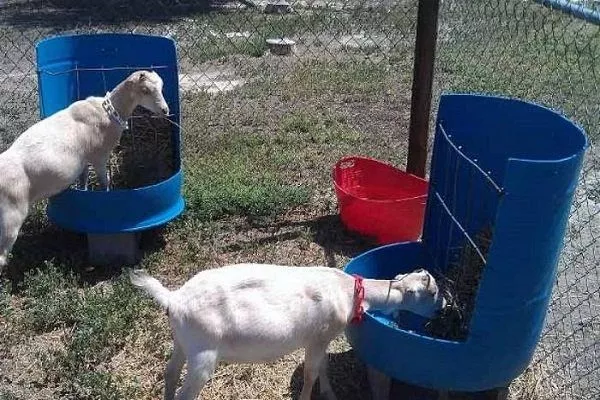
Vertical
This type involves installing the structure vertically. The main advantage is saving space and materials, as two L-shaped feeders can be made from a single barrel.
Step-by-step instructions:
- Place the plastic item on its side or leave it standing.
- Use a marker to draw an L shape on both sides so that the cut will be the same. The distance from the bottom on one side and the lid on the other is 20-25 cm.
- Cut the structure and then carefully process the cuts.
- Attach large-mesh chain-link fencing to the open surface. If you don't have chain-link fencing, use soft wire.
- Place on a backing.
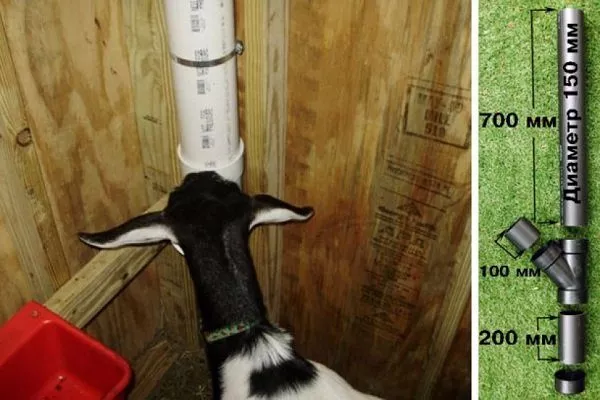
From pipes
The structure is constructed using plastic water pipes with a minimum diameter of 10-15 cm. The key is to avoid using old pipes, as they may be toxic to goats. You will also need two plugs and a 45º tee. The length is optional, but the longer the pipe, the less stable it becomes. The optimal length is 120-150 cm.
Manufacturing process:
- Divide the pipe into 3 sections as shown in the image below. Finish the cut edges immediately.
- Insert a 70 cm piece into the tee – this will be the top.
- Place the 20 cm part into the tee from below.
- Mount the smallest piece (10 cm) into the side branch of the tee, from where the goats will feed.
- Cover the bottom of the entire structure with a plug.
- Place a plug on top that will be easy to open.
- Attach to the structure with clamps.
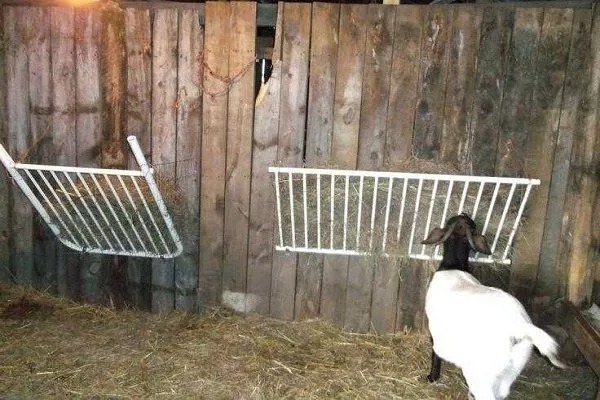
Hay rack made of planks
This is a budget-friendly option that even a beginner can build. The length of the board should correspond to the number of goats.
How to make:
- Nail 2 boards to the corner of the barn - one on top, one on the bottom.
- Attach another slat (at a distance of 80 to 90 cm). This will be the frame.
- Take small pickets and make lattices out of them.
For pens and stalls
Most often, small goat houses have feeders for one or a maximum of five goats, but for farms, row mangers are more convenient. They are arranged in one long row, usually against a wall to save space. However, double-sided designs are also possible.
The optimal option for large herds is a folding structure, which simplifies cleaning. Simple feeders for stalls are constructed from metal pipes or wood. Designs are varied.
Farmers build portable structures for summer corrals, which are then installed in the winter goat barn.
The main thing in the production of all models is the creation of the base frame and crossbars/mesh.
For a goat with kids
To feed both goats and kids hay at the same time, experts have come up with a universal manger with crossbars made of solid boards with irregular holes cut into them – the lower slot is for the kids, the upper one – for the mothers.
But there are other options that are desirable to place in the goat house with the kids.
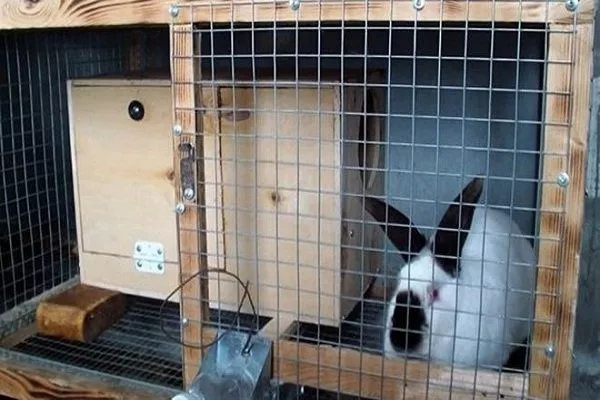

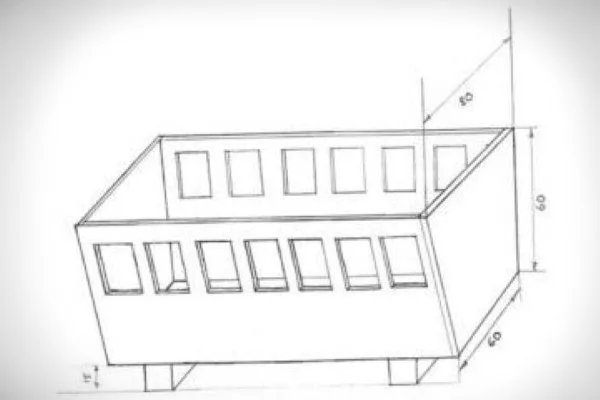
Drying and granule box
After giving birth, the mother, like the kids themselves, requires enhanced nutrition, so they should be fed pelleted and chopped feed. You can build such a box yourself. You'll need plywood, clear plastic/plexiglass, and mounting materials.
Scheme:
The construction process includes the following stages:
- Cut out 2 side walls, a front wall, a bottom and a lid from a sheet of plywood.
- Make the back wall out of plexiglass.
- Connect all the box parts into one frame so that the front element is at an angle of 45°.
Metal dispenser
The optimal option for metal dispensing troughs is a steel cone-shaped trough. It can be portable or wall-mounted.
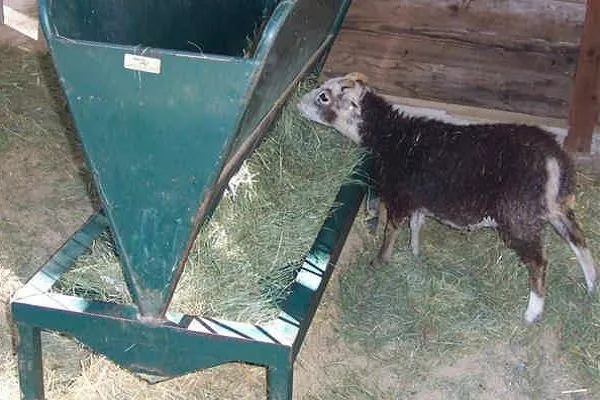
Manufacturing stages:
- Weld four steel sheets together using a welder—two across the width and two across the length—to form a cone. Leave a gap at the bottom for hay or other feed. Be careful not to let the feed get stuck in the gap or spill out too much. Therefore, the joint angle on both sides should be between 15 and 18°.
- Make a pallet with legs.
- Weld a distributor to it.
Goat breeders advise making a lattice wall on one side of the dispenser, thanks to which the mother goat can also enjoy the hay.
Drinking bowls for goats
There are two types of drinking containers: wall-mounted and floor-mounted. The former is considered the most suitable, as it keeps water clean for a long time and prevents overflow.
Drinking bowls can be simple or automatic (with a dispenser inside). At home, various materials are used to make a drinking bowl:
- bucket;
- plastic bottles;
- basins;
- water pipes, etc.
How to remake failed models?
If a mistake was made in the production of a goat feeder, don't despair, because the defect can be corrected:
- if the manger is located very low, simply nail the legs;
- if the distance between the slats is excessive, add pickets (sometimes you need to pull out the previous ones first);
- If the antlers get stuck in the cell feeder when turning the head, reduce the depth and increase the width of the opening.
Building goat feeders at home is easy for both experts and novices. The key is finding the right building materials, fasteners, and tools. If you're unsure of your own skills, consider enlisting the help of friends who are at least a little skilled in carpentry.