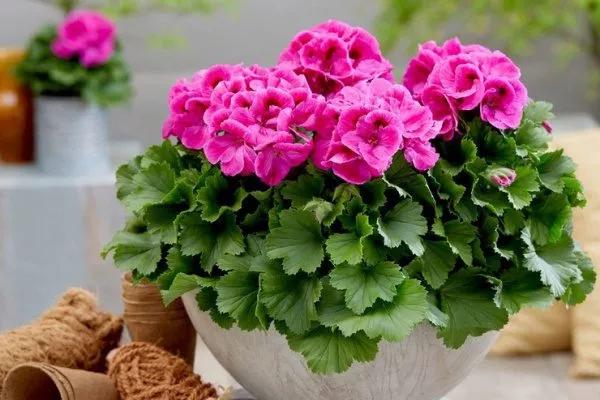
Caring for a plant like pelargonium requires specific care and simple manipulations, resulting in a lush and long-lasting bloom. The plant is considered easy to grow, but if proper cultivation practices are not followed, problems can arise.
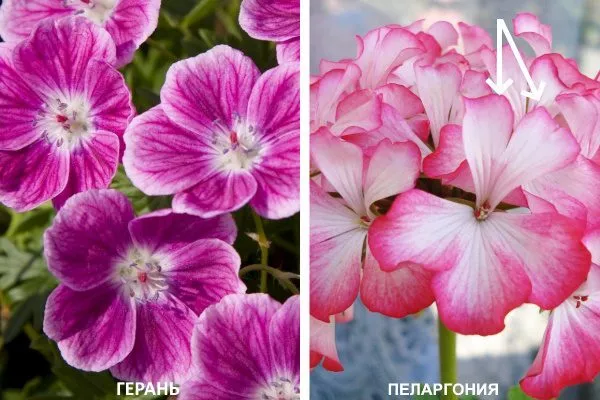
Pelargonium and geranium – similarities and differences
It's common practice here to call pelargonium (Pelargonium in Latin) geranium. On the one hand, this isn't a serious mistake, as both plants belong to the same family, Geraniaceae, but on the other, they are different plants (the genus Geranium and the genus Pelargonium).
How are these indoor flowers similar to each other:
- appearance;
- the shape of the seed capsule is elongated;
- stems - erect;
- covering the leaves - small glandular hairs;
- smell - specific;
- medicinal properties - equally useful;
- The rules for care and cultivation are identical.
Despite so many similarities, there are also differences between the genera:
| Signs | Genus Geranium | Genus Pelargonium |
| Natural origin | Northern regions | Southern Continent |
| Petals (by quantity) | from 5 to 8 pcs. | maximum 5 pcs. |
| Flower shape | symmetrical, correct | asymmetry is noted - the two upper petals differ in size/shape from the three lower ones |
| Presence of fertile stamens | from 10 pcs. and more | from 5 to 7 pcs. |
| Petal color | Most often, cool shades are found - bluish, violet, never scarlet | the coloring is varied - from white to red, blue tones are absent |
| Formation of inflorescences | single | umbrella |
| Winter hardiness | excellent | weak |
On the need for proper care
Without following specific care guidelines, you'll never be able to grow a healthy, profusely blooming pelargonium. Not only do each family and genus require specific conditions, but so do each cultivar, so carefully review the requirements before growing it. However, there are some general guidelines:
- When germinating a flower from a seed. When propagating from seed, it's important to maintain a temperature of 22-24 degrees Celsius and cover the seedlings with plastic film to create greenhouse conditions. Open the cover daily for ventilation and to prevent rotting.
Due to their increased fragility and sensitivity, the sprouts need to be protected from drafts and sun. - For seedlings. It's important to provide 12-14 hours of daylight after true leaves form, otherwise the seedlings will become too leggy. Temperatures should range from 16 to 18 degrees Celsius at night and 18 to 20 degrees Celsius during the day.
To ensure the bush forms correctly, turn it once a week to expose it to the light in different directions and avoid overwatering. - Behind an adult plant. It's simple here - stick to generally accepted norms.
- During the flowering period. The most important thing is to remove spent blooms so they don't draw nutrients from the plant. Do the same with new shoots growing from the roots. Water frequently—every 4-5 days—and loosen the soil daily.
Basic care
The most important thing for pelargoniums is to create the necessary growing conditions, and then it's crucial to maintain their health. This requires timely and proper watering, fertilizing, and loosening the soil.
Temperature of content
Pelargoniums prefer warmth, as they originate from southern regions, but today there are a huge number of varieties, including hybrids, that easily adapt to cooler conditions. Therefore, the average (general) values vary within the following ranges:
- during the day – from +20 to +25 degrees;
- at night – from +12 to +16 degrees.
- ✓ The optimal temperature for pelargonium during the period of active growth should be maintained in the range of +20 to +25 degrees during the day and +12 to +16 degrees at night.
- ✓ To prevent diseases, it is necessary to ensure good air circulation around the plant, while avoiding drafts.

Lighting
Pelargoniums love light as much as warmth, so placing them on a north-facing windowsill is not recommended, especially in winter. If this is not an option, be prepared to install artificial lighting such as phyto- or fluorescent lamps.
Other features:
- It can be grown in partial shade, but this has a negative effect on the appearance - the lower tiers of foliage become small, the stems become bare, and the flowers are sparse;
- the optimal window sill is western and eastern;
- The pot can be placed on the south side only during the winter, as the plant will get burned in the summer.
Air humidity
Pelargoniums don't tolerate high humidity, so they need moderately dry and always fresh air. In summer, pots can even be placed on the balcony, but not in direct sunlight.
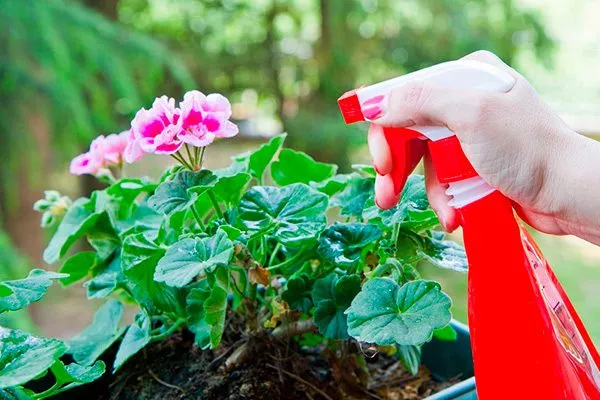
Watering and spraying
The frequency of watering depends on the time of year and the growing season:
- in summer, especially during hot weather, water once every 2-4 days;
- in winter it is necessary to moisturize once every 10-15 days;
- in autumn, when the flower is preparing for hibernation – once every 8-10 days;
- in spring, during growth activation – once every 6-7 days.
Pelargoniums are watered with rainwater, filtered water, or settled water. Tap water is strictly prohibited, as it contains chlorine and iron, which are harmful to the plant (iron leaves rusty stains on the foliage when watered).
You can water pelargonium occasionally - during excessively hot summer periods or in winter when heating devices are on.
Soil and container
The plant requires fertility, so the soil chosen for planting/replanting must be specific. It must be permeable and loose. Choosing the right pot is also important:
- height – maximum 10 cm;
- width – 3 cm larger than the diameter of the root system;
- Material – give preference to clay and ceramics.
Drainage holes in the bottom are a must. If clay containers aren't available, plant in plastic ones, but replace them with new ones every year.
You can buy potting soil at a specialty store. Experienced gardeners usually use "For Pelargoniums" or regular "Universal" potting soil. However, you can also make your own. There are several variations:
- 1 part river sand, 2 parts each of garden soil (pre-fried or poured with boiling water, a light solution of manganese) and peat;
- 2 parts each of humus, peat, garden soil and turf soil, 1 part river sand.
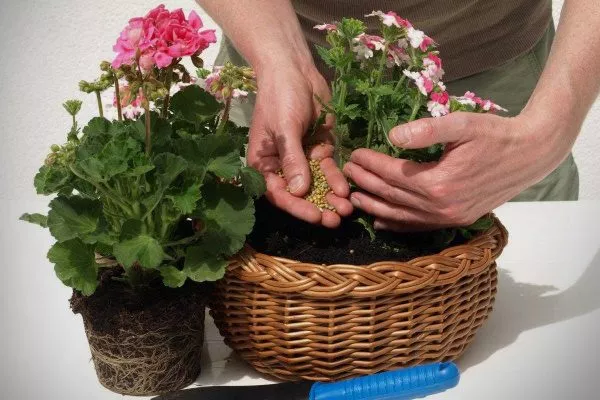
Feeding and fertilizing pelargoniums
Pelargoniums especially need additional nutrition during the growth phase, that is, after awakening from dormancy. Keep in mind that this plant dislikes organic matter, so only mineral complexes are used. The rule of thumb is to fertilize pelargoniums once every 10-15 days. Here's how to do it:
- Apply nitrogen-containing complexes the first time after hibernation. If none are available, replace them with a solution of water (1 liter) and ammonia (literally 1 drop, maximum 2).
- For all other fertilizing, use products such as Flower Paradise, Bona Forte, etc. They can be replaced with the following solution: take 9-10 drops of hydrogen peroxide and 1 drop of regular iodine per 1 liter of water.
Fertilizer application recommendations:
- during flowering, use products that contain the most phosphorus, iodine and potassium;
- Before fertilizing, water the flower and let the liquid soak in - if you apply fertilizer first, the plant will get burned;
- feeding time is early morning - if during the day or evening, the nutrients will be poorly absorbed due to overheating;
- in case of illness, avoid adding any nutrients;
- use only liquid solutions, not dry compounds;
- Both root and foliar feeding are acceptable.
Strictly adhere to all dosages specified in the instructions for any given fertilizer. Remember that both underfeeding and overfeeding can have unpleasant consequences.
Care after replanting pelargoniums
Care procedures are the same as for growing regular geraniums, so they aren't particularly complex. However, this doesn't apply to the care required after repotting. After such treatments, the plant becomes extremely sensitive to all external factors, making it difficult to repot.
Almost all beginners wonder whether it's necessary to repot a purchased flower immediately after delivery. Experts advise against this for the main reason: stress. Stress develops due to the following factors:
- transportation;
- new microclimate;
- different water quality;
- different humidification regime;
- change in lighting, etc.
Therefore, transplantation should be done no earlier than 3-4 weeks after purchasing the crop.
Care instructions after transferring a flower to another pot and substrate for successful adaptation and survival:
- the room with the pot should be warm enough - at least +24-26 degrees during the day, +20-22 degrees at night;
- do not expose the pot to direct sunlight; if it is on the south side, be sure to shade it (time in the shade is 7-12 days, then move it to the plant’s usual place);
- watering – moderate, only as the top layer of the substrate dries out;
- Spraying and hygienic showers are strictly prohibited;
- You can’t add fertilizers either – feeding is only allowed 60-70 days after transplanting, then for 3-4 months, fertilize only once every 20-30 days.
Pruning indoor geraniums
Pelargonium needs thorough pruning twice a year, thanks to which the bush will look beautiful - in the fall (immediately after the end of the flowering period) and in the spring (before the formation of buds).
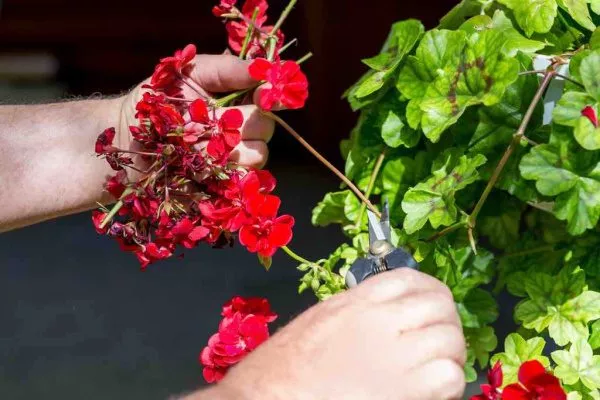
During the growing season, do the following (as needed):
- pick off faded flowers;
- remove old leaves;
- Cut off any accidentally broken stems.
Pruning rules:
- If the bush is growing very tall, remove some of the stem so that at least two nodes remain on the branches. The trunk height should be about 5 cm.
- When growing Royal Pelargonium species, the top is not completely removed, but only 1/3 is cut off.
- To improve the crown, pinch off shoots that have 6-10 blossoming leaves.
- For trimming, use a knife with a thin blade (or a scalpel, razor blade).
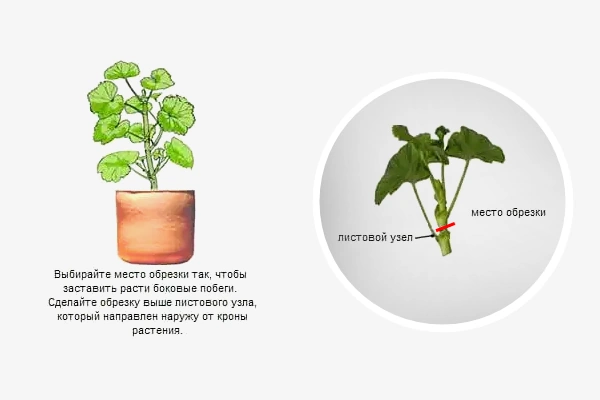
- The cut should be located under the leaf nodes that face outward.

- Cut type: acute angle.
- Disinfection of the cut sites is a mandatory procedure to prevent the development of infectious diseases. This is accomplished by dusting them with crushed activated carbon or wood ash.
Standard varieties of pelargonium deserve special attention. They are pruned as follows:
- Remove the side stems from the bush.
- After this, insert a support stake into the pot next to the plant. It should be equal to the height of the plant.
- Tie the shoot to the support post using soft rope.
- Wait until the top of the plant grows larger than the stake.
- Pinch the top, which will cause new shoots to form on the sides.
- After these stems have formed, cut off the weakest ones, leaving the most powerful and thick ones.
See how experienced gardeners prune in the video review below:
Reproduction of indoor pelargonium
Pelargoniums are typically repotted into new soil and pots once every three years. This process can also be combined with propagation, for example, by dividing the bush. However, there are other ways to increase the number of houseplants of this genus, such as cuttings, seeds, and so on.
Cuttings
This is the most simplified method for beginners, preserving all varietal characteristics and ensuring rapid rooting. The process is as follows:
- Cut off the apical shoot with 4-5 leaves. It should be about 8-10 cm long and cut at an angle.
- Remove 2 leaves from the bottom and let the cuttings dry for a couple of hours.
- Treat the cut areas with ash.
- Prepare a small pot with new substrate.
- Make an indentation with your finger (wooden stick).
- Insert the shoot with the cut side down.
- Sprinkle with soil mixture and compact the trunk.
- Place it in a well-lit place, and the next day moisten the soil, but just a little.
- When 10-12 new leaves form, remove the growing point, which will give the bush a fuller appearance in the future. Roots will form in approximately 30-40 days.
To see how experienced gardeners do it, watch the following video:
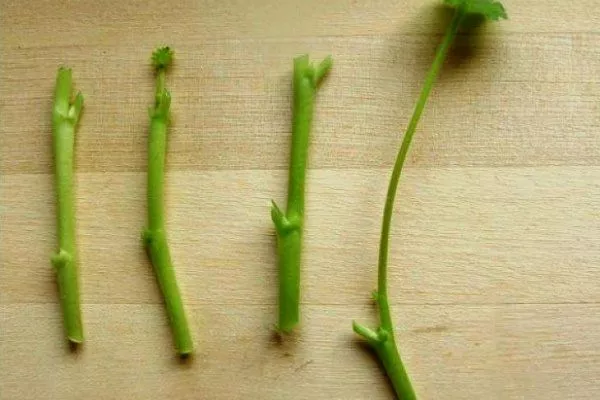
Stem part
You can use cuttings left over from pruning, but preferably spring pruning. Keep in mind that this part must still have buds. Rooting is done similarly to the previous method, but the trunk is first divided into several pieces.
Seeds
A rather complex process, in which it is impossible to preserve maternal traits. The principle is as follows:
- Prepare a container, pour the substrate into it, pour warm water over it, and let the liquid soak in completely.
- The seeds must be culled, disinfected and scarified.
- Place the planting material on the surface of the soil mixture.
- Cover with plastic wrap.
- Place the container in a dark place.
- Maintain a temperature between 22 and 25 degrees Celsius. Once the sprouts have formed, after 14-18 days, move the container to a windowsill and begin gradually airing it out – first, open the film for 10 minutes, then 20, and so on.
- When 2-4 leaves appear, transplant into separate pots and reduce the temperature to +18-19 degrees.
- After 6 leaves have formed, pinch off the top.
- After 2-2.5 months after sowing, transplant to a permanent location.
The process of planting by seed can be seen in this video:
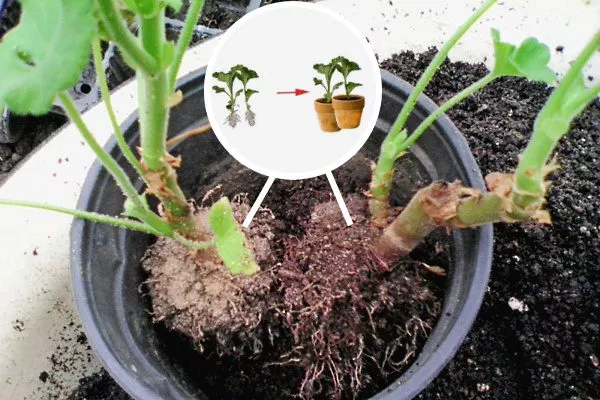
By dividing the bush
This technique is used only when replanting, as it's undesirable to disturb the plant unnecessarily. How it's done:
- Remove the flower from the pot.
- Clean and rinse the root system from any remaining substrate.
- Determine the location of the split.
- Cut the plant.
- Plant the resulting parts in pots.
- No special care or conditions are required.
Winter maintenance
When the cold season arrives, pelargonium enters a dormant state, allowing the plant to fully rest and prepare for future flowering. Flower care in winter comes down to the following manipulations:
- If the pot was on the balcony, bring it indoors. If it was on the windowsill, trim it.
- Due to the shortening of daylight hours, install phyto-lamps nearby and turn them on as it gets dark outside.
- Move the pots away from the glass to prevent the cold from transferring to the plants – they will become overcooled or freeze.
- Reduce the frequency of watering.
- Never spray green mass in winter.
- It is also not advisable to feed flowers.
Protecting Pelargoniums
Pelargoniums are most often affected by pests and diseases, so it's important to know what specific problems may arise during cultivation. Keep in mind that each variety and type of pelargonium has its own specific diseases and pests, but there are also some common ones.
From diseases
Diseases that Pelargonium is susceptible to:
- Gray rot. Symptoms include the formation of a grayish moldy coating on the surface of the leaves and darker spots on the stem. Causes include overwatering, heavy substrate, and lack of drainage.
For treatment, fungicides such as Teldor 500 and Agricol are used. - Leaf rust. The disease can be recognized by the formation of yellow-red spots and stripes on the leaves, as well as leaf drop and drying. Causes include fungal infection, improper watering, and high humidity.
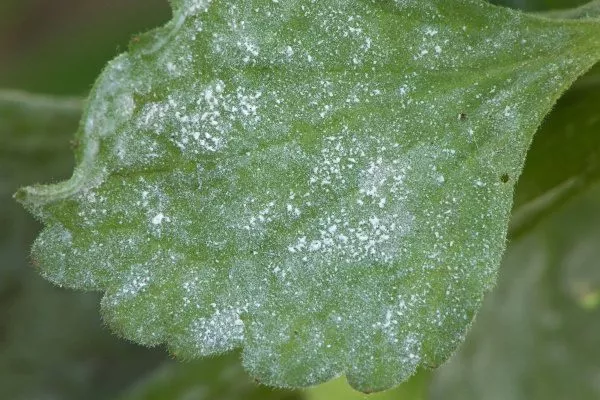
The following drugs are used for control: Topaz, Oxyhom. - Powdery mildew. Signs include the formation of whitish spots on the leaves, followed by darkening and drying of the foliage, and yellowing of the flowers. Causes include humidity, high temperatures, and overfertilization with nitrogen.
Treatment can be done with such medications as Pseudobacterin-2, Gamair, Topaz, Fundazol.
- Alternaria. Symptoms include the formation of brown spots with a light spot in the center, and the drying of the leaves. The cause is infection. Treatment is with Ridomil and similar fungicides.
- Blackleg. The first sign is darkening and softening of the plant's base. The main cause is excessive humidity in the room, or overwatering due to improper watering. The etiology is fungal.
The bush cannot be treated, so the only solution is destruction.
For prevention, use any fungicidal preparations, strictly observe the humidity, temperature and watering regime.
From pests
Insects rarely attack pelargoniums, but are more often transferred from other indoor plants. What you might find:
- Aphids. Signs include curling leaves, the formation of a sticky layer, and the presence of pests on the underside of leaves. To combat the pest, use a solution of laundry soap, Zubr, Iskra, or Decis.
- Thrips. Symptoms include corky growths on the undersides of leaves, deformation of new leaves, and the formation of a brown edge on petals. Treatment can be achieved with Akarin, Aktara, Actellic, Confidor, and Biotlin.
- Ticks. Their presence can be recognized by visible insects that are localized on the back side of the leaf blade, yellow blotches, white spots, and drying out of the green mass.
To combat this, use brown laundry soap, Fufanon, Molniya, Vertimek, Akarin. - Caterpillars. Their infestation is indicated by foliage damage and the presence of black excrement. The parasites can be controlled by hand (collecting) or with medications such as Fitoverm, Actellica, Zolon, Fufanon, Bicol, Bitoxibacillin, and Lepidocid.
- Whitefly. Signs include insects flying when touching the green parts of the plant and the presence of yellow larvae. Potassium soap, Inta-Vir, Iskra, Fufanon, and Karbofos are used for control.
- Isolate the affected plant from other indoor plants to prevent the spread of pests.
- Treat the pelargonium with a suitable insecticide, strictly following the instructions for use.
- Repeat the treatment after 7-10 days to destroy any remaining pests and their larvae.
To protect your pelargoniums from pests, spray them periodically with insecticides according to the instructions for use.
Frequently asked questions and answers about care
There are a number of questions that require quick answers. For example:
- Why doesn't the pelargonium bloom? There are many reasons, but they all boil down to improper care practices—pruning, lighting, watering, humidity, temperature, etc. To get the plant to bloom again, normalize your care practices.
- Why do leaves turn white? There is only one reason: the room is too hot.
- Why are the leaves turning yellow? This happens due to a lack of fertilizer, improper watering, insufficient light, or a cramped pot. More information on the causes of yellowing leaves and what to do about it is available here. Here.
- Why do leaves turn red? The plant symbolizes the presence of drafts and coolness in the room or exposure to sunlight on the leaves.
- What causes leaves to become blistered? There is only one reason - overwatering.
- Why did the leaves suddenly start falling? This happens when there is insufficient lighting.
- Why does the plant dry out? This occurs due to a lack of moisture and the presence of diseases.
Caring for pelargoniums isn't as difficult as it seems at first glance. You just need to follow the same steps as growing any indoor plant. Experienced gardeners recommend making small holes in the soil with a wooden stick to make the task easier. This prevents water and air from stagnating.