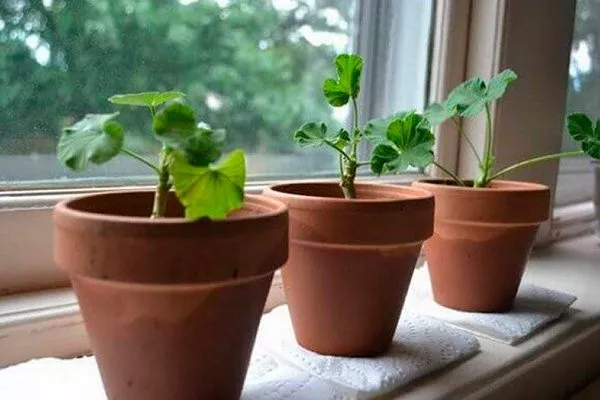
Pelargoniums can be propagated in a variety of ways, including root division, cuttings, seeds, and so on. Any gardener can do this, but not every method is suitable for beginners. Therefore, before attempting the procedure, carefully familiarize yourself with all the intricacies and nuances of propagating this houseplant.
When is the best time to propagate geraniums?
PelargoniumUnlike other houseplants, jasmine can be repotted at any time of year, although not all varieties can, and only vegetatively. However, it's best to do so immediately after dormancy, when the plant awakens and begins to grow. This ensures faster and easier rooting.
- ✓ The air temperature should be stable, without sudden changes, optimally +20…+22°C.
- ✓ Air humidity not less than 60%, but without direct spraying of the plant.
Peculiarities:
- In spring, geranium (the second, common name) needs to be propagated from the beginning of March to the end of April.
- Seeds can be used to increase the number of flowers only in the spring. Sowing in a common container is done around December or January, but sowing can begin as early as April.
- The rooting period depends on the time of planting:
- fastest from March to the end of April – about 8-12 days;
- a little longer from the first days of May to the last month of summer – 10-15 days;
- if propagated in autumn – 15-30 days.
When planting vegetatively, exclusively in winter It's impossible to say exactly how long it will take for rooting to occur. It depends on many factors, including the condition of the mother plant and the conditions.
How to propagate geraniums and pelargoniums: methods
Pelargonium and geranium belong to the same family, yet they are completely different flowers. However, their propagation methods and growing conditions are similar.
| Name | Rooting period | Optimal breeding time | Method of reproduction |
|---|---|---|---|
| By dividing the bush | 8-12 days | March-April | Vegetative |
| Rooting of a leaf | 10-15 days | May-August | Vegetative |
| Propagation by seeds | 15-30 days | December-April | Seminal |
| Rooted cuttings and shoots | 14-20 days | All year round | Vegetative |
By dividing the bush
This technique is only suitable for plants that are 4-5 years old. By this time, their root system is fully formed, with numerous shoots and buds.
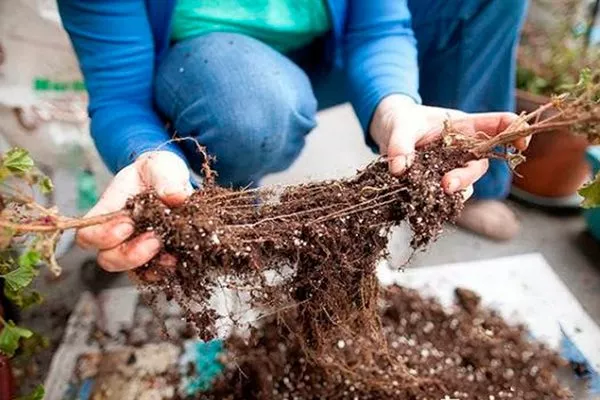
Propagation by root division is best in two situations: if the plant is cramped in its pot or if the soil needs to be changed. In other situations, it's best to avoid this method, as pelargoniums don't tolerate such procedures well.
Features of dividing the bush:
- Water the soil in the pot and let the water soak in.
- Remove the flower and place it root-side down in warm water (room temperature). Leave for 15-20 minutes to soak the soil.
- Wash the roots and inspect them. If you find any dead, rotted, dried out, or diseased/pest-infested areas, trim them off.
- Sprinkle the cut areas with wood ash.
- Let it dry and then lay the bush out on the table.
- Determine the locations of the cuts. Keep in mind that each new seedling should have at least 1-2 buds and root shoots.
- Cut it open. Treat the wounds with ash as well.
- Plant a plant.
Keep in partial shade for three days, then move to a windowsill with diffused light.
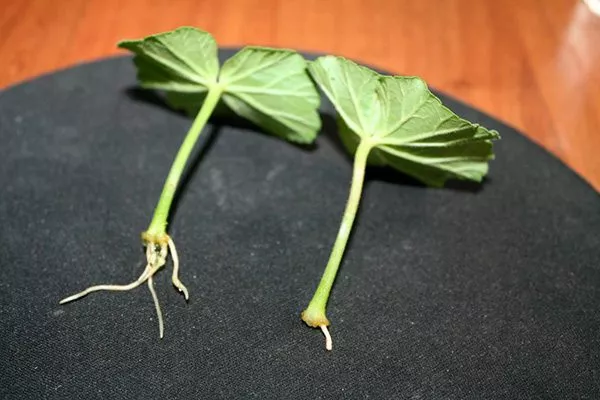
Rooting of a leaf
Pelargonium leaves are difficult to root, so this method is rarely used—few succeed. But if you want to try it yourself, keep in mind that the leaf blade of this plant has no growth points (nodes), so the leaf must be cut off along with the cutting.
How to do it:
- Prepare a sharp knife (preferably a scalpel or blade).
- Treat with antiseptic.
- Select a strong, elastic leaf from a healthy mother bush.
- Cut the cutting at an acute angle.
- Prepare water: add and dissolve 1 tablet of activated carbon in 200 ml of water.
- Place the planting material in the liquid.
- When roots appear, transplant into a pot in the standard way.
Keep in mind that the stem may rot due to exposure to water, so change the water every 2-3 days, removing any mucus from the cutting. To accelerate root growth, add a growth stimulant (such as Kornevin) to the water, strictly following the recommended dosage.
Watch the video below to see how experienced gardeners root pelargonium leaves:
Propagation by seeds
This method has the disadvantage of requiring about six months to wait for the first flowering. Another drawback is that it requires not only a significant amount of time but also effort, as it requires a number of steps. Nevertheless, it is considered quite attractive among gardeners – it's fascinating to watch a simple seed grow.
The first thing you need to do is purchase or collect planting material, sort it, and discard any unsuitable parts. Then follow these instructions:
- Scarify the seeds. This involves cutting off the tip of the seed coat to speed up the germination process. Alternatively, rub the seeds with sandpaper.
- Disinfect. Typically, planting material is placed in a weak solution of potassium permanganate for 15-20 minutes. This is sufficient to kill pathogens.
- Soak the seeds. If you bought thiram-coated seeds, you don't need to do this. Homemade seeds, however, require soaking—it promotes germination. The water should be room temperature or a couple of degrees warmer than room temperature. Soak for about 5-6 hours.
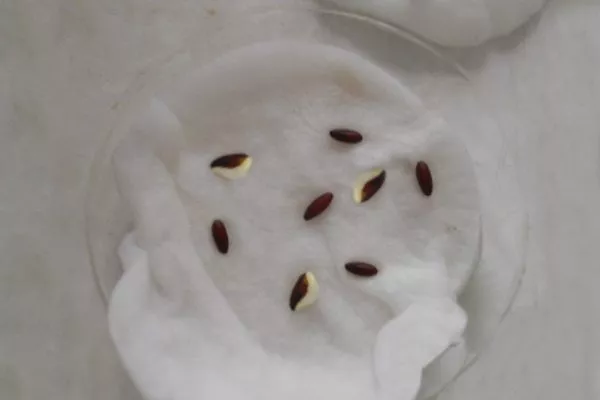
If you want to speed up the process, add a growth stimulator, but keep it in the solution for the amount of time indicated in the instructions. The most popular products are Epin, Zircon, and Isabion. - Now germinate the seeds—spread them out on a nutrient medium, moistening it periodically. There are different techniques for this:
- on a napkin or cotton pad;
- on hydrogel;
- in a moistened substrate.
Unique parameters for seed propagation- ✓ Seeds must be fresh, no older than 1 year, to ensure high germination.
- ✓ The depth of planting seeds should not be more than 0.5 cm, otherwise they may not germinate.

- When the first sprouts appear, prepare the soil for planting the sprouted seeds. It should be permeable, light, and slightly acidic or neutral. You can buy soil from a specialty store, such as Klassman, Agrotorf, etc.
You can also make it yourself. Sand mixed with peat in equal parts works best. Alternatively, place the seeds in peat pellets (or coconut pellets). - Select a container. This could be one large box or plastic/peat cups, containers, cassettes, etc.
- Now fill the containers. Place a maximum 2 cm layer of drainage material on the bottom. This can be perlite, vermiculite, expanded clay, or regular fine-grained pebbles.
- Add potting soil on top, leaving a 2 cm margin from the top edge.
- Using a wooden stick, make grooves. The distance between them should be about 3 cm, and the depth should be 5 mm.
- Use a spray bottle to moisten the surface.
- Distribute the seeds in grooves at intervals of 3-4 cm.
- Sprinkle with substrate.
- Water again from a spray bottle - this will prevent the planting material from moving from its place.
- Create a shelter out of plastic film to create a greenhouse effect. A lid can be used if planting in a container.
To ensure that seedlings appear in 7-10 days (subject to scarification) or 15-20 days (without cutting off the sheath), observe the following conditions:
- Place the box in a warm place, making sure that the temperature is always the same;
- the optimal thermometer readings in the room are from +24 to +27 degrees;
- Spray the soil daily to keep it moist (not wet);
- Experienced gardeners begin to ventilate the plants from the third day of sowing - to do this, remove the cover first for 10 minutes, after a couple of days for 20 minutes, etc.;
- provide 10-12 hours of light - if you don’t do this, the seedlings will stretch out;
- After the seedlings have formed above the soil surface, remove the covering completely;
- transfer the seedlings to cooler conditions - during the day the room temperature should be from +18 to +20 degrees, and at night from +16 to +18;
- If the boxes are on a windowsill, turn them over every 3-4 days so that the plants can receive sunlight from all sides;
- When planting in a glass, leave only one sprout and remove the rest.

Seedlings require picking, as their root system grows during development and becomes crowded. This should be done after 2-3 true leaves have formed. Plant them in individual pots, each holding 200-250 ml.
The picking procedure:
- Water the seedling containers approximately 2-2.5 hours before transplanting. Use a spray bottle only.
- Fill individual cups with drainage material, then with the substrate. The substrate should be identical to the previous one.
- Make a depression in the center (you can use your finger). The depth is determined by the size of the seedling roots.
- Use a stick or spoon to remove the seedlings. Proceed very carefully, as damaging the root system will prevent the bush from establishing itself in its new location.
- Lightly shake off any remaining substrate.
- Place the seedlings in the holes without breaking the root shoots.
- Cover with soil, compact slightly and water.
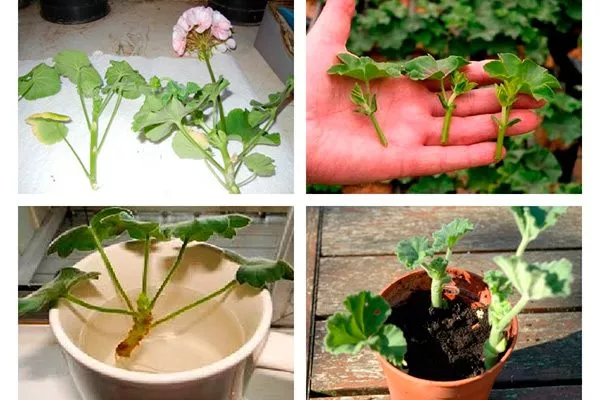
Rooted cuttings and shoots
This technique for propagating pelargoniums is considered the most popular and simple, making it ideal for all novice gardeners. But the main advantage lies not in the ease of the method, but in its speed—the cuttings quickly root and produce flower stalks within 2-3 months.
Peculiarities:
- For cuttings, shoots from a healthy mother bush, which is at least 2 years old, are used;
- shoots are taken from any part of the plant, and cuttings only from the tops;
- The entire job should take you no more than 2.5 hours, as after 2 hours of drying, you need to immediately root the stem.
How to properly root pelargonium cuttings?
There are various ways to root pelargoniums, depending on the material used (water, peat, substrate, and even perlite). Each method has its own characteristics.
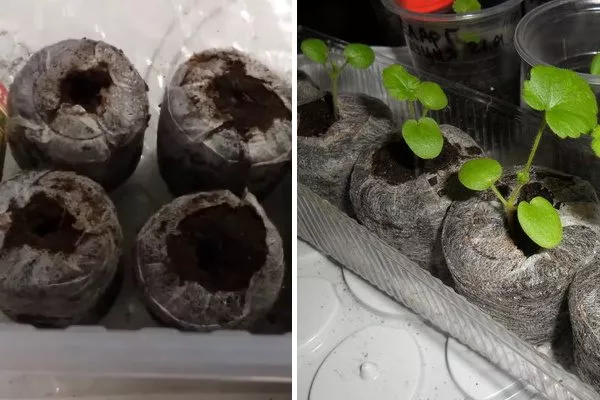
Peat tablets
This is the best option for geranium varieties such as regal and scented. These are most often the varieties with large flowers, which require super-fertile soil, so peat is the first choice. Peat tablets are the safest option – they quickly absorb water, preventing overwatering, which prevents root rot.
Rooting features:
- Place a drainage layer in a large peat or plastic glass.
- Place a tablet on top.
- Spray it generously and insert a cutting 1/3 cup deep.
Water
Single-flowered geranium varieties root best in aquatic environments, but regal, double, and similar varieties don't always produce root shoots. For these, a soil-based mix is recommended.
How to root in water – step-by-step instructions:
- Prepare the water – let it sit for a couple of days or filter it.
- Add 1 tablet of activated charcoal (per 200-250 ml). Stir thoroughly (until completely dissolved).
- Place the cutting so that only 3 cm of it is in the liquid. Submerging it deeper is undesirable, as the stem will rot.
- Move the container (it must be transparent) to the windowsill, but so that direct sunlight does not fall on the cutting.
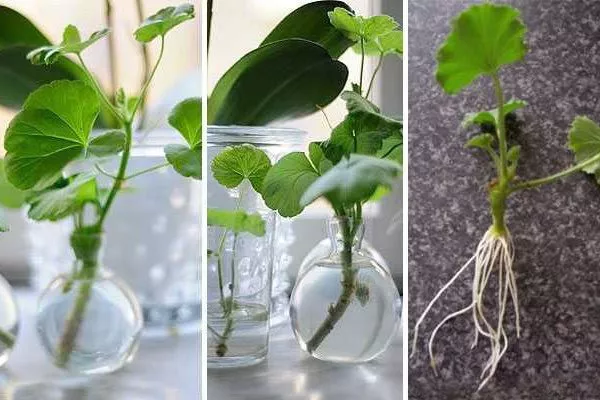
Change the water weekly, and top up the water to the required level if evaporation is rapid. Transplant into a permanent pot when roots reach 3-4 cm, which occurs after about six weeks.
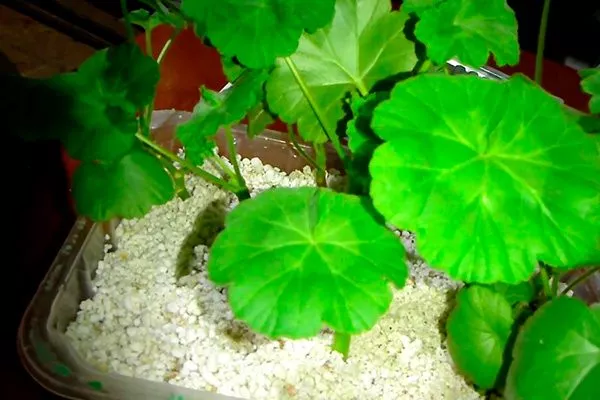
In vermiculite (or perlite)
Vermiculite has become increasingly popular in recent years, as it's used both as a drainage material and for rooting cuttings. The same applies to perlite, a volcanic mineral. These materials absorb water quickly and release moisture slowly, preventing roots from rotting.
How to root correctly in vermiculite/perlite:
- Rinse the material thoroughly.
- Place in a basin, fill with water, and leave to soak for 24 hours.
- Drill drainage holes in the plastic cups.
- Place vermiculite halfway up the container.
- Sprinkle the cut cutting with succinic acid or Kornevin.
- Place the seedling in perlite, deepening it by 2 cm.
- Place the glass directly into the plastic bag.
Replant when the roots reach 5 cm in length, water periodically, and ventilate every day.
In the ground
The most common method. First, you need to prepare the substrate. A common rooting mixture is 50% turf, 30% river sand, and 20% peat. Then, follow these steps:
- Make holes in the bottom of a disposable cup or small pot for drainage.
- First, add some pebbles (2 cm).
- Place the soil mixture on top.
- Place the pot in a tray (this is how watering is done during rooting).
- Make a hole in the center of the substrate.
- Insert the prepared cuttings. Plant them 3-5 cm deep, no more.
- Lightly tamp down the sides to ensure the cutting is stable.
- Water with warm water. It's best to immediately moisten the soil with a rooting stimulant solution. Be sure to add Fitosporin (15 drops) diluted in 1 liter of water. This will prevent infection.
You can repot after 14-20 days. This gives the roots time to develop.
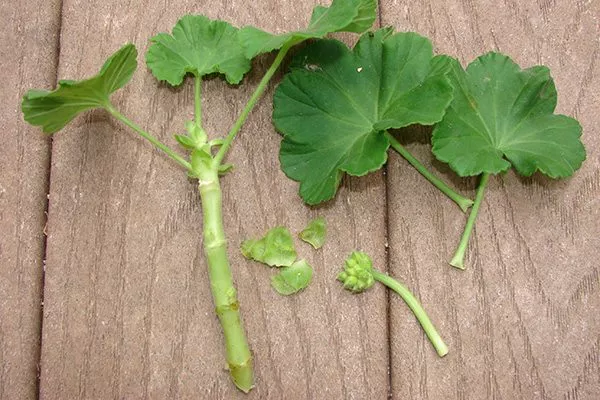
How to properly propagate geranium cuttings and prepare shoots?
The future health of the flower and its ability to root depend on the preparation steps. Therefore, pay attention to the special rules for harvesting and propagating cuttings:
- Cuttings are only used in three seasons, excluding winter. Keep in mind that in spring and summer, only green shoots should be propagated, while in autumn, only semi-woody, older shoots should be propagated.
- The length of the cutting depends on the size of the future bush and the variety. For mini rosebuds, it's 3-5 cm, for standard varieties, it's about 5 cm, and for the rest, it's 8 to 12 cm.
- Before making a cut, be sure to disinfect the instrument. It should be thin and very sharp. A razor blade or scalpel is best for this purpose.
- It is better to use apical cuttings that have a vertical orientation.
- Each cutting should have at least three leaves at the very top. If there are more, remove the excess from the lower and middle tiers.
- Make the cut just below the node. This is the growing point where the roots will begin to emerge.
- Immediately sprinkle the cuts on both the mother plant and the cutting with wood ash or crushed activated charcoal. A fungicide solution can be used. In the former case, allow the cutting to dry for 2-3 hours; in the latter case, it will take about 10-12 hours.
- Make the cut at a 90 degree angle.
- To speed up rooting, dip the plant in any rooting agent (Epin, Kornevin, etc.).
Not all pelargoniums root easily. For example, regal varieties, considered very fussy, require special preparation before taking cuttings. Twenty-five to thirty days before propagation, the mother plant is stimulated by making cuts under the buds along the entire shoot. This is necessary to form root nodules.
Planting a plant in the ground: step-by-step instructions
After successful rooting, regardless of the method used, the seedlings should be transplanted into a permanent indoor pot. This is also a form of stress for pelargoniums, so it's important to follow all requirements, rules, and regulations.
Choosing a pot
The root system of pelargonium does not like too much space, so the size of the pot is very important when choosing it.
Recommendations:
- for planting a rooted plant, the diameter of the container should vary from 9 to 14 cm, depending on the flower variety;
- optimal height 11-13 cm;
- during the next replanting, 1.5-2 cm is added to the depth and width each year (example: planted in a pot with a diameter of 10 cm, after a year it should be 12 cm, after 2 years - 14 cm, etc., up to 5 years of age);
- Material – clay, unglazed ceramics, plastic is also acceptable, but of high quality.
Selecting a substrate
The main requirements for pelargonium soil are breathability and looseness. Therefore, several components are used simultaneously.
What can be used:
- Turf soil. This is a fundamental component, which should make up about 50%. Use soil taken from the garden. Pre-baked in the oven at 200 degrees Celsius for 30-50 minutes. You can also add boiling water or a pink solution of potassium permanganate.
- Peat. It's usually store-bought, but if possible, collect it yourself. Only low-lying material is required (it has the required pH). Coconut fiber can be used instead. It makes up 20% of the total mass.
- Compost or humus. It's needed to enrich the substrate with organic matter. It's added at a rate of 10%.
- River sand. It's essential for propagation by cuttings. Like the soil, it's disinfected beforehand. Its percentage varies between 20 and 30%.
- Charcoal. It's rich in essential microelements, reduces acidity, and disinfects. It should be added at a concentration of 5-10%.
- Vermiculite or perlite. The permissible limit is 5%.
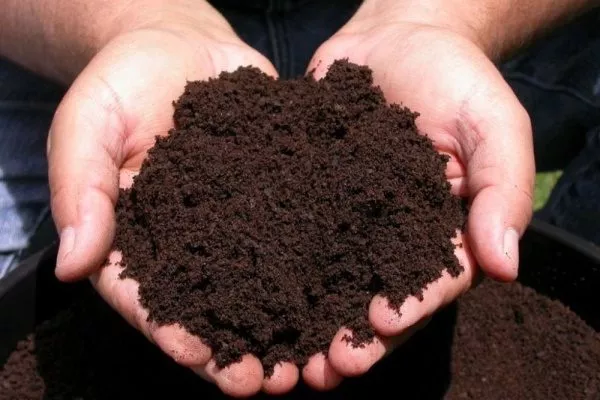
It's not necessary to include all components at once, but there should be at least three. For example:
- turf soil - 2 parts;
- sand, peat, humus - 1 part each;
- wood ash – 0.5 parts.
Preparing the seedling
The seedlings don't require any special preparatory work. Simply inspect the roots carefully and remove any unsuitable parts (dry, rotten, or broken).
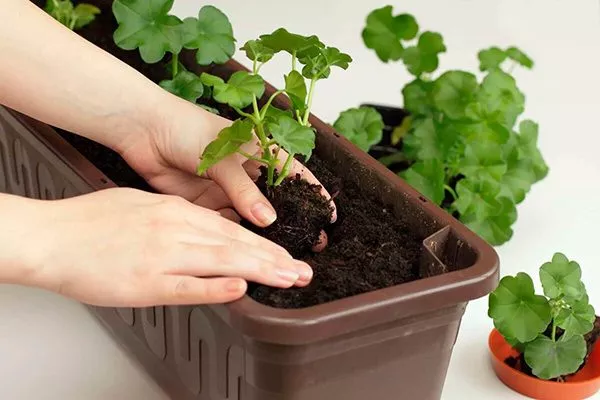
The landing process
Rooted cuttings are transplanted into permanent containers in two ways: with and without a root ball. The process is as follows:
- Lightly moisten the soil.
- Remove the plant from the pot, soil included. If you're planting it this way, don't do anything, but if you prefer the open method, soak the plant roots in water for 20 minutes, then rinse the root system and let it dry slightly (half an hour is enough).
- Prepare the pots – sterilize them, put expanded clay on the bottom, and soil on top.
- Make a hole the size of the roots or root ball.
- Insert the seedling. Cover with soil and compact it.
- Moisten the soil.
Potential problems when replanting geraniums
Many varieties and species of pelargonium are considered low-maintenance plants. However, even so, gardeners make mistakes that can lead to unpleasant consequences, including the death of the flower. Therefore, please note the following:
- the leaves turn yellow – the flower does not have enough watering;
- the leaves turn red at the edges – the pelargonium is overcooled;
- the flower is completely wilting – the soil mixture is too moist;
- the leaves become thin and rot – the air is too humid;
- The stem became bare after transplantation - the pot was placed in partial shade, the plant does not have enough light.
Rooting and survival do not occur for the following reasons:
- the air temperature does not meet the requirements;
- presence of drafts;
- the gardener does not ventilate the plant during rooting (does not remove the cover);
- a dried out or too old shoot was selected (it does not produce roots);
- too dark a place for rooting;
- exposure to direct sunlight.
How to care for a plant after replanting?
Immediately after planting the pelargonium in a permanent pot, take care of the following:
- after a couple of days, water with a solution containing a growth accelerator (Zircon, etc.);
- after 15 days, fertilize the plant with any complex preparation;
- at the same time, pinch the top (the bush will grow spreading);
- Watering should be carried out when the surface of the substrate begins to dry out.
When propagating pelargoniums, be sure to consider the plant species and the specific variety—a method that works for one plant may not work for another. Never deviate from the recommendations, strictly adhere to the growing conditions, and the young shoots will delight you with rapid adaptation and lush flowering.