Pelargonium is a popular houseplant, characterized by its hardiness, decorative qualities, and abundant flowering. However, it also requires repotting, especially if growth slows or the soil becomes depleted. Proper repotting helps refresh the soil, strengthen the root system, and stimulate further development.
In what cases is a transplant required and when is it best to do it?
It is recommended to replant young pelargoniums every two years, since during this time the root system actively develops and the bush begins to experience a need for more nutrients.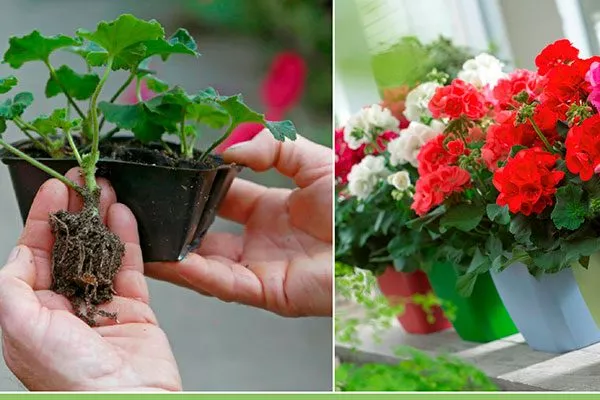
Key Features:
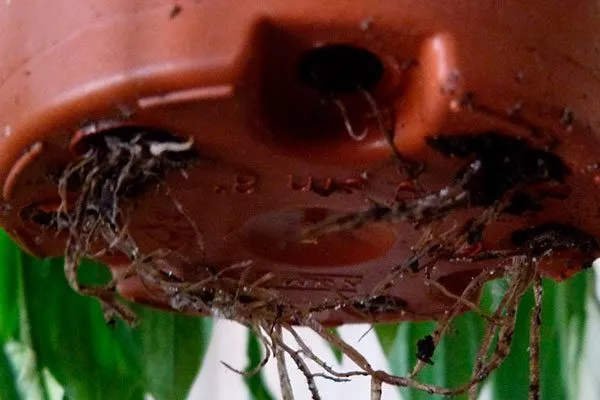
- When growing a large number of plants, monitor the condition of the roots: if they begin to grow through the drainage holes, this is a signal for immediate replanting.

- Annual repotting is especially important for pelargoniums grown outdoors, as winter conditions are unfavorable for their growth and development.
- Overwatering of the roots is also a reason to repot, as are signs of disease or death. In such emergency cases, repotting should be done immediately.
Preparing a plant for transplantation
To facilitate repotting pelargoniums and reduce the risk of root damage, the plant must be prepared. The day before the planned repotting, thoroughly moisten the plant. A generous watering will make it easier to remove the plant from its container.
Choosing a pot
Choosing a plant container is an important step in pelargonium care, requiring careful consideration. The pot size is determined by the purpose of the repotting.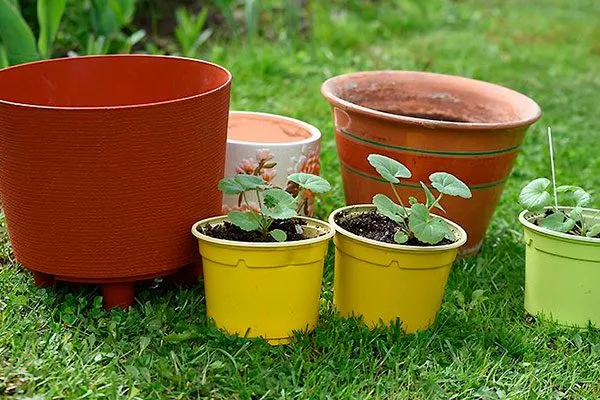
Basic requirements:
- Clay is considered the ideal material for flower pots due to its eco-friendliness and breathability. However, clay containers are fragile, and roots can grow through the material.
- Alternatively, consider ceramic pots, which are affordable and come in a variety of designs. The downside is that they are not airtight, which can lead to waterlogging and mold growth.
- When repotting, due to crowding, choose a container 1-2 cm larger than the previous one. An excessively large pot is not necessary. Pelargoniums need space to develop their root system, but too much soil will delay flowering until the roots have fully colonized the entire root ball.
- If repotting is being done to stimulate flowering, it's sufficient to leave the plant in the same-sized pot. This method is also effective when dividing or rejuvenating a plant.
Selecting or preparing soil
A wide selection of ready-made potting mixes for plants is available in stores. When choosing soil, it's important to examine its composition. For pelargoniums, a general-purpose soil with a small addition of peat or perlite to improve the structure is suitable.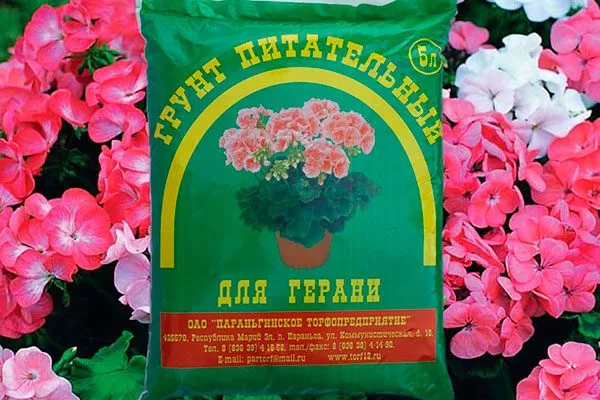
You can make your own potting mix. The most common recipe includes two parts garden soil, two parts compost, and one part coarse river sand.
There are also alternative options:
- mix one part each of garden soil, peat and sand;
- Combine equal parts of turf soil, leaf humus, peat and sand.
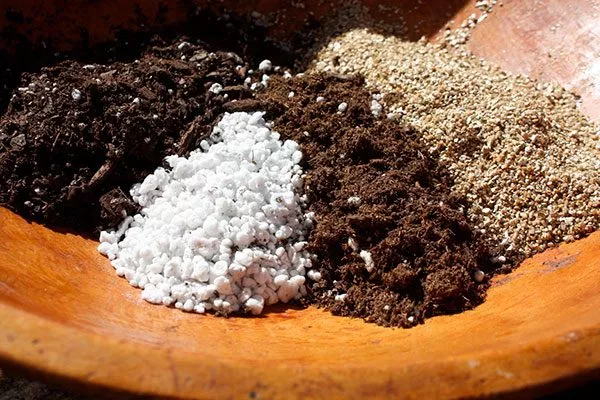
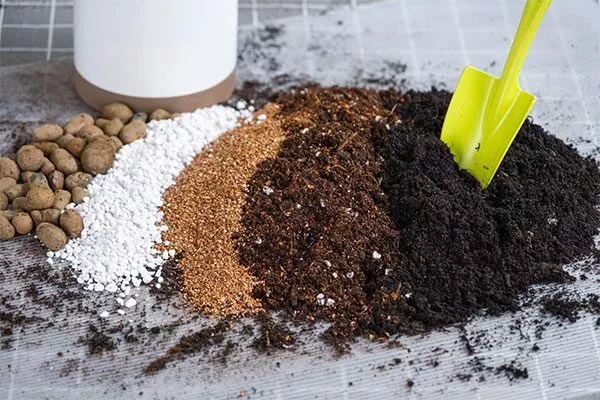
Before use, be sure to disinfect the prepared mixture by heating it in the oven to kill any harmful microorganisms. After heat treatment, let the soil sit at room temperature for 2-3 days before using it as directed.
Transplant procedure
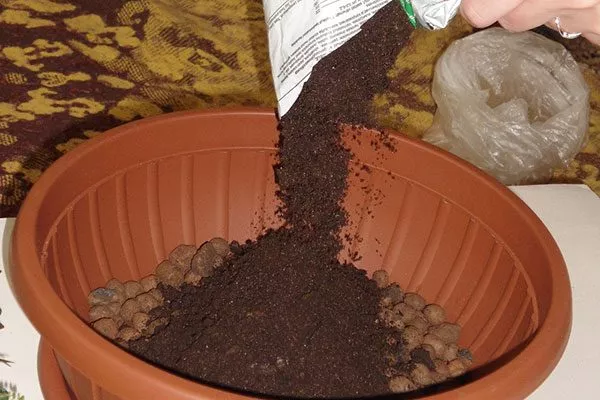
Create a drainage layer in advance: add 1-2 cm of expanded clay, ceramic fragments, brick chips, small stones, or polystyrene foam to the bottom of the pot. This will ensure that excess moisture is drained.
Next, follow the step-by-step instructions:
- Pour a small amount of prepared soil mixture on top of the drainage, the thickness of which depends on the size of the pot.
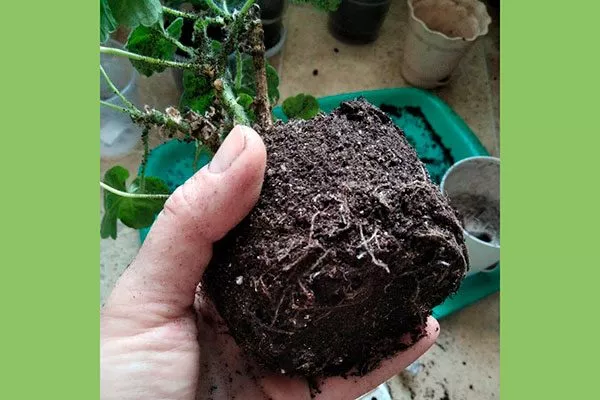
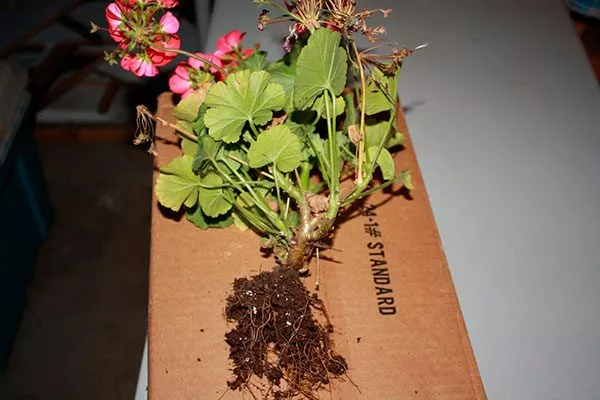
- Carefully remove the moistened pelargonium bush from the old container, gently tapping the sides and bottom. Hold the plant by the base of the stem with one hand and gently pull with the other.
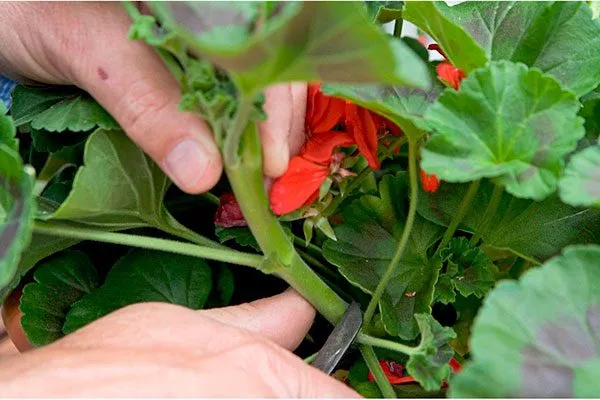
- After removing the flower, carefully inspect the root system and remove any damaged or rotted roots. For this purpose, it is recommended to use sharp scissors pre-treated with alcohol.
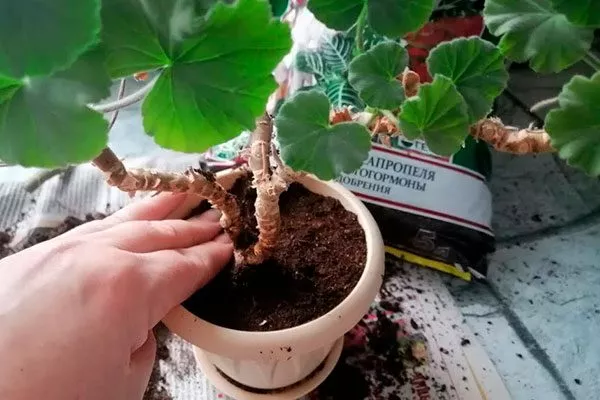
- Carefully spread the pelargonium roots over the added soil layer and cover with soil. Fill the gaps with potting mix, leaving about 2 cm from the edge of the pot. Then lightly compact the soil around the stem.
- Finally, moisten the plant and place it in a shaded area to root. After 7-10 days, the plant can be moved to its permanent location.
To improve survival, treat the pelargonium with a solution of Epin or Zircon, following the manufacturer's instructions.
How to properly transplant geraniums: subtleties and nuances
When replanting a newly purchased flower or plant from open ground for winter storage, special attention should be paid to several key aspects. Below are some important recommendations from experienced gardeners.
Transplantation after purchase
When purchasing a pelargonium from a store, inspect it carefully, as its shelf life is unknown. A healthy plant will have no signs of pests, and its leaves will be firm. It's best to choose specimens with buds, not open flowers.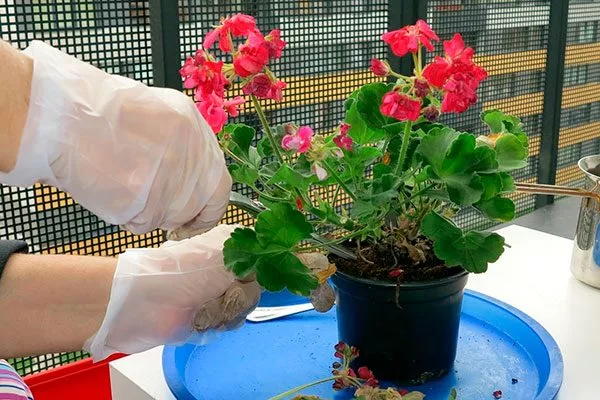
Follow the rules:
- Once purchased and delivered to your home, quarantine the pelargonium for two weeks away from other plants. Only then should you move it to its permanent location.
- Repot 1-1.5 months after winter purchase. If the plant was purchased in the fall, the adaptation period should be longer. The optimal time for soil renewal is late February to early March.
- Keep in mind that the soil in which pelargoniums are sold often contains minimal amounts of nutrients to prevent excessive growth in the store.
Transplanting in spring into a larger pot
First, you need to prepare a container for repotting the pelargonium. You can use either a new pot or a thoroughly cleaned and disinfected old one. It's important that the new container is 1-2 cm larger than the previous one.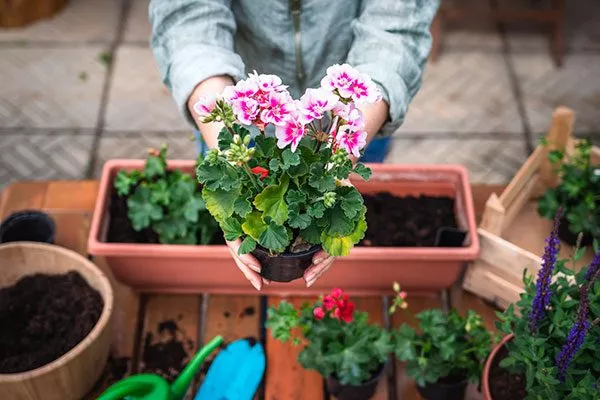
Follow these steps:
- Place a 1-2 cm thick drainage layer on the bottom of the container. Then pour a small amount of soil mixture onto the drainage layer.
- Carefully remove the plant from the old pot, being careful not to damage the root system or the above-ground portion. To facilitate this process, it is recommended to lightly tap the bottom and sides of the pot with a small object.
- Place the removed pelargonium along with the root ball into a new pot on top of the drainage and fill the gaps on the sides with the prepared soil mixture.
- Gently compact the soil around the plant and place the container in the chosen location.
During flowering
Repotting a blooming pelargonium is controversial, and it's generally not recommended. However, there are situations when such a move becomes critical to the plant's survival. For example, if the roots have begun to rot due to overwatering or if pests have infested the soil.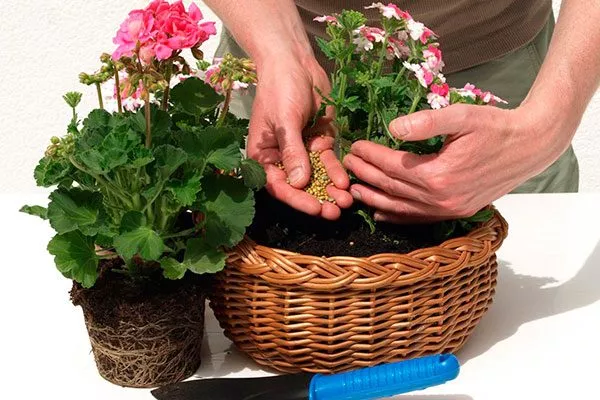
In addition, the need may arise if the plant is blooming, but is developing poorly and has few leaves.
If replanting is unavoidable, follow these instructions:
- Water the geranium generously the night before.
- Prepare a new pot by disinfecting it.
- Place a drainage layer of 1 to 3 cm thick on the bottom of the container.
- Carefully remove the plant from the old pot. Carefully inspect the roots and remove any damaged or rotted parts.
- Place the pelargonium in a new container on a layer of prepared soil and cover with fresh soil.
From open ground to flowerpots
Once frost sets in, usually in early September, transplant your pelargonium from the ground into pots for winter storage. Follow these recommendations:
- Prepare a disinfected pot with a drainage layer, on top of which pour nutritious soil.
- Water the plant generously if it's growing outdoors. Carefully lift the plant out, keeping some soil on the roots, and shake off any excess soil. Trim any roots that are too long and remove any damaged or rotted ones.
- When repotting the pelargonium into a pot with new soil, plant it to the same depth it was in the open ground. After repotting, water the plant and place it in a shaded area for about a week, then move it to its permanent, well-lit location.
Rejuvenating transplant
This usually occurs between the third and fourth years of a pelargonium's life, when the bushes have become sufficiently developed and healthy. In early spring, usually in March, prune the plant radically, leaving only a few (5-6) strong growth points from which new leaves will emerge.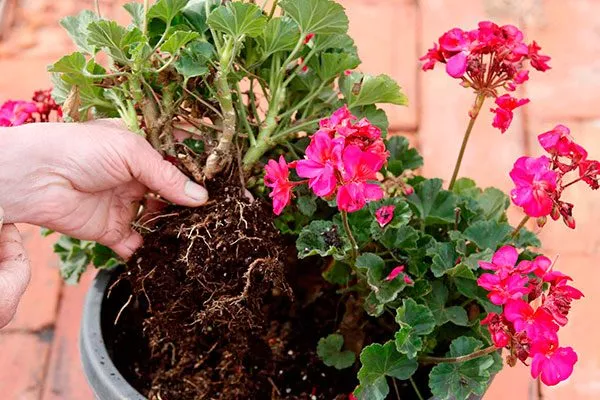
To restore old and overgrown bushes, use the root division method:
- The night before, water the crop generously.
- The next day, carefully remove the bush from the ground, then divide its rhizome into several small parts.
- Plant each resulting seedling in a separate pot, following standard recommendations for planting pelargonium.
How often should indoor pelargoniums be repotted and what difficulties might arise?
To maintain vigorous flowering, it is recommended to replant the plant every spring. Failure to do so can result in excessive foliage growth, which will negatively impact the quantity and quality of the flowers.
Suitable conditions:
- It's crucial to provide careful and gentle care for the transplanted plant to avoid potential complications. It's recommended to keep the plant in partial shade during the first few days after transplanting. Loosening the soil should be shallow, no deeper than 1-1.5 cm.
- Water only when the top 2-3 cm of soil has dried out, directing the water around the edge of the pot. A watering can with a narrow spout is ideal for this purpose, as it prevents water from getting into the center, which can lead to root rot.
- Yellowing leaves after repotting are normal and associated with stress. Remove affected foliage and spray the plant with growth stimulants such as Epin or Zircon. Using Kornevin will help accelerate lateral root development.
Aftercare of the plant
To ensure your pelargonium enjoys abundant blooms for a long time, it's important to provide it with suitable growing conditions. Follow these simple steps.
Selecting a location and lighting
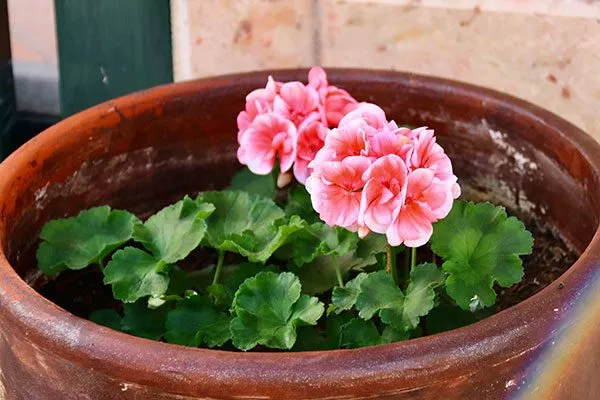
The plant thrives in bright light, which prevents the shoots from becoming leggy and promotes abundant flowering. East- or west-facing windows are ideal.
Air temperature and humidity
The optimal temperature for pelargoniums is 18-21°C during the day and up to 13°C at night. In winter, you can reduce the temperature to 10-15°C.
Watering and fertilizing
In summer, water the plant generously every 2-3 days; in winter, water less frequently, avoiding overwatering. Before watering, ensure the soil is dry to a depth of 2-3 cm.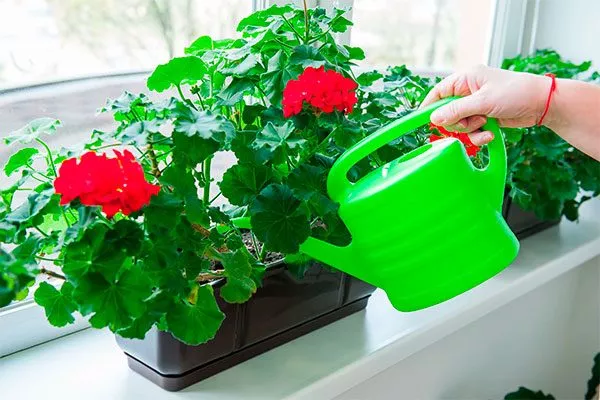
Use warm, settled water. After watering, empty the water from the tray. Feed the plant with organic or mineral fertilizers according to the instructions.
Pinching and formative pruning
In spring, perform a structured pruning, removing the first node on the stem and shortening the main trunk by a third. Follow these other recommendations:
- Remove deformed, dry and old shoots.
- Use sharp and disinfected instruments.
- In summer, pinch the plant periodically to form a lush bush.
Repotting pelargoniums is an important step in their care, directly affecting their health and appearance. Adhering to the correct timing, choosing the right soil, and paying attention to the root system allow the plant to quickly adapt and continue to delight you with lush blooms. Don't be afraid to repot your plant—with proper attention, this process will only bring benefits.