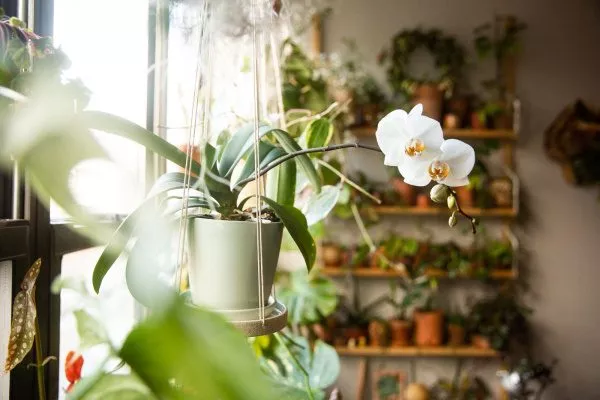
Orchids are most often given as gifts, and not as cut flowers, but in a pot. Therefore, a novice gardener should learn the proper orchid care, as this is the only way to ensure the flower delights its new owner with long-lasting blooms. However, experienced gardeners also enjoy growing this exotic plant.
Care Features
There are several species of indoor orchids, but the most common are phalaenopsis, dendrobium, and cambria. All of them are characterized by their fussy maintenance, although experienced orchid growers claim they are easy to care for.
- ✓ Optimum temperature for phalaenopsis: during the day +22…+25°C, at night +18…+20°C.
- ✓ Air humidity should be at least 60% for most orchid species.
Keep in mind that direct sunlight is harmful to orchids, so choosing the right location is crucial. Otherwise, the foliage will be constantly exposed to sunburn, which will ultimately lead to the death of the plant.
The right choice and purchase
Regardless of the purpose of purchasing an exotic flower (for a gift or for personal cultivation), be sure to follow the requirements for selecting and purchasing the plant. This directly impacts the quality of its adaptation and subsequent development. The optimal time to visit a specialty store is from April to September.
What you need to pay special attention to:
- Substrate quality. Orchids are most often planted in transparent containers, but if not, you can lightly loosen the surface of the soil mixture for a closer look. The substrate should be free of mold and signs of disease. A good mixture includes large pieces of bark and a little sphagnum moss.
- Green mass. Healthy foliage is always green, true to its cultivar, with a glossy surface and a compact structure. Negative signs that indicate you should discard the plant include:
- wrinkled foliage;
- spots or dots on the surface;
- yellowing;
- mechanical damage;
- disproportionate shape of leaves in length and width;
- lethargy.
- Root system. Viable roots have the following characteristics:
- density and strength;
- absence of fractures and dark areas;
- color - white or yellowish, and if the substrate is very wet, then light greenish;
- homogeneity of root shoots.
- Pseudobulb. Pay attention only if this element is typical for the variety. The stem thickening should not be limp or wrinkled.
Additional nuances to consider when choosing one that should not be ignored:
- It's important to know the specific orchid variety, as each has its own care requirements. Therefore, check the pot for a tag. It should include:
- view;
- subspecies;
- variety.
- The supports should also be free of mold and even dirt.
- Inspect the roots and green mass for insects - do not buy the flower if they are present.
- Ask the seller when exactly the orchids were purchased—the exact delivery date. If they were purchased more than a month ago, don't buy them, as sellers don't have accurate care information for the specific orchid variety. Failure to follow these instructions could cause problems down the road.
Don't buy plants with flower stalks—the bush won't grow any further. Buds are the best option.
Briefly about planting flowers yourself
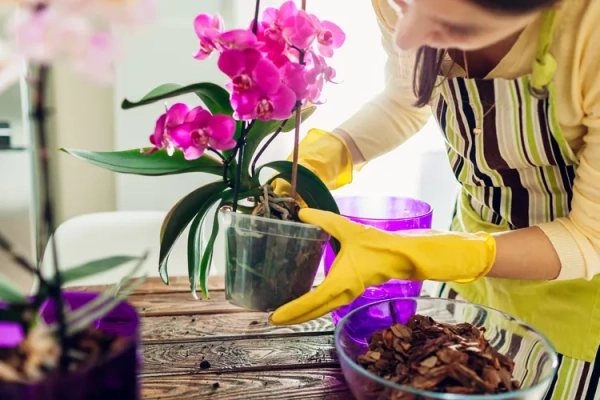
After purchasing an orchid, it's recommended to repot it in a different pot using high-quality potting soil, as the seller typically doesn't care about the temporary container. Here are some tips for planting orchids indoors:
- Choose a container. Only glass, ceramic, or plastic are suitable for this plant, but the former is preferred as it is transparent and allows light to pass through. The pot size should be appropriate for the orchid's root system.
- Prepare the pot: disinfect it, and if there are no drainage holes in the bottom, make them.
- Prepare the substrate. It includes oak or pine bark, peat, expanded clay/perlite/vermiculite, sphagnum moss, wood/activated carbon, coconut/cork fiber, pine cones, and humus. The proportions and use of specific components depend on the species and variety of flower. All components should be large enough to allow good air circulation between the roots.
- Place large expanded clay on the bottom, fill the pot with prepared substrate halfway or a little more.
- Place the orchid roots on top of the mound and gradually add potting soil until the pot is full. The area where the phalaenopsis stem begins and the upper roots should not be completely covered. This means the base of the plant should be slightly raised above the potting soil.
- There is no need to water the orchid for the first 7-10 days after planting.
- Move the plant to a greenhouse environment or provide it with humid air, for example, by misting the leaves and the air around them.
The process of planting an orchid in a new pot is also shown in the following video:
Is there a difference in care depending on the variety or species?
Orchidaceae (another name for orchids) are divided into many species and subspecies, but for care instructions, only the group that depends on the temperature regime is important:
- The plants are heat-loving. These include subspecies such as Malagasy Star, Vanda dwarfis, Phalaenopsis, and Dendrobium bullenii. Since these plants are native to jungles and tropical environments, their optimal growing temperature ranges from 15 to 33 degrees Celsius during the day.
At night, the thermometer readings should be reduced to +15…+28 degrees. - Flowers that love average temperatures. The main subspecies are Cymbidium, Miltonia, and Odontoglossum. They grow wild in the mountain tropics and subtropics. Daytime temperatures range from 18 to 22 degrees Celsius, and nighttime temperatures range from 12 to 15 degrees Celsius.
- Orchids that prefer cool temperatures. Subspecies: Paphiopedilum, Phalaenopsis glabra, and Laelia. Native to highlands and subtropics, the ideal daytime temperature ranges from 15 to 18 degrees Celsius, and nighttime temperatures from 12 to 15 degrees Celsius.
Cold-resistant varieties, unlike others, categorically do not tolerate a lot of light and temperatures above 18 degrees – the flowers wither.
If we consider the main types of indoor orchids, the conditions are as follows:
- Phalaenopsis:
- temperature – 16-24 degrees;
- humidity – 45-50%;
- lighting – 10 hours;
- irrigation type – submersible;
- location – partial shade;
- substrate – no peat, no foam.
- Dendrobium:
- temperature – 18-25 degrees in summer, 12-18 degrees in winter;
- humidity – 70%;
- daylight hours – 10-12 hours;
- watering - any and regular;
- feature – it is necessary to create auxiliary humidification using wet pebbles or an aquarium;
- substrate – sphagnum moss and bark.
- Cambria:
- temperature – 13-23 degrees;
- humidity – 60%;
- daylight hours – 12-15 hours;
- feature – a day/night difference in air temperature is required;
- substrate – coal, fibers, bark.
First steps in care
Immediately after purchasing or planting orchids, they need to be provided with suitable conditions, then repotted if necessary, quarantined, fertilized, and pruned. This is the only way to increase the plant's vitality and ensure consistent and abundant flowering.
Permanent location and lighting
Lighting plays a crucial role in orchids; its level depends on the plant variety, but there are also some general characteristics:
- light – diffused, without the influence of direct sunlight;
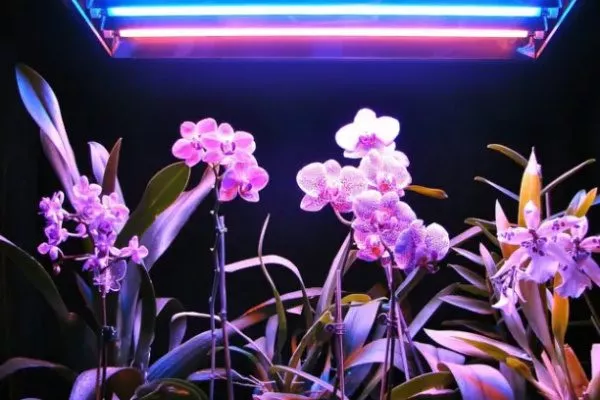
- Daylight hours are on average about 12 hours, so it is important to install phytolamps in late autumn and winter.
To ensure maximum comfort for your plant, you need to choose the right windowsill. Key criteria:
- From the south side. It's perfect for winter, but detrimental to summer, especially in hot climates. The plant doesn't experience any discomfort in winter and barely slows down. It doesn't even have time to weaken. However, in mid-spring, the pots should be moved to other windows. Alternatively, hang curtains, but light ones.
- Windows facing west and east. A good option for spring and summer, but not recommended for winter, as there will be little light.
- North side. The worst option for any time of year, because the lack of sunlight is felt in both winter and summer.
Watering rules
The frequency and amount of watering orchids depends on the variety and type of plant, but to accurately determine whether the plant needs watering, simply insert a wooden skewer into the soil and leave it for 3-5 hours. Then, remove the skewer and inspect it:
- if it is wet, it is too early to water;
- If it's dry, it's time.
There are other ways to determine when a flower needs water:
- small stripes will form on its leaves;
- the roots turn pale;
- the walls of the pot dry out;
- the container becomes light;
- yellowing of leaves, wilting – during prolonged drought.
The specifics of watering orchis stem from the fact that in the wild, flowers grow on tree stumps and bark, so the substrate also has its own characteristics. Bark barely accumulates moisture, so it dries out quickly, which is not a sign of water stress.
How often to water:
- spring and autumn, cool summer – 3-4 times a month;
- hot summer – twice a week;
- winter – 2-3 times a month.
What kind of water is used for orchids:
- stood for 3-4 days;
- boiled after settling or, even better, filtered;
- room temperature.
If you don't have a special filter at home or can't boil water, soften it with acidic (high-moor) peat moss wrapped in a cloth. A handful of peat moss per 3 liters of water is enough; let it sit for 10 hours.
There are methods of moisturizing orchids that are permitted to be used:
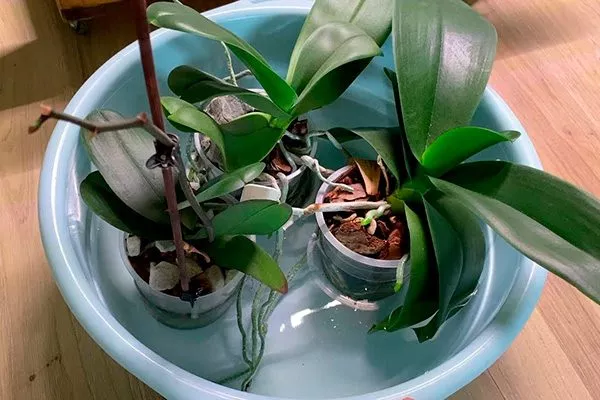
- Submersible. It's considered the best method, as the substrate absorbs only the required amount of liquid while the pot is soaking in water. Special pots are made for this type of watering, but regular trays and bowls can also be used.
 How to do it:
- pour water into the container;
- lower the orchid pot to half its height;
- leave for 15 minutes;
- remove the pot and let the water drain.
- Leukochny (superficial). This isn't a very suitable method, as you could add too much liquid or get it on the leaves and stems, which could cause rotting. Therefore, use only a watering can with a very narrow spout. Rules:
- pour water until it begins to seep through the drainage holes;
- take a break for 2-4 minutes;
- Pour in the liquid again – do this up to 4 times in total.
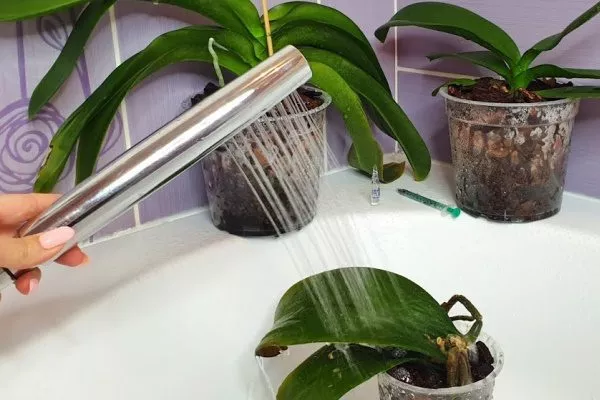
- Warm shower. This technique shouldn't be used continuously, but only once every 1-2 months, for example, to wake the orchid from dormancy. Additional benefits of hygienic care include washing away dust and pests. However, it's important to consider the variety, as not all orchids tolerate water on their leaves and stems.
The procedure is as follows:- Place the pot with the plant in a bathtub or large basin;
- water from above using a shower hose with a spray nozzle or a watering can with the same nozzle (temperature about 45-50 degrees);
- pour until the substrate is completely saturated with liquid;
- Wipe the leaves and stems with a soft cloth, not forgetting the areas in the axils.
- Root spraying. It's used primarily for orchids growing without a pot. To water, simply mist the roots with a spray bottle.
Transfer
Orchids need to be repotted approximately once every 2-3 years. It's not recommended to do this immediately after purchase, nor after quarantine—it needs more time to adapt. If you're unsure of the quality of the substrate or the plant was purchased in sphagnum peat moss, repotting is unavoidable.
There are other situations in which the procedure is required:
- if the roots rot or dry out;
- when there is not enough space in the pot (the plant is growing, but the pot is still in its original size);
- intertwining of root shoots, their death in large numbers
- plaque on the surface of the soil, pot;
- damage to roots or container;
- dividing the bush for the purposes of reproduction.
The transplant process is simple. Follow these steps:
- Remove the orchid from the pot when the substrate needs watering (but do not water).
- Clean any remaining soil from the roots.
- Remove any rotten, dried out or damaged items.
- Rinse the root system under running water.
- Plant in a pot with new substrate.
Adaptation to a new place
To ensure that this delicate and capricious orchid easily adapts to its new environment, follow these rules immediately after purchase:
- Keep the plant in the pot you bought it in for a few days, even if it's just a transport pot. This allows the plant to acclimate to your weather conditions.
- Be sure to remove the packaging film.
- Quarantine the flower.
Quarantine is an important step in an orchid's adaptation. Quarantine also helps identify pests, especially hidden ones (those that are impossible to spot at a glance).
Other features:
- The new "tenant" should be placed at a significant distance (at least 2-4 m) from other houseplants. This is due to potential diseases and pests on store-bought plants.
- The quarantine period varies from 14 to 20 days.
- The location should preferably be the one that best suits the future growing conditions, so a windowsill or a cabinet near the window would be suitable.
- Do not touch the orchid for about 10-12 days - do not water, do not fertilize, do not move it to another place frequently.
- Keep in mind that the flower shouldn't be exposed to direct sunlight. It's best to place it in shade or partial shade to encourage the plant to go dormant.
- Lightly moisten the substrate starting from the second week of quarantine.
- About 5-7 days before the end of quarantine, begin to break the plant's dormancy. To do this, move the pot closer to natural light twice a day, increasing the time it spends in the light each day.
Top dressing
Overfeeding orchids damages their root system, causing the leaves to become sunken and limp. Underfeeding, however, stunts development and growth. The main signs are a lack of blooms and a change in foliage color.
Therefore, when growing orchid plants, pay attention to the dosage and proportions of the elements/products added, depending on the variety.
Despite this, there are general rules for applying fertilizers:
- in winter – once a month;
- in spring and summer - twice a month, if the weather is very hot, then the frequency of feeding is reduced by 2 times;
- fertilize after watering and together with it;
- After replanting, it is prohibited to apply fertilizers for 30-40 days;
- when the flowers are dormant, reduce the dosage by exactly half;
- Change brands of fertilizers – addiction occurs.
The most important nutrients for orchids:
- Nitrogen – promotes the growth of green mass, therefore it is used for annuals;
- phosphorus – develops the root system and accelerates flower growth;
- Potassium and magnesium – accelerate the plant’s metabolic processes, thereby increasing immunity;
- Calcium – affects the roots and the absorption of other nutrients.
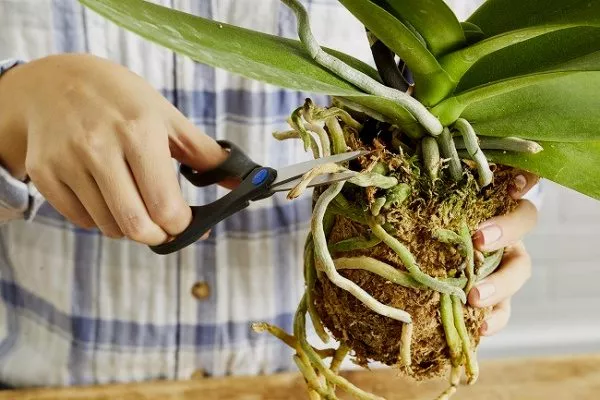
Trimming
Mature and older orchids especially need pruning. Failure to do so not only ruins their aesthetic appeal but also leads to the following problems:
- too many leaves and extra shoots will form;
- aerial root shoots are formed;
- the period of rest will increase;
- the trunk tilts to the side;
- flowering becomes sparse or disappears completely.
At any age, orchids should remove spent flower stalks to speed up the formation of new buds. Here's how to do it correctly: trim the dried flower stalks above the dormant bud, about 2 cm away. This will eventually encourage buds to appear.
Care during dormancy and flowering
Care procedures during and after flowering vary significantly. Flowering begins when the buds first open and lasts for approximately three months. To extend this period, properly care for the plant:
- Carry out pruning in a timely manner, which will stimulate new flower stalk growth.
- Fertilize the plant according to the dosages specified in the instructions for the specific fertilizer. This is important because flowering expends a lot of energy and nutrients.
- Water frequently, be sure to use a warm shower.
- Increase the room temperature by 3-5 degrees.
- Do not move the pot to a new location.
When the flowering period ends, the plant enters dormancy. Before this, you can either trim or leave the flower stalks alone, but the former option is preferable, as the next bloom will occur sooner. Furthermore, the flower will begin dormancy sooner, which will allow it to gain more strength.
The following video explains how to properly trim a flower stalk:
Differences in care in summer and winter
As you know, during the winter, plants rest, gaining strength for the growing season, so summer and winter care are slightly different:
- Winter. Reduce watering and fertilizing and provide the plant with more aeration. In February, gradually increase the frequency of watering and be sure to fertilize, as the plant begins to develop flower stalks.
- Summer. During flowering, all procedures are carried out intensifically.
Diseases and pests
Orchids are most often affected by fungal diseases, which are caused by excessive humidity during overwatering. Less commonly, viral and bacterial infections can also occur. Here's a list of the most common problems:
- black, gray, brown, root rot;
- fusarium;
- leaf spot;
- anthracnose;
- powdery mildew.
Pests that love orchids are conventionally divided into 3 groups:
- the first is nematode, silverfish, woodlouse;
- the second is snail forms;
- the third is sucking insects, especially various types of aphids.
To prevent these kinds of problems, carry out preventative spraying, and if plants are already affected by diseases and pests, revive them immediately. The orchid's chances of recovery depend on proper care. Here's what to do:
- remove all damaged and affected parts of the bush - depending on the problem, this may be the roots and the above-ground part;
- burn them to prevent spreading;
- If a very large part of the plant is affected, remove all elements without regret - sometimes only a couple of leaves may remain on the bush, but the flower will recover;
- Be sure to treat all cut areas (you can sprinkle them with crushed activated carbon or Miramistin);
- Spray with insecticides (against pests) or fungicides (against diseases).
Problems and difficulties in care
Many beginners encounter problems when growing orchids, which is why they are considered very capricious and finicky. In reality, mistakes are made only in the first years of orchid cultivation due to a simple lack of knowledge about certain nuances.
Root rot
This is the most common problem: roots begin to rot. If left untreated, the plant dies. There are several reasons for this:
- excessively frequent watering;
- adding too much water;
- use of cold liquid;
- diseases.
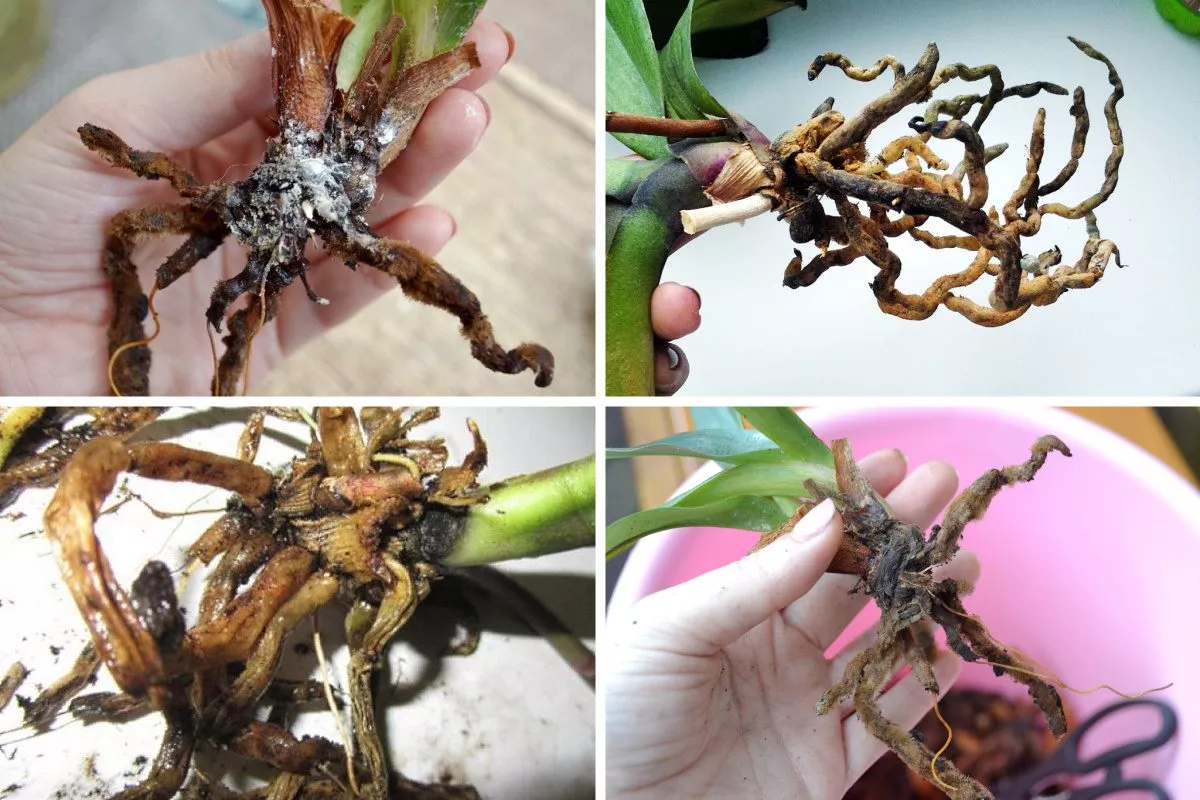
To save the plant, take proper care of it when you notice a problem:
- Remove the orchid from the container.
- Shake off any remaining soil from the root system.
- Cut off rotten elements.
- Process the cuts.
- Soak the plant's roots in a rooting agent (such as Fundazol, Maxim, or Kornevin) for 30 minutes. This will help quickly build up root mass.
- Plant in a pot with new substrate.
The leaves are turning yellow
This occurs when the watering schedule isn't followed, the pot is placed in direct sunlight, there's too much fertilizer, or the root system is rotting or dying. It also occurs when the plant is too old or acclimating.
What to do:
- find out the reason;
- pluck off yellow leaves;
- normalize moisture or move the flower to partial shade.
You can find more information about why orchid leaves turn yellow and what to do in this article.
No flowering
A healthy orchid should bloom on time and in accordance with the characteristics of its particular variety. If this isn't happening, consider the following reasons for the lack of flower stalks:
- stress after transportation or transplant
- old age of the plant;
- lack of light;
- direct influence of the sun on green mass;
- the presence of drafts or a sudden cold snap in the room;
- placing the flower near heating devices;
- failure to comply with fertilizer application rules.
To remedy the situation, normalize the orchis's growing conditions. Then, stimulate flowering. This can be done in several ways:
- Change the temperature regime using the gradient method. To do this, take the plant outside/on the balcony at night (or open a window), and bring it back inside during the day. Keep in mind that the nighttime temperature should be around 16–17 degrees Celsius.
Extreme changes promote carbon dioxide saturation, which is involved in the formation of flower stalks. The maximum duration of treatments is two weeks, the minimum is 10 days. - Take the flower outside. Simply leave the orchid outdoors for up to 25 days. Summer and early fall are the best time to do so.
- Change the humidity. The main condition is a room temperature of no more than 28 to 30 degrees Celsius. The treatment lasts for 30 days. To do this, stop all watering except for root watering (from the tray), reducing the frequency by exactly half. Do not fertilize the plant during this time.
Frequently asked questions
A list of the most popular questions will help you quickly find an answer to an important question:
- Can an orchid survive for a long time without water? Yes, but the maximum period is 30 days. This is due to the accumulative nature of the leaves, stems, and roots. Specifically, they accumulate a large amount of liquid, which is then used for drinking.
- Does a flower need support? In the wild, it is not required, but if you are worried that long stems will fall under the weight of the flower stalks, you can put any support under them, and the plant will decide for itself whether to “throw” its shoots onto it or not.
- How to rejuvenate an orchid? First, determine whether the orchid has truly matured. Signs of this include yellowing leaves, lack of blooms, etc. You can rejuvenate the flower using various techniques:
- by dividing the bush - it is removed from the pot, divided into 2-4 parts and replanted;
- rejuvenating pruning – old leaves and shoots are removed;
- Root removal – all damaged and dried root shoots must be cut off.
Orchid Care Reviews
Orchid care can seem complicated to some gardeners, easy to others. This depends on experience and the variety being grown. To avoid unnecessary hassle, beginners should choose a variety like phalaenopsis, which is considered easy to care for.