House orchids are spectacular flowers, often considered fussy. But in reality, they simply require specific growing conditions. One common orchid problem is the need for periodic repotting. To minimize stress from this procedure and ensure positive results, it's important to repot the plant correctly, and most importantly, at the right time.
In what cases is a transplant necessary?
According to gardeners, the best time to repot is spring—a time of awakening and intense development, as well as a resting phase after a long flowering period. During this period, orchids tolerate the stress associated with replanting well.
- ✓ Consider the moon phase: transplantation is most favorable during the waxing moon.
- ✓ Avoid replanting on days when the temperature drops below 15°C or rises above 30°C.
Reasons for transplantation:
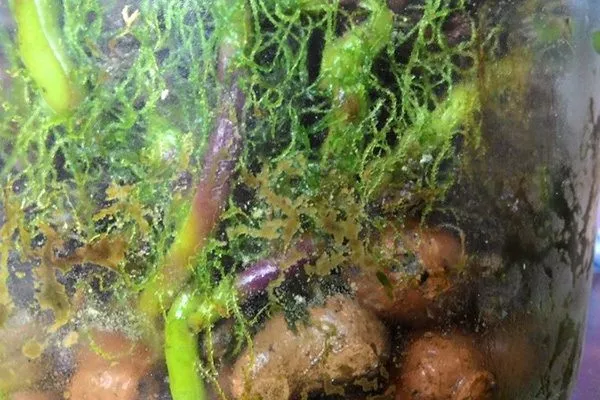
- A green coating appeared. If the inside walls of a clear pot have turned green, it means moisture is stagnating. As a result, moss and algae are growing. This is due to poor air circulation due to the small pot. It's time to give your plant a larger container.
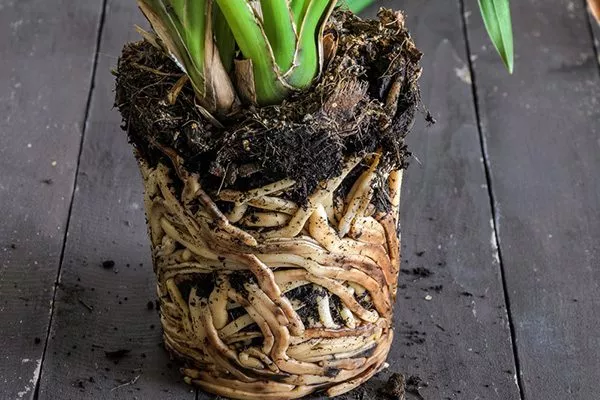
- The roots filled the entire volume of the pot. Over time, the root system grows to such an extent that the roots literally push against the pot's walls. However, it's important to remember that even if root formation is minimal, don't rush, as root growth is a common occurrence for orchids.
- The roots are intertwined. Repotting should only be done when the pot is completely full, when the roots become intertwined, creating a large tangle. If this isn't done promptly, the roots will begin to break apart. Repotting is also necessary if aerial roots begin to grow rapidly—this occurs when there's insufficient space in the pot.

- The roots are damaged. The appearance of cracks or breaks is a clear signal for immediate repotting. Damaged areas can be attacked by insect pests, which will further aggravate the situation.
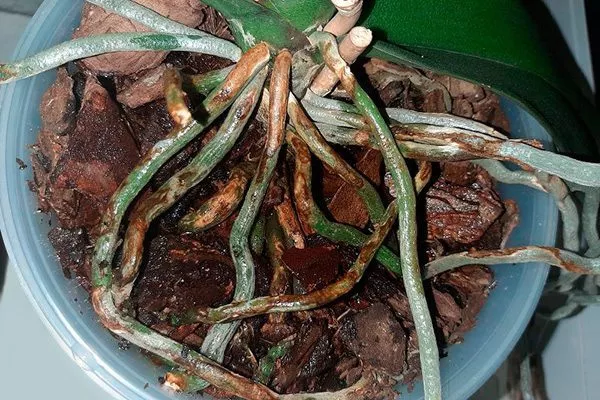
- A coating and spots appeared on the roots. Coloration is an important factor. Healthy roots are gray-green, while the coating is gray-silver. Warning signs include mold, black spots, and a gray or whitish coating. These indicate fungal and bacterial infections. These signs indicate the presence of pathogenic microorganisms on the roots.
A plant affected by a disease must not only be replanted immediately, but also its roots must be treated with fungicides and the diseased areas must be removed.
- Pests were found in the substrate. If insects are spotted, the pot and substrate must be replaced immediately. Sometimes, a flower is purchased already infested with pests. This is why it's important to quarantine purchased orchids for two weeks.
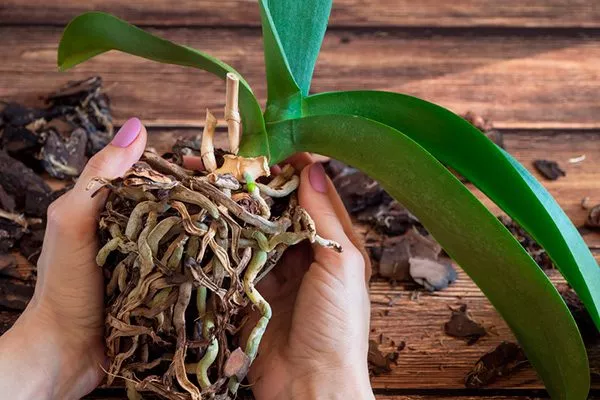
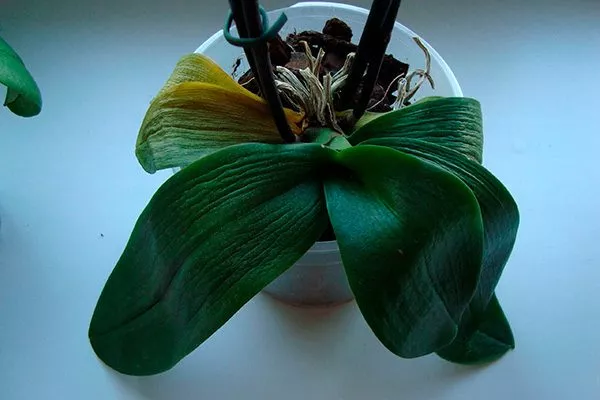
- The plant is withering. If the flower is wilting and drying up, the leaves are wrinkled and losing their elasticity, you must first establish care — suddenly, something was missed. If nothing helps, the plant needs to be repotted—it may not be getting enough moisture and nutrients, and the roots may not have enough space.
- The flower has lost its stability. If the flower moves freely in its pot, the roots that previously provided stability have died. It's time to try to revive the plant—if it still has healthy roots. Repot it in a new, larger pot filled with fresh potting soil.
If all the roots are damaged, the plant is placed in a mini-greenhouse made from a plastic bottle (5-10 liters). High humidity and the required temperature are maintained there. Sometimes, the plant does develop new roots. - Does not bloom. If an orchid hasn't bloomed for at least three months, and the dormant phase has already passed, it's too small in its pot. This means the plant isn't receiving the necessary nutrients and moisture. Repotting the plant in a new container will stimulate flowering.
Is it possible to transplant during flowering?
Beginners often don't realize that orchids can only be repotted during certain periods. During flowering, new buds are forming, which takes a lot of energy from the plant. Therefore, repotting at this time is undesirable, as adaptation takes a significant amount of energy. Ultimately, the plant won't have the energy left for budding.
Repotting a blooming orchid should only be done in a critical situation, for example, if pests are found in the substrate. However, after this, the plant will likely refuse to bloom. However, gardeners assure that if the transplant is made from a cramped pot to a spacious one, the plant does not perceive this as stress. Once in more comfortable conditions, the orchid can continue blooming.
The nuances of replanting orchids at home
Orchid replanting itself is not particularly difficult; it is only important to thoroughly understand the technology of this procedure and the permissible timeframes for it.
Deadlines
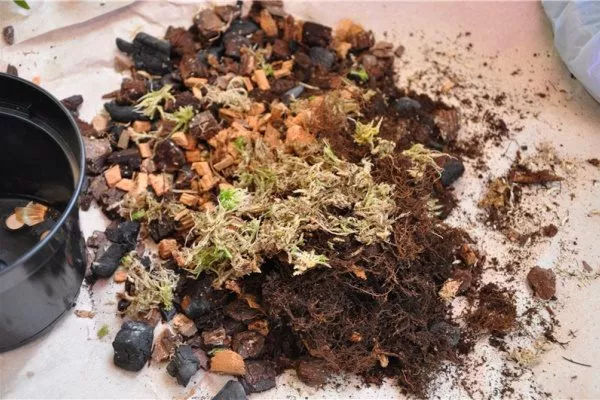
Repotting is usually necessary due to substrate deterioration (decomposition). This typically occurs after 2-3 years of use. During this time, the roots grow, and the plant begins to push out of the pot. The substrate takes on the consistency of dust.
The best time to repot is two weeks after flowering has finished. For the popular Phalaenopsis orchid, this period occurs around late winter to early spring, before the active growing season.
Regularity
Repotting is done as needed—we discussed the factors that prompt this procedure above. Essentially, the plant can be repotted annually, but there's no real need for it, and orchids don't like frequent repotting. Repotting once every 2-3 years is sufficient.
Substrate
Most indoor orchids are epiphytes. They don't particularly require a substrate to survive; it primarily serves to anchor the plant, provide stability, and maintain root moisture.
A special substrate is recommended for orchids. It's made from pine bark or stone pine (Italian pine). It's primarily suitable for "ground" orchids or species with poorly developed roots. For other orchids, you can harvest the bark yourself from fallen pine trees.
How to prepare pine bark:
- Choose areas that have little resin;
- Boil the collected bark, bake it in the oven, or freeze it outside to disinfect it and kill any pests.
- Cut the bark into 2-3 cm cubes and dry. Cut it coarsely to ensure good ventilation in the pot.
- Add expanded clay and charcoal to the bark in a 3:1:1 ratio, as well as a handful of old substrate to “introduce” beneficial microflora into the new mixture.
Pot
The new pot the orchid is repotted into should be one or two sizes larger than the old one. It should be large enough to accommodate the roots. If some of the plant's roots have rotted and had to be removed, select a smaller container.
Pot requirements:
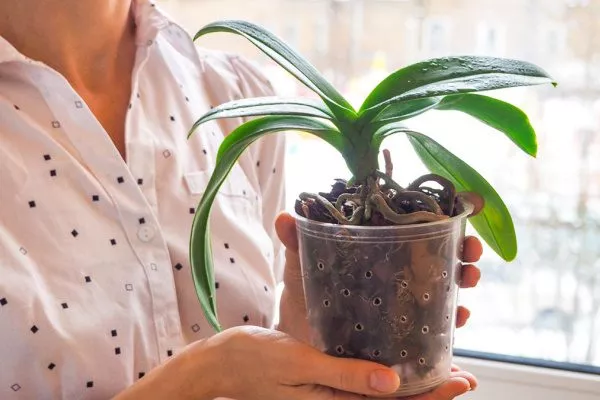
- transparent material - so that the roots participate in photosynthesis;
- there are holes at the bottom to drain excess water and allow the root system to ventilate and breathe;
- the diameter of the holes is large enough, but not so large that the substrate falls out through them (with the exception of “ground” orchids).
Flower characteristics during transplantation
The technology of replanting largely depends on the growing conditions of the orchid, the season, the vegetation cycle and the condition of the plant.
Features of orchid replanting:
- Store bought. Repotting is only necessary in the most extreme cases, for example, if the plant is on the verge of death. Repotting is also recommended if the bark is damaged—after the plant has finished flowering and has acclimatized for two weeks.
- In the spring. This is the most suitable time for repotting. It is carried out during the period of increasing daylight hours, at the end of winter. The procedure is carried out using standard technology.
- In a glass container. With this unusual planting method, the plant requires virtually no watering. If the substrate is selected and laid correctly, moisture will rise from the bottom of the container to the roots, which can grow to very large sizes.
- Old plants. They are repotted according to the standard procedure. The main difference is the need for extra caution when moving large orchids. Older plants typically have a large "beard" of roots that must be handled with extreme care.
Materials and tools for transplantation
Prepare the pot, substrate, and tools in advance. It's important to have everything within reach so you don't have to worry about finding them while repotting.
What you will need for transplantation:
- a pot of suitable size;
- a sharp garden knife or pruning shears - to cut off damaged roots;
- sharpened wood or activated charcoal - sprinkle on the cuts;
- bamboo sticks or pine chips - to fix the flower stalk;
- insecticide - for treating roots (it may be needed if pests are detected);
- raw materials for substrate preparation;
- expanded clay or crushed stone - for drainage (it, like the substrate, is calcined).
Cutting instruments are disinfected to prevent infection.
Step-by-step instructions for transplantation
The replanting process requires the grower to be extremely careful and strictly adhere to the technology.
Step-by-step instructions:
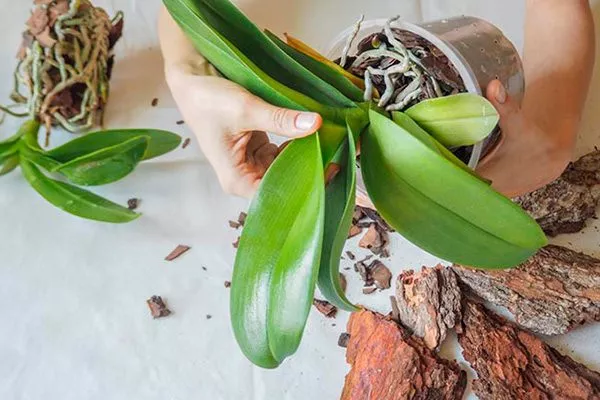
Step 1. Remove the flower from the pot. Water the plant generously—well-watered roots are more pliable and less likely to break or be damaged. Carefully remove the plant from the container, holding it by the base of the stem. Gently try to loosen the roots from the sides of the pot. If this is not possible, use a toothpick to push the roots down the sides of the pot.
Thread the roots protruding from the drainage holes into the container. Try not to tear them. If you can't push them through the holes, cut or break the pot. Tip: crimp the sides of the container (if it's plastic) to make it easier to remove the plant.
Step 2: Remove the substrate. Some of it falls out when you pull out the roots. Remove the rest by hand. Wet any bark stuck to the roots and carefully peel it off. If it doesn't come off, leave it—it won't harm the plant.
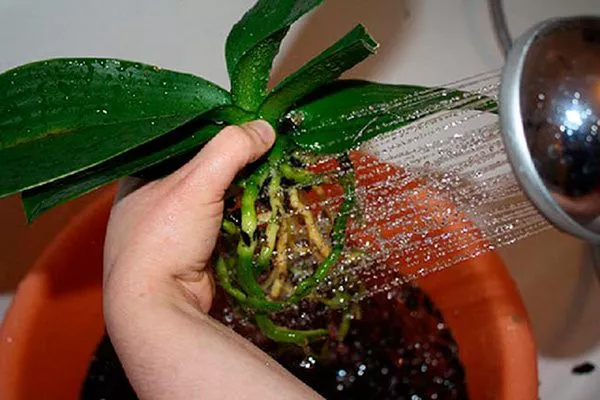
Step 3. Rinse the root system. This will help remove old soil from the roots. The water should be warm and running. Avoid getting water in the center of the rosette. It also shouldn't be in the leaf axils. If water does get into these areas, blot them with a dry cloth or cotton pad.
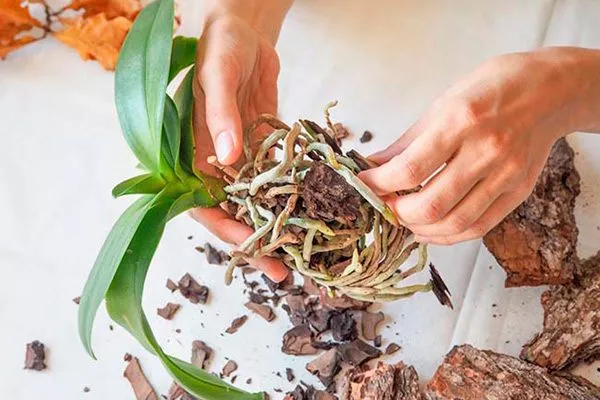
Step 4: Remove affected roots. Inspect the root system and assess its condition. Healthy roots will be green, indicating they were photosynthesising, while those at the bottom of the pot will be beige or yellowish. Trim off any dried or rotten roots.
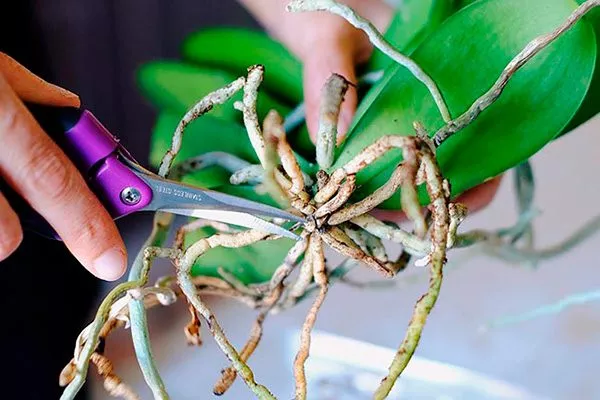
Rotten roots are soft and water will ooze when pressed; dry roots will look like straw. Trim the roots back to healthy tissue. Remove any dry leaves and debris from the stem. pedunclesTreat the roots with fungicides such as Topsin, Fitoflavin, or similar. Disinfect the cuts with brilliant green and dust with crushed charcoal.
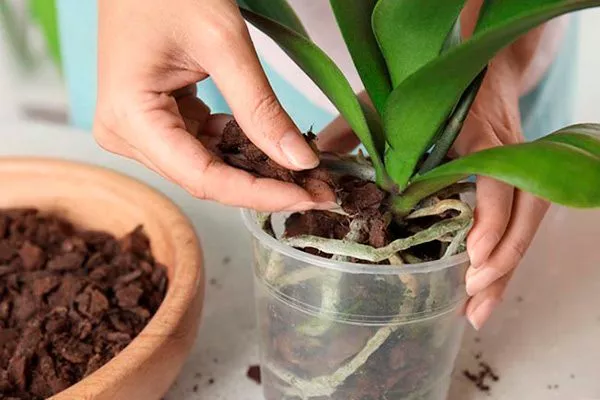
Step 5. Transplant the orchid into a new pot. Place coarsely chopped bark, expanded clay, or polystyrene foam at the bottom for drainage. Place the plant in the pot, ensuring the roots fit completely within the pot. Add potting soil to fill the spaces between the roots. Shake the pot to fill the gaps and ensure the plant is securely positioned in the soil. If the plant tends to fall over, place a support next to it.
Post-transplant care
A repotted orchid requires careful and loving care. This will help it adapt to its new location more quickly. It's also important to watch out for any root problems that may have been damaged during pruning and removal from the pot.
- For the first 48 hours, keep the plant in partial shade, avoiding direct sunlight.
- On the 3rd day, begin lightly spraying the leaves in the morning and evening.
- One week after transplanting, carry out the first watering using the immersion method for 15 minutes.
Watering
Place the pot with the repotted flower in a shaded area. Avoid drafts—orchids don't tolerate them. Maintain the temperature at a level appropriate for the specific plant. type of orchidRecommended air humidity is 60-70%.
The orchid should be watered for the first time 7-10 days after planting. If the soil is damp, do not water it, as this can cause root rot.
Methods watering an orchid:
- Shower. A "tropical shower" is created by directing a stream of warm water onto the flower while it's in the bath. After 15-20 minutes, the pot is removed, and the leaves are wiped with a dry cloth.
- By immersion. The pot is placed in a basin filled with water. Water penetrates the substrate through the drainage holes.
- With a watering can. Water the plant in a thin stream until water runs out of the holes. It's important to allow all excess water to drain out of the pot.
It's recommended to spray the leaves daily with boiled water from a spray bottle. This helps the plant establish itself more quickly in its new location. Be careful not to allow water to seep into the leaf axils. This spraying procedure should typically last for one month. The best time to do this is in the morning. In hot weather, increase the frequency of spraying to 2-3 times.
Orchids should be watered only with soft or moderately hard water with a pH of 5. The latter can be determined using special test strips. Hardness can be determined visually by the layer of limescale on the kettle. The thicker the layer, the harder the water.
Is fertilizing necessary?
The new substrate is rich in nutrients, so the first feeding should not be done until at least 2-3 months after repotting. Furthermore, roots damaged during repotting will not be able to fully absorb the nutrients, which means unfavorable microflora will develop in the pot.
Feeding orchids It's better to use complex preparations created specifically for these flowers. You can buy them at a flower shop. Suitable formulations include "Bona Forte" (dilute 10 ml in 1.5 liters of water) or "Kemira Lux" (dilute 1 g in 1 liter of water).
Water the substrate with the nutrient solution until the liquid runs into the tray. Fertilizing is recommended during the active growing season, when new leaves are forming.
To stimulate new root growth and alleviate the stress of transplantation, it is recommended to feed the plants with special stimulants:
- Ribav-Extra for orchids — a universal bioregulatory product. Stimulates and accelerates the development of epiphytes by activating root growth. Dosage: 1-3 drops per 1 liter of water.
- Zircon. It is used for watering and spraying. Dosage: 2-4 drops per 1 liter of water.
- HB-101Use for watering and foliar spraying. Dosage: 1 drop per 1 liter of water.
Possible problems after transplantation
When replanting, there's a high risk of damaging the roots and the plant's poor adaptation to the new location. It's important to closely monitor the transplanted plant to quickly take action if problems arise.
No flowering
After repotting, an orchid may not bloom for a long time. It takes a considerable amount of time—from six months to a year—from the time new roots develop to the appearance of flower stalks, depending on the variety and growing conditions.
If all deadlines have passed and the orchid still has not bloomed, you need to determine the cause of the problem.
Why doesn't an orchid bloom after repotting?
- the temperature regime is violated;
- too much or too little lighting;
- excessive watering.
How to fix the situation:
- Stimulate flowering Using chemicals. The most popular option is "Epin." Spray in the morning every day. Or water weekly, diluting 3-5 drops in water. Succinic acid diluted in water—2 g per 1-2 liters—can also help.
- Create temperature stress To encourage flower stalks to appear. For example, you can take the plant outside or onto the balcony overnight. The recommended temperature is 18°C. In the morning, bring the plant inside to a warmer room.
- Reduce watering. Give the plant a short dry spell. Water the plant for 3-4 days, then stop watering for a couple of weeks.
What to do if an orchid wilts after repotting?
If the plant's leaves have lost their elasticity, it is necessary to find out the cause of this phenomenon as soon as possible and eliminate it.
Why does an orchid wilt and how to deal with it?
- Mechanical damage to the roots occurred during transplantation. To eliminate the effects, move the plant to a cool, shaded area. Then place the pot in a bowl of warm, boiled water for 1 hour. Then return the plant to its original location.
- The roots dried out. The problem can be solved by normalizing the watering regime.
- The roots have rotted.
- The roots don't have enough air. Create additional holes in the plastic pot using a hot nail/knitting needle.
- The leaves are exposed to direct sunlight. It is enough to move the orchid pot to a more suitable place.
- Pest infestation. Control begins immediately using effective insecticides. For minor infestations, the pests can be removed by hand (if they are large enough).
Although orchids are considered a capricious flower, don't be afraid or avoid repotting them. This is a necessary procedure, without which the plant will wither, become ill, or at least refuse to bloom.
I also want to repot my lilac orchid, and at the same time try to "rejuvenate" it. I'm waiting for the last bud to bloom. But it seems to have died; the last flower on the stem has been there for about six months now, and it hasn't dried out, and there are no new buds. I don't even know what to do. Should I wait a little longer or try repotting it with the flower?
Thanks for the interesting information.
I've been growing orchids for a while now. I've tried repotting them a couple of times, but they always ran into problems. Thanks for the informative article. This time, thanks to all the information, the process went smoothly. I didn't have a single problem!