To ensure successful planting of hydrangeas outdoors, it's important to master the basics—timing, preparation, site selection, and planting. It's also crucial to know how to care for the young plants afterward.
When to plant hydrangea in open ground?
Garden hydrangeas, like indoor hydrangeas, can be planted in three seasons: summer, spring, and fall. Winter is not recommended, as the plant is dormant. If you don't give it a rest during this time, you won't see abundant blooms next year.
In the spring
All varieties and cultivars of hydrangeas are suitable for spring planting, as are any region, as this time of year is considered the most versatile and desirable. Advantages:
- plants have time to take root and adapt during the summer, even in northern regions where summers are short;
- in spring, plants wake up and quickly increase green mass;
- rooting is successful;
- any seedlings are suitable;
- Additionally, propagation and collection of cuttings are carried out in the spring.
There's one drawback: if return frosts are expected, you'll have to cover the bushes at night. The optimal time for the south is March-April, for the central part of the country – April-May, and for the north – only the end of May.
In summer
All types of hydrangeas can be planted in summer, but the bushes must be as strong as possible, which is the main drawback. Another drawback is that bare-root seedlings cannot be planted, as such specimens may not have time to fully establish.
There are also advantages:
- can be propagated;
- not afraid of recurrent frosts;
- Planting can be done until mid-July.
In the fall
Tree and panicle hydrangeas are best suited for fall planting. The optimal time for harsh climates is early September, for the central and middle zones – from mid-September to mid-October, and for the south – until mid-November.
Advantages:
- the plants will bloom in spring and summer, but with spring planting this is difficult to achieve in the first year;
- soil preparation is easier, since the ground is sufficiently warmed up and already saturated with useful substances;
- saving fertilizers (less is needed before wintering);
- the risk of pest infestation is reduced;
- All the plant's energy goes into rooting, not into growing green mass.
There are also many disadvantages:
- the planting material must have a very well-developed root system;
- young seedlings are not suitable;
- If you miss the deadline for a specific species and variety, the bush will not have time to take root;
- There is a risk of freezing during unexpected frosts, so you will have to closely monitor the weather forecast in order to have time to cover it;
- If autumn is very rainy, fungal diseases occur.
How to plant hydrangea correctly?
The rules that must be followed during planting ensure rapid rooting of the seedling, prevention of disease, and abundant flowering in the future. Therefore, they should not be ignored, especially since hydrangeas are not considered easy-to-care-for plants.
What should a seedling be like?
The quality of the planting material determines the survival and rooting rate. Therefore, pay attention to the following factors:
- there should be no signs of damage, mold, or dryness on the roots, shoots, or leaves;
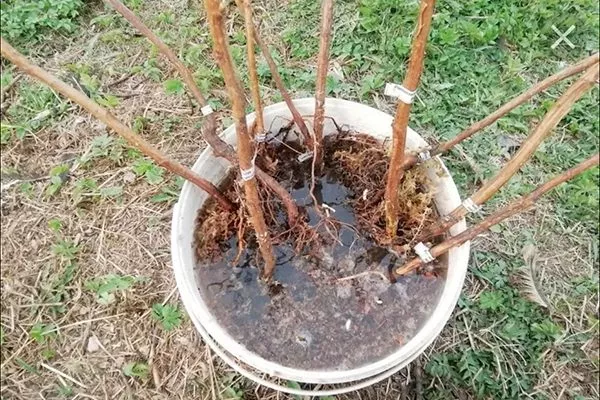
- the root system (if it is open) should have shoots and be powerful;
- with a closed root system, the earthen lump should not emit a foul odor, but should not be too waterlogged;
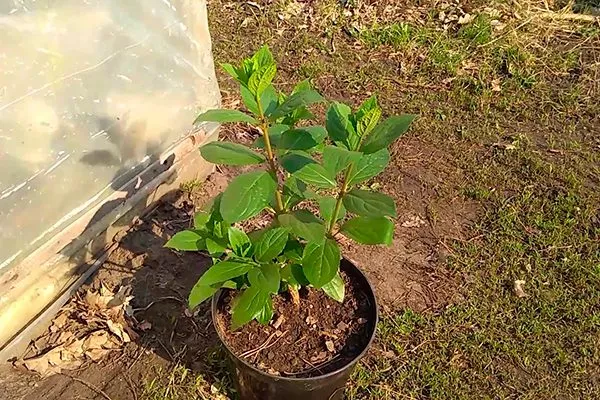
- The seedling should have: at least 2 developed stems with an elastic structure, light bark with an even color, and live buds.
Preparing the seedling
Preparatory measures are necessary to speed up the rooting and adaptation process. This is especially important in the fall to prepare young bushes for winter. Here's what you need to do:
- trim off all damaged areas with disinfected pruning shears;
- trim the roots slightly if they are too long;
- trim the shoots a little, which will stimulate growth;
- if the root system is open, soak the roots in a root formation stimulator (Epin Extra, Kornevin, Heteroauxin, etc.);
- If the root system is closed, water it lightly and shake the bush slightly.
If you've purchased seedlings and the outside temperature isn't suitable for planting, preserve the bushes. Here's how:
- the room is cool (a cellar, loggia or basement would be ideal);
- storage time – up to 2 months;
- place - darkened;
- watering – once every 10-15 days, but not abundantly.
Choosing a location
The site should be as windless as possible, otherwise the flowers will fall off and the shoots themselves will be exposed to drafts, which can contribute to disease and weaken the immune system. The location should have moderate lighting, specifically, the light should be diffused, and the sun's rays should not burn the plants.
Pay special attention to the neighborhood:
- Avoid planting hydrangeas near trees and tall shrubs, as their root system is quite extensive. This leads to root entanglement and a lack of moisture for the flowers (trees and large shrubs will drain all the moisture).
- Hydrangeas do not like aggressive neighbors, so avoid planting them next to ferns (especially ostrich fern), spotted loosestrife, bulbous ryegrass, and similar crops.
- The best companion plants for hydrangeas are lilac, spirea, and garden jasmine. They don't compete with each other in terms of nutrient requirements and aren't susceptible to the same diseases and pests.
What kind of soil should I plant in?
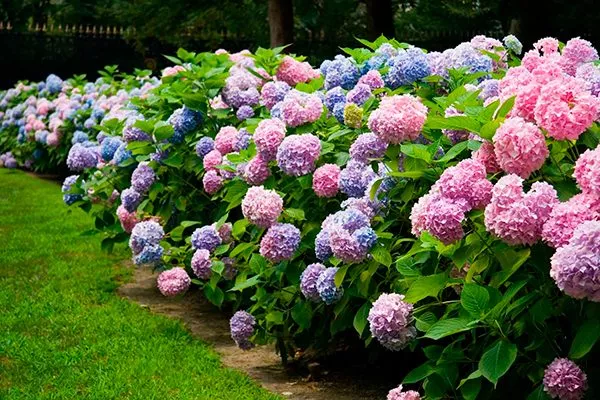
Alkaline and neutral soils are unsuitable for hydrangeas, as they cause chlorosis, slow growth, and the flowers become too pale. Therefore, the soil should be acidic; the optimal pH ranges from 6.5 to 7.0.
Other crop preferences – what kind of soil should it be:
- breathable;
- loose;
- drained;
- rich in organic matter;
- easy.
Preparing the soil and planting hole
Prepare the soil and planting holes at least two weeks before planting the seedlings. It's important to follow a specific sequence:
- Inspect the area and remove all debris, old leaves, branches, and other items. Afterward, remove any weeds or their remains—preferably by the roots.
- Cultivate the soil with a shovel, digging it in to a depth of one bayonet.
- Level the surface with a rake or garden trowel. Make sure the soil is free of large clods.
- Dig planting holes. The optimal distance between plants is 70 to 100 cm for low-growing varieties and 120 to 150 cm for tall varieties. The depth and diameter should be approximately 50 cm. However, if the seedling has a root ball, increase the area by 10-20 cm.
- Process the removed soil. To do this, mix equal parts of the soil with well-rotted compost/humus, high-moor peat, and sand. To obtain the necessary nutrients, add 2 tablespoons of potassium sulfate, 4 tablespoons of superphosphate, and 1.5-2 tablespoons of urea.

- Fill the hole with this soil mixture and cover it with plastic film, so that the soil is fully saturated with all the substances.

You can also use more modern planting compounds in accordance with the instructions - Bona Forte Premium potting soil for hydrangeas.
Step-by-step planting of hydrangeas
When planting, pay special attention to the installation of the seedling and other important steps:
- Open the holes and remove the soil mixture.
- Disinfect the walls and bottom by spraying with Fitosporin solution.
- Add a small layer of drainage (stones, pebbles, gravel).
- Add substrate to 1/3 of the hole's volume.
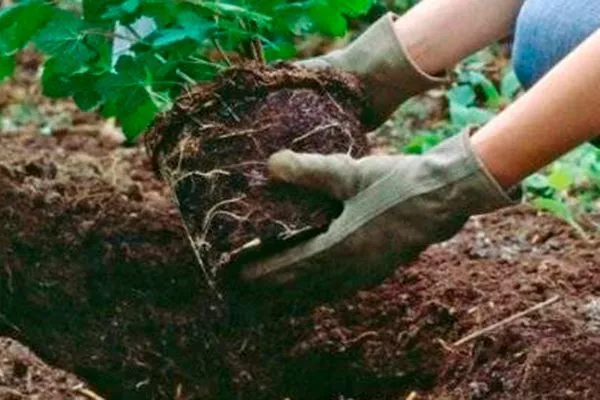
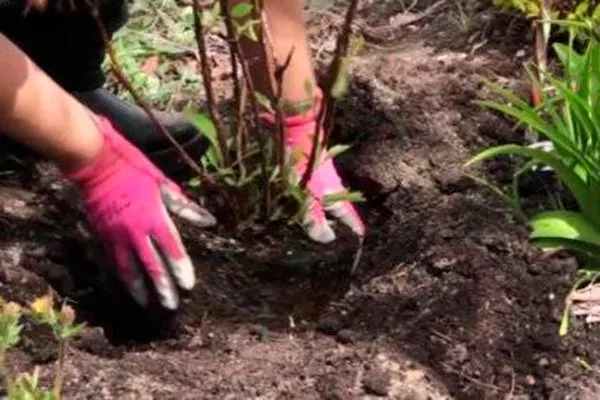
- Place the seedling in the center. If it's a closed-root plant, make a small depression in the ground; if it's open-root, form a mound. Hold the planting material by the stems and position it evenly.
- Spread the root system out to the sides. Do this as carefully as possible to avoid breaking the shoots and the main root.
- Begin gradually adding the soil mixture, ensuring it penetrates between all the roots and fills the space completely. You can lightly compact it with your hands to achieve this.
- Add the remaining substrate so that the root collar is either level with the surface or 1-2 cm below. Don't bury it too deeply, as this will encourage rotting.
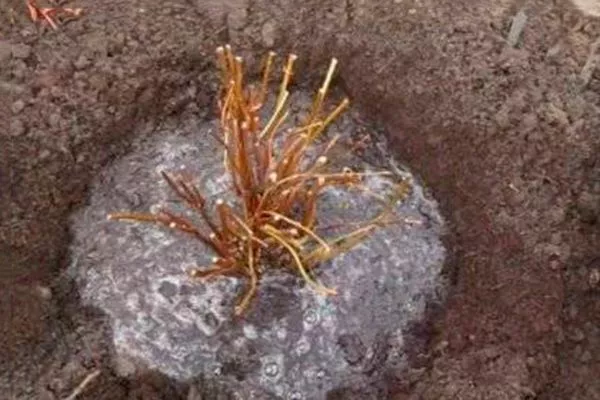
- Water the soil with warm, settled water. Apply 9 to 12 liters per bush.
- Immediately mulch the trunk area. This helps maintain the desired moisture level for a long time and reduces the risk of weed growth and pest infestation. Organic mulch—straw, shredded tree bark, manure, sawdust, and similar materials—is the best choice for hydrangeas.

- ✓ The soil acidity level should be strictly within 6.5-7.0 pH, measure it before planting.
- ✓ Use only organic materials for mulching; avoid fresh coniferous sawdust, as it can increase soil acidity beyond normal levels.
Growing from seeds – features
The generative method of planting hydrangeas doesn't always preserve varietal characteristics, so it's most often used to develop new cultivars. The cultivation process takes a long time, but generally it looks like this:
- A nutrient substrate is poured into the container. It consists of 4 parts leaf mold, 2 parts peat soil, and 1 part sand.
- The seeds are scattered over the surface and then sprinkled with the same substrate.
- Next, you need to spray the surface with warm water from a spray bottle and immediately cover it with glass or plastic film.
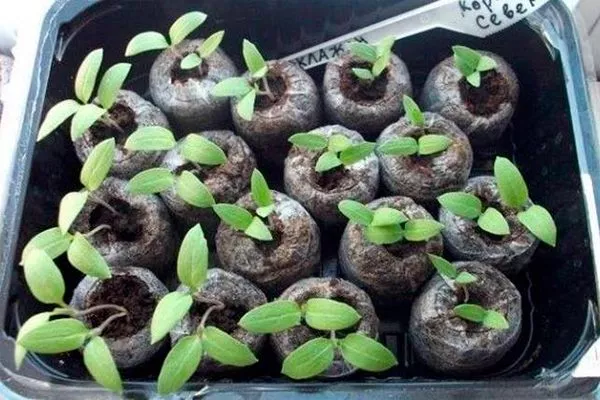
- The container is then placed in a room with a temperature of 14 to 20 degrees Celsius. Seedlings will emerge in 30 to 50 days, but during this time, the glass will need to be opened frequently for ventilation and watering.
- It is necessary to pick the seedlings twice into separate containers.
Post-planting care
During the first month after planting hydrangeas, it's important to carefully care for the seedlings. To do this, simply follow these steps:
- Water periodically. As needed, ensure the soil never dries out, but is not overly waterlogged. If the soil is neutral or slightly acidic, you can add a small amount of citric acid to the water (approximately 20 g per 10 liters of water).
- Loosen and weed. These procedures are carried out immediately after watering. The more frequently the soil is loosened, the more oxygen the root system receives, and therefore, rooting occurs more quickly.
- Feed. This isn't necessary for fall planting, but it is necessary for spring planting. Since the bushes need to root quickly, potassium and phosphorus-based fertilizers are needed. The former strengthens the immune system and synthesizes proteins, while the latter promotes root growth.
Even if planting was done in the spring, you should not use nitrogen fertilizers - this will only result in green mass growth, and this is undesirable in the first month after planting.
Planting hydrangeas outdoors isn't particularly difficult. The key is to strictly follow the recommendations of specialists and experienced gardeners. Don't forget to consider the requirements for your specific hydrangea species and variety, but this applies more to subsequent cultivation than to planting.