Hydrangea Miranda is a beautiful plant that can brighten any corner of the garden. Its magnificent flowers, flexible stems, and low maintenance make it an excellent choice for creating stunning floral arrangements. By following simple planting, care, and propagation guidelines, you can enjoy its lush blooms.
Description of the variety
This hydrangea belongs to the long-petioled variety and is classified as a vine. The plant can reach a height of up to 10 m, and the diameter of the shrub exceeds 80 cm. The leaves are shaped like a wide egg with a base that can be either heart-shaped or pointed.
- ✓ Ability to produce aerial roots for anchoring to surfaces.
- ✓ Frost resistance down to -25°C, which makes it suitable for northern regions.
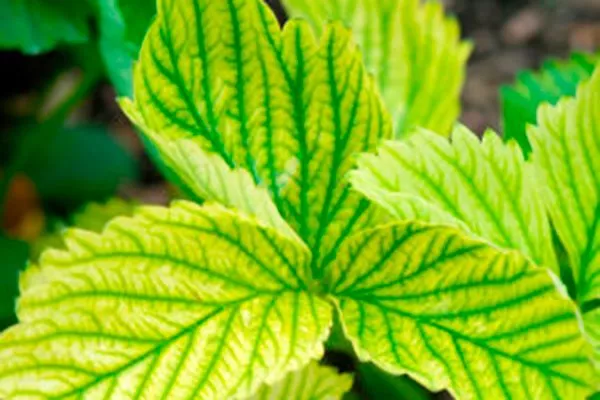
The overall leaf color is green, with a pale yellow-green margin. The surface is smooth, and the petiole is noticeably long, giving the plant a highly decorative appearance. The inflorescence visually resembles a corymb with a flat configuration. The white flowers are relatively small in diameter—only 2 cm. They are scentless.
Advantages and disadvantages
One of the Miranda hydrangea's outstanding characteristics is its frost resistance. This plant is ideal for growing in northern regions, although it is especially popular in central Russia.
Features of flowering
Flowering occurs in June, July, and August, but favorable weather conditions can extend flowering until almost the end of autumn. In addition to white blooms, cream shades are sometimes found, adding further variety to the plant.

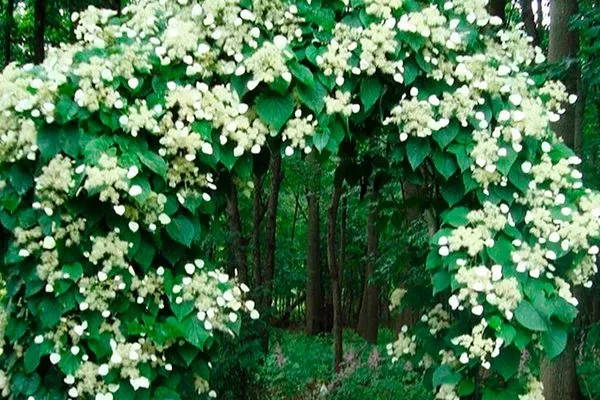
Use in landscape design
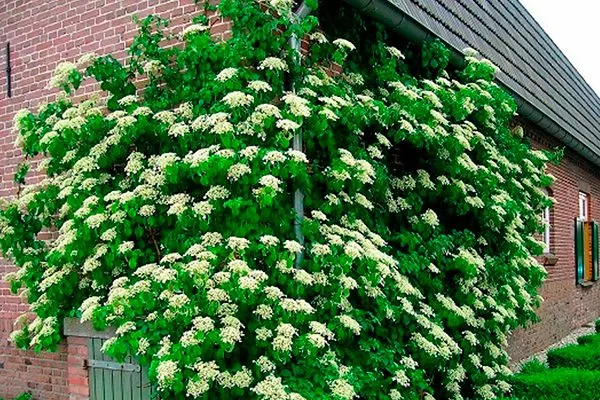
The petiole hydrangea Miranda demonstrates adaptability by producing aerial roots that serve as support, anchoring the plant to the surface and gradually climbing upward. In the wild, these roots are used to anchor the plant to trees.
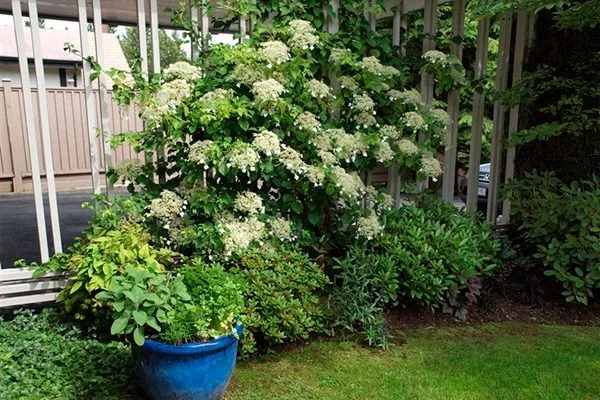
In a garden or park, shoots are often trained toward supporting structures, such as house walls, fences, special support structures, or arbors. If suitable supports are unavailable, hydrangeas spread along the ground, creating a ground cover.
Landing
It's recommended to plant Miranda hydrangeas outdoors in early autumn. In the south, this process continues until the end of September.
Selecting and preparing a site for planting
Hydrangea Miranda prefers a bright location for proper development, but avoid direct sun to prevent leaf scorching. Ideally, choose a site with indirect light for most of the day. When placing this plant, consider the following:
- Having a support such as a wall, tree or suitable structure is necessary for vertical growth.
- Avoid placing near large trees or shrubs, as they may compete for soil moisture, and hydrangeas love moisture.
- When growing as a groundcover, choose a spacious location where the plant can spread freely.
Landing algorithm
After choosing the optimal location for your hydrangea, prepare the soil. If the site has sandy soil, add compost to the planting hole. To amend overly heavy soil, add compost and sand. When planting multiple seedlings, maintain a distance of 1.5 to 4 meters between them.
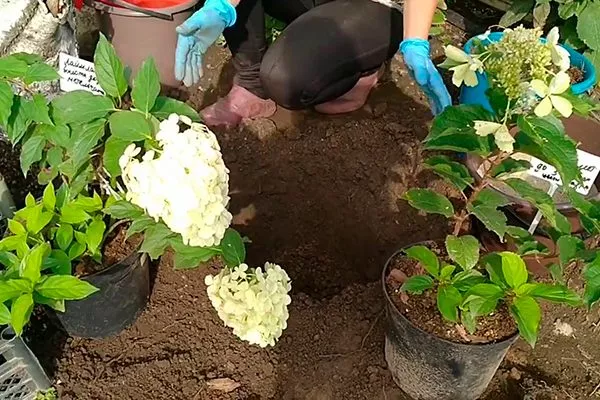
Steps for planting in open ground:
- Prepare the area by digging the soil and removing rocks. Add drainage material or fertilizer if necessary.
- Immerse the root system of the seedling in water for a few minutes before planting.
- Make a planting hole twice the size of the plant's root ball. Mix garden soil with compost.
- Place the root ball in the hole so that it is 20 cm from the support. Ensure that the support is strong, especially if it is an arch.
- Fill the hole with nutritious soil mixture and compact its surface. Water.
Mulch the area around the tree trunk. This is necessary to reduce moisture evaporation.
Caring for petiolate hydrangea
To ensure your hydrangea enjoys beautiful blooms all season long, provide it with proper care. The plant requires standard gardening practices.
How to water?
Hydrangea petiolates planted on an east-facing side require regular watering during the first few years of growth, especially due to the potential for excessively dry soil in this area. In summer, mulch the plantings, for example with pine bark, to reduce moisture evaporation.
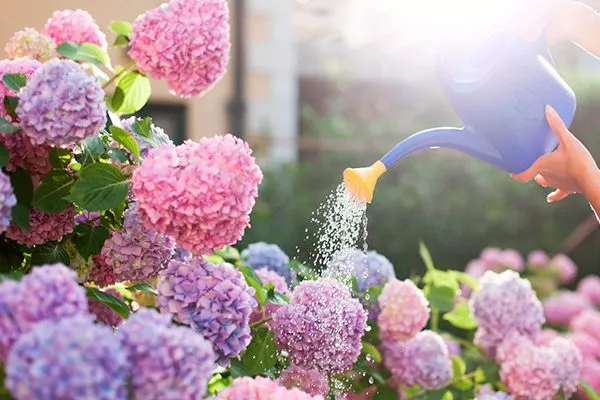
Mature vines that have been standing in one place for a long time no longer require such frequent watering, as they develop a strong root system that penetrates deep soil layers. Direct water toward the trunk circle and avoid contact with the leaves.
Top dressing
Fertilize petiole hydrangeas during the first few years after planting outdoors, using organic matter, particularly compost. This process also applies to mature bushes, as it positively impacts their growth and development.
To fertilize, mulch the tree trunk with compost, mixing it with 1 or 2 handfuls of acidic soil. Then, loosen the top layer of soil along with the compost. Use rhododendron and azalea fertilizer for additional nutrients.
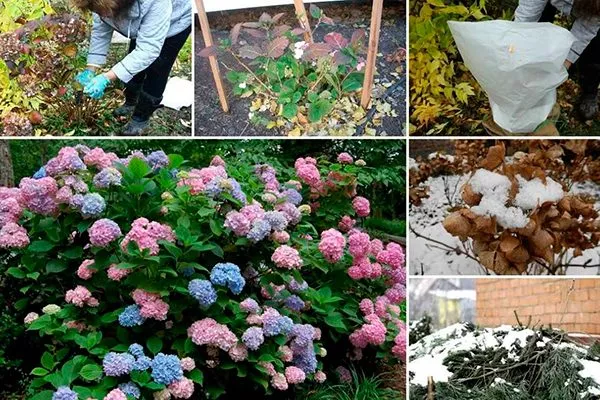
Wintering
This plant exhibits frost resistance, surviving temperatures down to -25°C. When growing hydrangeas in the Moscow region, choose a planting site protected from cold winds. Covering the plant for the winter will help it survive the cold season.
Trimming
During the first few years of growth, avoid pruning your petiole hydrangea, as the plant needs time to establish roots and acclimate. Pruning petiole hydrangeas should be done only when absolutely necessary, typically in July, after the bush has finished blooming.
Remove excess horizontal shoots only when necessary to maintain the desired shape of the bush. Pruning can be used to control excessive stem growth, especially if it could damage a building's roof or gutters.
Reproduction methods
Those just beginning their gardening experience are advised to choose vegetative propagation methods, as they are simpler and more effective. Seeds are rarely used, as their germination rate is generally low.
Rooting cuttings
The most common method of propagating petiolate hydrangeas is by cuttings. Step-by-step instructions:
- Select a healthy, vigorous mother plant to take cuttings from. Make sure the plant has no visible signs of disease or damage.
- Prepare a sharp garden knife or pruning shears for cutting the cuttings. Treat the tools with an antiseptic solution to prevent possible infection.
- The best time to take cuttings is early summer. At this time, the plant is in the active growth phase, which facilitates successful rooting.
- Cut healthy shoots about 10-15 cm long. Cut the stem at an angle to create a larger rooting area.
- Remove the lower leaves, leaving only the top 2-3.
- Treat the bottom cut of each cutting with a growth stimulator or rooting solution to speed up the rooting process.
- Prepare a soil substrate with a high sand content to ensure good drainage.
- Plant the cuttings in the soil to a depth of about 5-7 cm with a distance of 10-15 cm between them.
- Place the cuttings at a slight angle so that water does not linger on the surface.
- Cover with a plastic bottle or glass jar.
- Ventilate regularly and maintain soil moisture.
- ✓ Use only healthy shoots without signs of disease for cuttings.
- ✓ The optimal length of the cutting should be at least 10-15 cm for successful rooting.
- ✓ Be sure to treat the lower cut of the cutting with a growth stimulator to accelerate root formation.
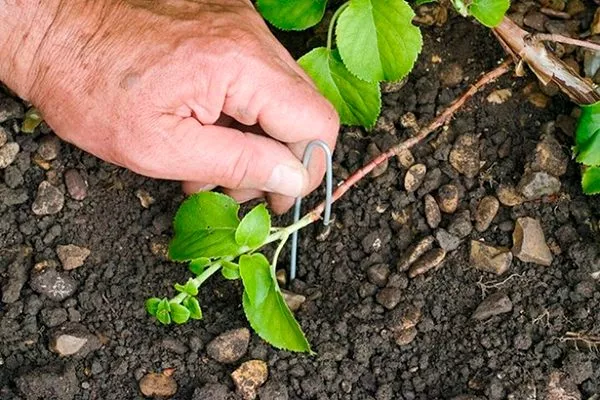
Rooting cuttings
Begin rooting the cuttings in May or August. Step-by-step instructions:
- Bend the shoot down to the ground, first making a cut in the middle of the stem. This will help increase the chances of successful rooting.
- Using a metal pin, secure the layer where it bends to the ground.
- Bury the cutting in the soil where it was cut. Make sure it is securely attached and in contact with the soil.
- Give the cutting time to root. Next spring, you'll see that the roots have formed successfully.
- Once the cutting has rooted, carefully separate it from the mother plant and move it to its new location.
By following these instructions, you can successfully increase the number of hydrangeas, obtaining healthy and strong plants.
Sowing seeds
The procedure for sowing petiolate hydrangea seeds is carried out in late or early February. Propagation by seed is as follows:
- Sow the seeds in containers filled with moist and nutritious substrate and place in a warm place.
- Cover the container with glass or plastic. Ventilate and water regularly. Seedlings usually appear in about 1.5 months.
- Dive seedlings with 2-3 leaves into individual containers.
Once the seedlings have become established, transfer them to the site in the spring.
Diseases and pests
Without proper care, the Miranda climbing hydrangea becomes susceptible to disease and pest attacks. Here are some common issues:
- Chlorosis. The disease causes the leaves to turn yellow and then dry out completely. This is caused by iron deficiency. Hydrangea can be cured by applying potassium nitrate and iron sulfate solution.

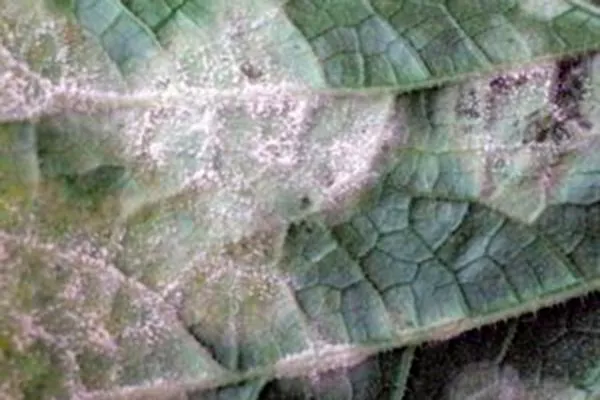
- Downy mildew. The disease is accompanied by gray and brown spots with a bloom on the leaves. To combat the disease, use copper-containing products.
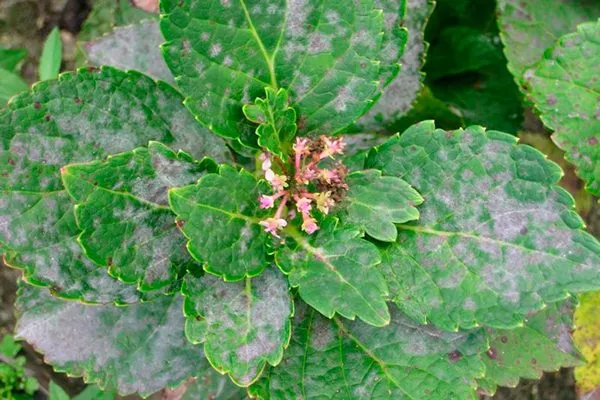
- Gray rot. This fungal disease most often affects young bushes, causing a gray coating to form on the above-ground parts. Treatment involves the use of Fundazol.
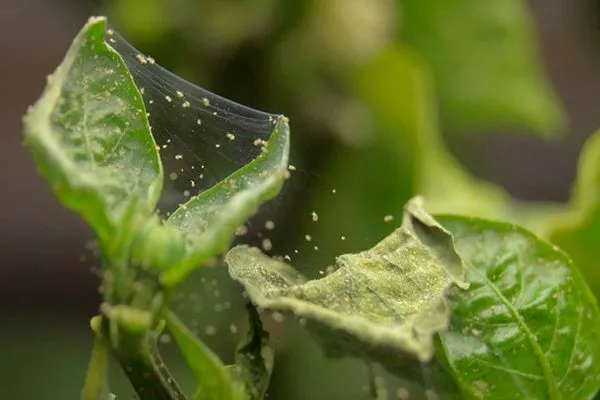
- Spider mite. These insects create a fine web that envelops the above-ground portion of the hydrangea and feed on its sap. To control them, use acaricides such as Vermitek, Acrofit, or Akrin.
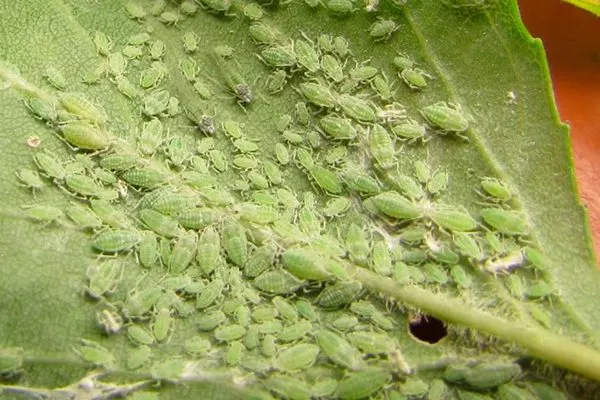
- Aphid. Pests extract plant juices. If you spot a colony, treat the bush with Iskra or Fitoverm, or use a soap solution if there are only a few insects.
- Root-knot nematodes. Small worms that damage the root system form growths on the shoots. Dig up and dispose of affected plants.
Hydrangeas also suffer from snails, which chew out the leaves and buds. To prevent this, sprinkle the soil around the plant with wood ash and collect the snails by hand.
Reviews
The Miranda climbing hydrangea is one of the most attractive varieties. Its appearance is stunning, resembling a leafy vine that stretches along walls, twines around trees, or creeps along the ground. The Miranda hydrangea requires little care, making it an attractive choice for gardeners.