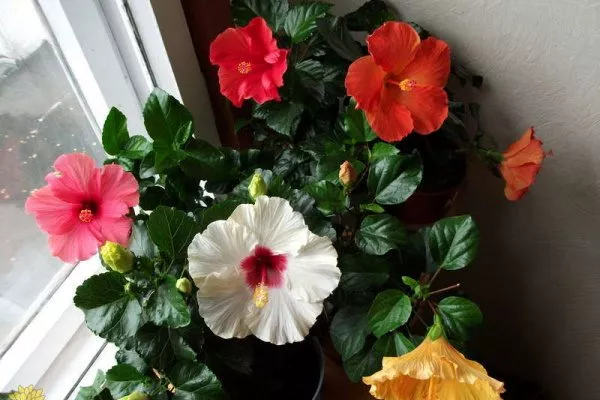
Growing hibiscus indoors can result in either excessive and constant blooming or the plant's death. This is due to failure to follow the requirements and rules developed for this plant. To avoid problems, you need to know what container and soil are suitable, how to properly plant and root cuttings, and what diseases and pests are dangerous.
Basic knowledge of hibiscus care
To avoid problems when growing hibiscus, it is important to familiarize yourself with the basic parameters of care procedures and growing conditions:
- Temperature. The optimal temperature ranges from +24 to +26 degrees, but the flower does not die even at +12 degrees and above.
- Lighting. It should last for 12-15 hours. The best location for the pot is an east- or west-facing window.
- Humidity. The ideal values are 80-90%, which can result in insufficient humidity in a typical room. Therefore, it will have to be increased artificially (by installing humidifiers, water containers, etc.).
- Watering. This is done as the top layer of the substrate dries out, but when watering, it's important to add enough water to completely soak the soil. Water more frequently in spring and summer, and half as often in winter and fall. Be sure to give the plant a hygienic shower once a month.
- Trimming. Sanitary pruning is mandatory throughout the year and cardinal pruning is required once a year. Some varieties require bush shaping.
- Fertilization. Fertilize frequently—without it, hibiscus will die. For this purpose, use complex minerals once a month throughout the growing season. Organic fertilizers are also essential. In the spring, immediately after hibiscus emerges from dormancy, apply nitrogen.
What time of year is best to propagate and plant the plant?
If you purchased a hibiscus seedling from a store, leave it alone for two weeks and avoid repotting it during this time. However, you will definitely need to repot it into a new medium. This is due to the poor soil conditions. Stores don't provide special fertilizer to prevent the plant from growing excessively.
Other features:
- the optimal period is spring-autumn, when there are no flowering buds on the bush;
- frequency of transplants into a new container - in the first 2-3 years: once every 12 months, then: once every 3 years.
Preparatory activities
Before planting, both the soil and the cuttings need to be prepared. It's important to keep an eye on the containers, too. This is done before replanting and during propagation.
Soil
Indoor hibiscus prefer fertile, neutral-pH, and loose soil. Specialty stores carry hibiscus-specific soil, but you can also buy potting mixes specifically designed for ficus. There are other options for making your own potting mix if you can't find ready-made mixes:
- Universal substrate, mixed in equal proportions with moss and soil from a flower bed;
- A universal mixture to which soil and humus are added in the same proportion;
- humus – 2 parts, leaf soil and sand – 1 part each.
Pot
During the first three years, you'll need to repot your hibiscus every year into a new container, as it's not recommended to immediately plant it in a larger one. This is because only the roots will grow, leaving no room for foliage or buds. This plant is "accustomed" to completely filling a spacious space in the substrate with its root system.
Based on the initial planting of the cutting, the container should be of the following dimensions:
- To help the hibiscus take root, use a glass that is 6 to 8 cm wide;
- then use a pot with a diameter of 11-16 cm;
- After each year, increase the width by 5-7 cm.
The container can be made of any material, but if the plant is tall, use a solid ceramic one to prevent it from tipping over. Be sure to disinfect the pot.
Planting material
To speed up rooting of cuttings or bushes, experts recommend soaking them in a rooting accelerator. These include products such as Zircon, Epin, Kornevin, and similar products. Before planting, soak the roots in warm water or a light pink solution of potassium permanganate (for disinfection).
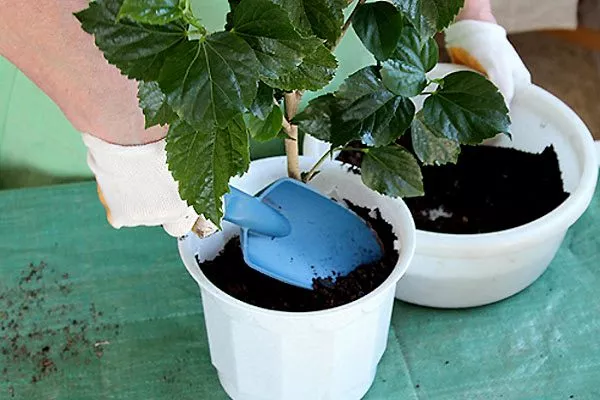
The landing process
It makes no difference whether you are planting a cutting or replanting a hibiscus bush, the process is always the same:
- Prepare the soil and pot. If the pot doesn't have drainage holes, make some.
- Place drainage material—expanded clay, pebbles, or gravel—on the bottom. Make a layer of about 2-3 cm.
- Fill the cutting halfway with substrate. If the root system is open, form a mound in the center; if the root system is rooted, form a depression.
- Place the seedling, spreading out the roots.
- Sprinkle the remaining potting mix over the top, patting it constantly with your hands. This will help eliminate any air pockets.
- Water with water that has been left to stand at room temperature, but do not overwater.
- After about 5-7 days, add more substrate because it will “sag”.
Methods of reproduction
There are several methods for increasing the numbers of indoor hibiscus plants. Each has its own characteristics, advantages, and disadvantages, so carefully consider all options before choosing a propagation method.
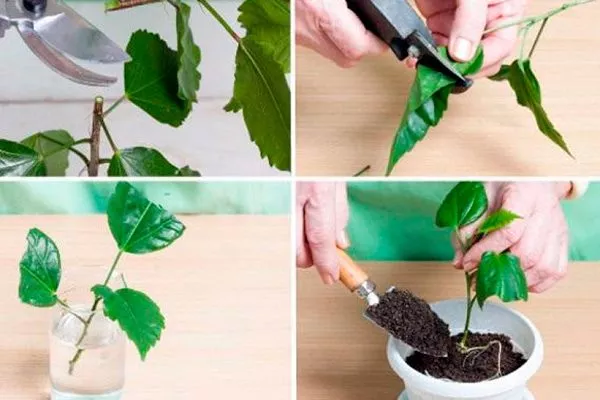
Cuttings
This method is the most popular, as it is considered the most effective and simple. Another undeniable advantage is the ability to achieve flowering the following year. All maternal (varietal) characteristics are 100% preserved.
Features to consider:
- Take cuttings from April to August, as planting time is from May to October. The best time for rooting is spring, as this is the period of active growth.
- Choose the right soil. For rooting, peat mixed with equal parts sphagnum moss is suitable. For a permanent pot (for the first year), it's best to use a mixture of turf soil, leaf mold, humus, and coarse river sand. The ratio of the components is 4:3:1:1.
- When rooting, pay attention to the container material. It should be plastic and transparent, with drainage holes. This will allow you to monitor the root system's growth.
- The optimal volume for cuttings is from 200 to 500 ml.
- Cuttings should be taken only before bud swelling or after flowering. The cutting should have at least 3-4 viable buds. Make the cut at an angle. The cutting should be 15-18 cm long.
- Before planting, be sure to remove the lower layer of foliage, but leave the upper layer to maintain the required moisture level. Trim the top of the cutting slightly, but make a straight cut (slanting only at the bottom, where the root will form).
- ✓ The presence of at least 3-4 buds on the cutting guarantees better rooting.
- ✓ The cutting must be semi-lignified, not too young and not too old.
Plant the cuttings in the classic way after rooting.
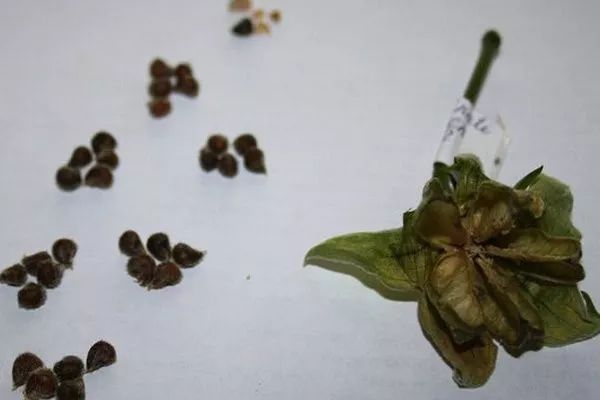
Seeds
The seed method is popular primarily among experimenters, as it leaves no chance of preserving varietal characteristics. However, it's quite easy to create a completely new, unusual variety. The method also has the following disadvantages:
- too long germination, rooting, etc.;
- labor intensity;
- the need to pick seedlings and create special conditions.
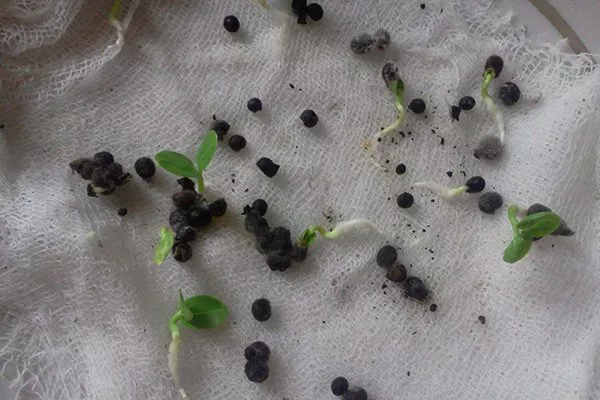
How to propagate hibiscus by seeds:
- At this stage, don't pick some flowers after they fade. A seed pod should form in their place.
- Wait until they dry out and harvest them when the pods turn brown. To do this, spread a sheet of paper or cloth under the bush. Otherwise, the seeds will scatter when you pick the pods.
- Next, extract the seeds from the pods.

- Test their germination ability. Take about 10 seeds, place them in damp cheesecloth, then wrap them in a plastic bag and tie it shut. Leave them for 6-8 days. Remove the seeds and inspect them. Swelling is a good indicator of viability.
- Place the remaining seeds in the same way.
- After extraction, treat all swollen seeds with growth stimulants. This takes about 20-24 hours. To disinfect the seeds, soak them in a light pink solution of potassium permanganate for about 30-40 minutes.
- Prepare the substrate and container. You can use disposable cups, plastic bottles, or a single container. Disinfect them and line the bottom with the soil mixture. The best option for germinating seeds is peat and river sand, taken in equal parts.
- Spread the grains over the surface, leaving about 5 mm between them.
- Fill with the remaining substrate and moisten with a spray bottle.
- Cover the container with glass, plastic or other transparent material.
- Place the containers in a room with a temperature between 24 and 25 degrees Celsius. The location should be well-lit, so a windowsill is suitable, but be careful not to expose them to direct sunlight.
- Remove the cover daily to ventilate and eliminate condensation.
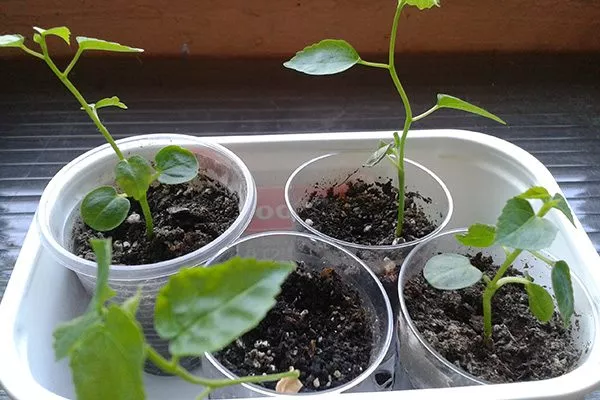
- Sprouts should appear in 2-3 weeks. Once they have two true leaves, remove the covering completely and transplant. Use only separate containers for this. Tall, transparent disposable cups are best.
- Continue caring for the seedlings using traditional methods, but keep in mind that as they grow, you will have to transplant the bushes several times.
Hibiscus will bloom in 3 or 4 years.
By dividing the bush
This hibiscus propagation technique is used when replanting is necessary. It has many advantages: flowering in the first season, no need for rooting (the roots are already present), and preservation of the parent plant. There is one drawback: tree-like varieties cannot be separated this way.
The procedure for dividing the bush is as follows:
- In early spring (before the sap begins to flow), thoroughly moisten the soil in the pot with mature hibiscus (over 3 years old).
- Allow the water to completely saturate the substrate. This is necessary to facilitate the process of removing the plant.
- Remove the bush and place it in water for 1-2 hours. The water should be settled and warm.
- Rinse the roots from the substrate.
- Disinfect the knife.
- Cut the bush into two or more pieces. Keep in mind that each piece must have a strong, woody trunk, which will serve as the base. The presence of buds and roots is important.
- Treat the cut areas with wood ash and let dry.
- Plant using the standard method.
How to root at home?
Rooting is most often used when propagating cuttings. This is an important step, determining the viability of the future plant. If the procedure is performed incorrectly, the plant will not only fail to root but may even die. Rooting can be done in either substrate or water.
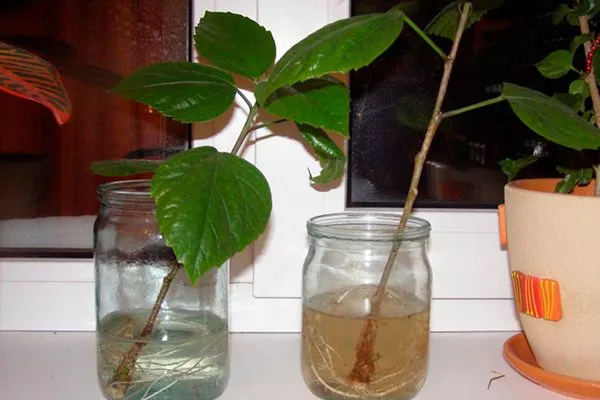
In the water
This is the easiest method of rooting, which is carried out step by step:
- Prepare a container – it should be opaque and disinfected.
- Pour water at room temperature into it.
- Apply Kornevin or another stimulant according to the instructions.
- Add 1 tablet of activated carbon and mix.
- Place the seedling so that one internode is in water.
- Cover with a bag or a cut plastic bottle to create a greenhouse effect.
- Remove the cover daily and add water if necessary.
- Once the roots reach 5 cm, transplant into a permanent container.
- ✓ The water temperature for rooting should be no lower than +22°C and no higher than +25°C.
- ✓ The use of activated carbon in water prevents the development of pathogenic microflora.
In the ground
The procedure is carried out in the same way as in water, but with the difference that the glass must be transparent, and the substrate is placed inside.
Peculiarities:
- substrate – peat and sand;
- drainage material is placed on the bottom;
- embedding depth – 2-3 cm;
- transplantation into a pot is carried out after 35-45 days.
How to care for it at first?
Immediately after planting/repotting, place the flower on a windowsill out of direct sunlight. The optimal daytime temperature is 20 to 22 degrees Celsius, and at night, 14 to 16 degrees Celsius. What to do:
- monitor the soil moisture level – water the flower;
- fertilize after 2 weeks with nitroammophoska (5 g per 1 liter of water);
- It is allowed to spray young leaves, but they must be wiped off immediately.
What to do if a houseplant doesn't take root?
If rooting isn't happening or the plant isn't thriving, check to see if you're creating the right conditions and caring for it. If you've done everything correctly, you can artificially stimulate rooting. This can be done using a variety of methods and tools:
- Water on the willow. Place willow cuttings (they should be 5-6 mm in diameter) in a bucket of water. Leave them there until roots form. You can root the hibiscus in this solution or water it.
- Honey. Prepare a solution: dissolve 1 teaspoon in 1.5 liters of water. Soak the hibiscus for 10-12 hours.
- Potato. Insert the cutting into the potato and bury it in the substrate.
- Medicines. There are many, but three are best suited for hibiscus:
- Heteroauxin. This is a phytohormone for growth. It is diluted as follows: 50 mg per 1 liter of water. The seedling is watered with the solution or the cutting is soaked.
- Kornevin. This is a biological rooting stimulant. It's used like Heteroauxin and is diluted at a rate of 5 g per 5 liters of water.
- Zircon. This is a natural rooting agent. For soaking, use one ampoule per 1 liter of water.
Dangerous diseases and pests
With proper care and planting, hibiscus is rarely susceptible to pests and diseases. However, if mistakes are made, gardeners most often encounter the following:
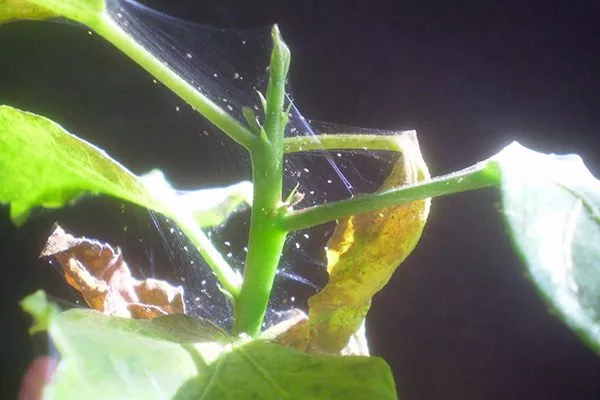
- Spider mite. Hibiscus is the plant that attracts them most. The parasite settles on the green parts of the bush, entangling them in a light-colored web. Controlling mites of this genus is difficult, as their bodies quickly develop a tolerance to the treatments, requiring frequent replacement.
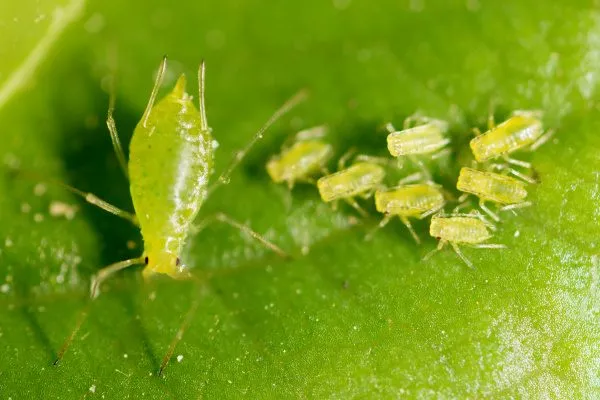
The best products are Aktara and Fitoverm, while folk remedies include a soap solution. For prevention, periodically spray the plant with water and any essential oil. - Aphid. This is also the most common. The insect sucks out all the plant's sap, causing the plant to wither and die. The pest can be identified by sticky droplets on the leaves and curling.
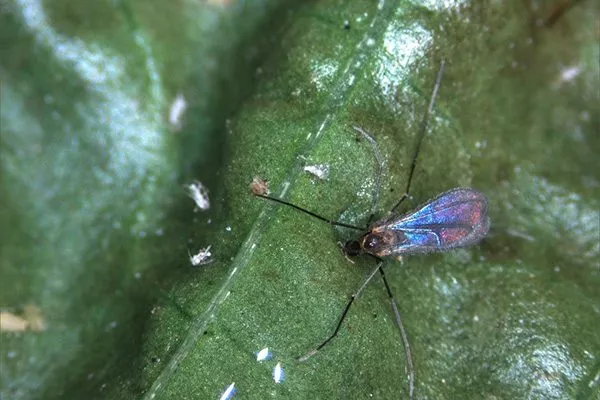
It can be destroyed with a soap solution, Aktara, or Iskra. - Gall midge. This midge can attack both the green foliage of hibiscus and the root system. Its presence is indicated by curled leaves, egg clutches inside buds, and chewed petals. It's not the midge that's harmful to the roots, but the caterpillars, which hatch and fall into the substrate.
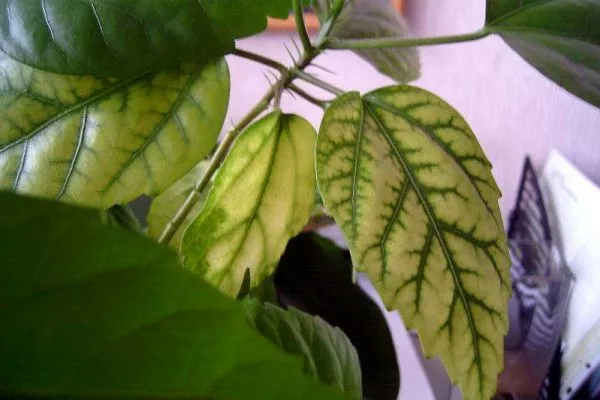
Any insecticides can be used for control, but it is best to remove all affected buds at first, which will prevent the formation of worms. - Chlorosis. The main symptoms are rapid leaf paleness, yellowing, and subsequent leaf fall. Fungicides such as Skor, Horus, Fundazol, and others are used for treatment.
- Sunburn. It occurs not only due to direct sunlight, but also when leaves are pressed tightly against the glass, or the flower is kept in the shade for a long time and then suddenly moved into a bright spot. Signs include yellow or red spots forming on the leaves.
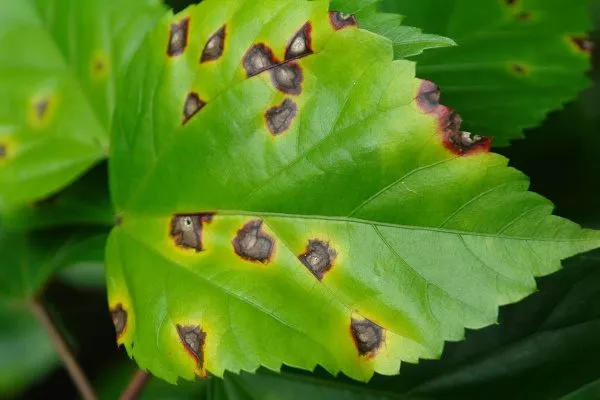
The gardener will have to remove all the affected elements and provide the flower with normal lighting. - Bacterial spotting. Symptoms include the formation of brown, rotting spots on the leaves. Suitable treatments include Euparen, Cumulus, and Fundazol.

Possible problems
Most often, problems stem from failure to comply with proper growing and care requirements. There can be many complications, so a novice hibiscus grower must familiarize themselves with them to know how to prevent problems or correct them.
Why do leaves turn yellow?
This is the most common problem for all gardeners. There may be several reasons for this:
- Chlorosis. The disease develops due to the use of poor-quality water for irrigation. Specifically, it occurs when the gardener fails to let the water settle for 2-3 days. As a result, the infection is caused by the presence of large amounts of calcium and chlorine salts.
Besides using fungicides, it's important to quickly save the plant. There are two options:- soil replacement;
- maximum substrate flushing with settled water with the addition of chelated iron.
- Overwatering. Although hibiscus thrives on high humidity, its root system doesn't appreciate overwatering, causing it to rot. This leads to yellowing of the foliage. The only solution is to repot it in a drier soil.
- Lack of lighting. Yellowing occurs very frequently, accompanied by leaf drop. To save the plant, immediately move it under phytolamps.
Why doesn't it bloom?
The main reason for the lack of bud formation is overfeeding with nitrogen-containing fertilizers, regardless of their form (organic, mineral, etc.). Therefore, it is important to strictly adhere to all dosages and rates. Nitrogen primarily promotes foliage and stem growth, while flowering requires potassium, magnesium, and phosphorus.
There are other reasons:
- poor lighting;
- wintering in excessive heat;
- lack of watering.
Other troubles
What else might a hibiscus grower encounter?
- The leaves are falling. There are several reasons for this: insufficient light, sudden temperature changes, drafts, and freezing. In this case, it's important to immediately identify the cause and correct the situation. But keep in mind that if only a small number of leaves fall, there's no need to worry, as this is a natural process—the bush is rejuvenating itself.
- Hibiscus is drying up. Another unpleasant issue that arises due to lack of watering, freezing, frequent relocation to a new location, or stress after transportation.
- The plant is withering. The most common cause is insufficient water, using cold water, or overwatering, which leads to root rot. If a seedling is wilting, the cause should be found in improper soil composition, a lack of disinfection, or improper planting depth.
When growing indoor hibiscus, pay special attention to the growing conditions and all planting, watering, and pruning guidelines. This is the only way to ensure lush blooms and excellent health. This plant always responds to the grower's care and produces beautiful flowers at the right time.