Begonia propagation can be accomplished in several ways, but unlike other houseplants, the process has its own unique characteristics. This is due to the plant's tropical origins (Africa, Asia, and southern regions are considered its homeland). The type of begonia must be considered: decorative flowering begonias with abundant, lush blooms, or decorative foliage begonias with inconspicuous, small buds.
Requirements and conditions for reproduction
| Name | Temperature | Lighting | Humidity |
|---|---|---|---|
| Ornamental flowering | +18…+24°C | Diffused light | 50-55% |
| Ornamental foliage | +15…+17°C | Diffused light | 50-55% |
Begoniaceae propagate under specific conditions, allowing for rapid rooting and rapid growth. Here's what you should pay special attention to:
- Temperature. Begonias don't tolerate temperature fluctuations, so they need to be kept at a constant temperature. The average temperature is 18 degrees Celsius, but in the summer months, temperatures between 22 and 24 degrees Celsius are acceptable, and in the winter, between 15 and 17 degrees Celsius.
However, it is prohibited to place pots in close proximity to heaters and window glass. - Lighting. It should be soft and diffused. Natural sunlight should only reach the plant between 7 a.m. and 11 a.m. and from 5 p.m. to 10 p.m. During the rest of the day, it is advisable to cover the windows with a light curtain or light-colored blinds.
Daylight hours range from 12 to 14 hours, with the highest required for ornamental foliage begonias. - Humidity. Despite its tropical origins, this plant dislikes high humidity, so 50-55% is ideal. Keep in mind that during winter, additional humidification may be necessary by spraying water near the plant or placing containers of water.
This is due to the dry air due to the radiators/heating devices being turned on. - Location. Begonias are sensitive to direct sunlight, so placing pots on south-facing windowsills is not recommended, especially during the spring and summer when the buds are blooming. The optimal location is west- and east-facing windowsills, as north-facing windows can cause the plant to become overly cold.
It is not advisable to move the pot frequently – this is stressful for the plant. - What time is considered optimal? The propagation period depends solely on the method used. For example, when sowing seeds, winter (January-February) is preferred; when using cuttings, spring-summer; and when dividing the bush and propagating by leaves, spring (immediately after awakening), when the bush's growth is significantly activated.
Preparatory activities before breeding
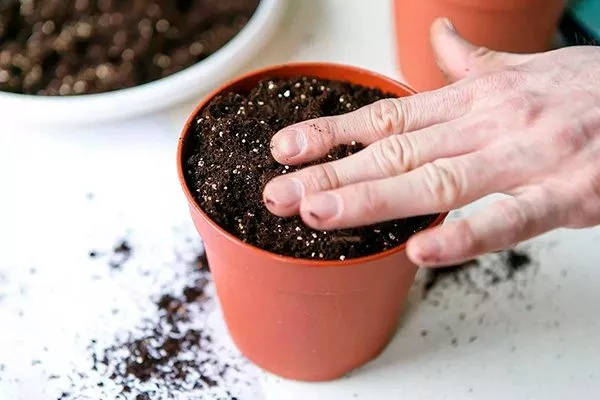
Before repotting, be sure to prepare all your tools. Disinfect them and, if necessary, sharpen knives and pruning shears (this will make pruning less traumatic for the plant). Don't forget to prepare or purchase potting soil and choose a pot.
Soil mixture
Flower shops offer a wide selection of universal begonia soils, but if you prefer to make your own, keep in mind that the optimal soil pH is between 5.5 and 6.4. The plant prefers loose, breathable soil, so the begonia-specific soil mixture should be appropriate.
Potting mix options:
- leaf soil – 2 parts, humus, peat, sand – 1 part each;
- peat – 1 part, river sand – 3 parts;
- leaf soil and peat - 1 part each, sand - 3 parts;
- 2 parts peat and leaf soil, 1 part sand, 0.5 parts rotted manure - this composition can only be used when dividing the bush, since the plant is considered an adult;
- in equal proportions - sand, peat, soil from a greenhouse, manure - also for adult begonias.
Pot
Begonias are sensitive to potting material, so choose a container made of porcelain, clay, or ceramic. If this is not possible, plastic is acceptable. Size is important. It should be 3-5 cm larger than the root ball and roots.
In a smaller pot, the plant will be cramped, while in a larger one, the risk of over-watering the soil mixture increases, which will cause rotting processes.
Methods of propagation of begonias
Begonias are considered a versatile plant when it comes to propagation methods, as almost any technique is suitable. Each has its own advantages and disadvantages, as well as distinctive characteristics, which should not be ignored.
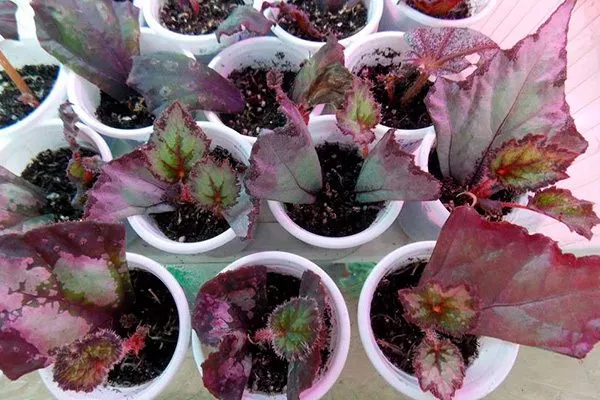
Cuttings
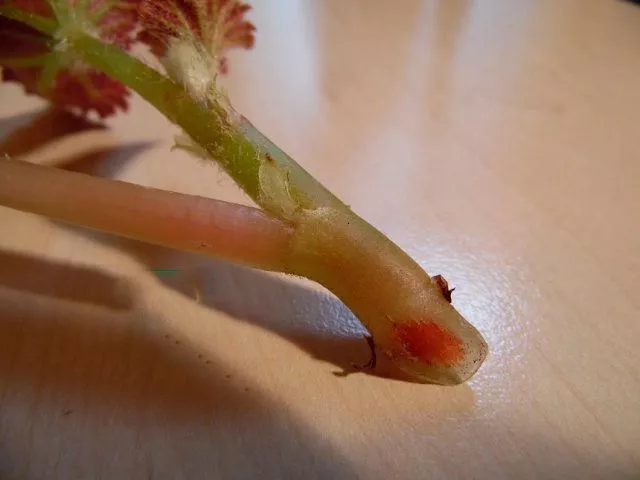
Taking cuttings during the active flowering period is prohibited, as this will slow growth and reduce the survival rate. However, if you are late with propagation in the spring, experts recommend trimming all flowers, buds, and inflorescences before the procedure. In other cases, only the lower leaves should be removed from the cutting, and the central leaves should be cut in half.
This method is applicable to all types of begonias and is distinguished by the fact that it is possible to preserve all varietal characteristics.
The first thing you need to do is cut and prepare the planting material. Features:
- the cutting must have at least 3 leaves;
- length of the shoot – 10-15 cm;
- part of the stem - middle and upper, but it is better to give preference to the apical stem;
- make the cut with a sharp knife;
- After pruning, treat the cut area with wood ash;
- Leave the cuttings to dry for a couple of hours.
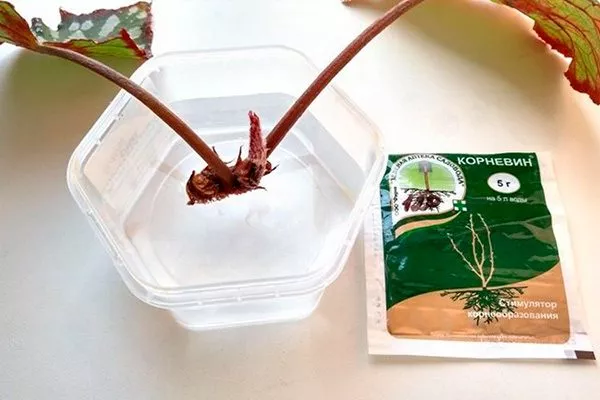
There are two methods for rooting cuttings: water and soil. The process for propagation in water is as follows:
- Prepare a container. A glass jar will work, but it must be dark. Alternatively, you can wrap the container in dark paper or fabric, or paint it. Darkened glass prevents heat from penetrating the air, keeping the liquid in the jar fresher longer.
- Prepare water. It should be settled or filtered and at room temperature. Add 1-2 tablets of activated charcoal (per 500-900 ml). Stir thoroughly until completely dissolved.
- To speed up the rooting process, add a little rooting stimulant (Kornevin, Epin, etc.). You can also use a folk remedy: add 10 drops of fresh aloe juice to 500 ml of water.
- Place the prepared cutting in a jar with liquid.
- ✓ The optimal length of the cuttings should be at least 10 cm, but not more than 15 cm to ensure sufficient nutrients.
- ✓ The water temperature for rooting should be stable, within 20-22°C, to avoid stress on the cuttings.
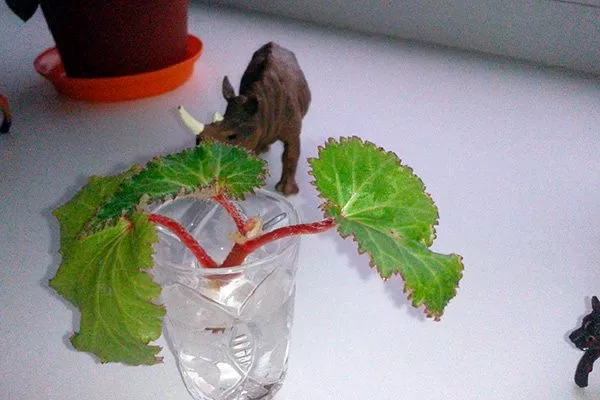
Until roots form, do not change the water; only add the required amount. Transplant to a permanent pot once the roots reach 2 cm.
When using substrate rooting, propagate begonia by cuttings as follows:
- Prepare the pot. For now, you can use a large plastic cup or any plastic container. Be sure to make holes in the bottom to allow excess water to drain after watering. Place a drainage layer (perlite, vermiculite, pebbles, or expanded clay) on the bottom. Top with potting soil almost to the brim of the cup.

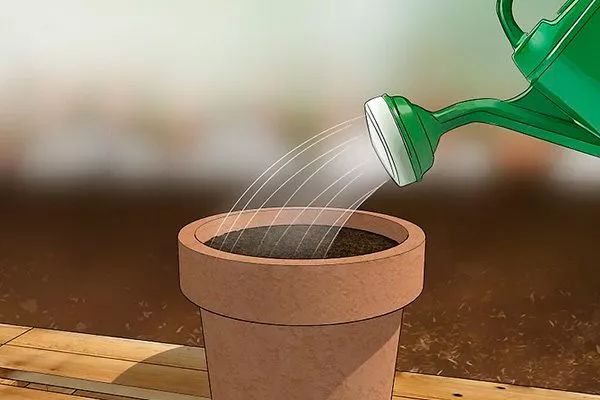
- Water the soil mixture and let the water soak in completely.
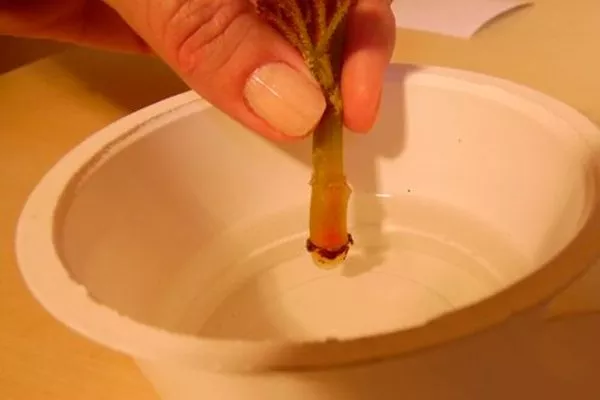
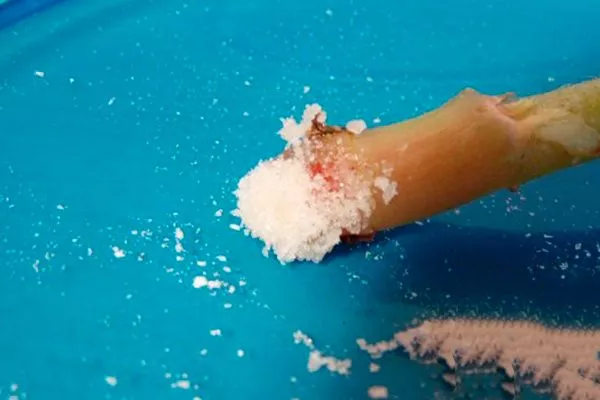
- Select a cutting and cut it at an acute angle, which will encourage more root shoots to form. Make sure to leave about 0.7-1.0 cm between the bud and the cut end.

- Prepare a growth stimulator.
- Dip the end of the cutting into water.
- Then into the rooting powder.
- Make a depression in the center of the pot and insert the cutting into it. Firm the soil very lightly.
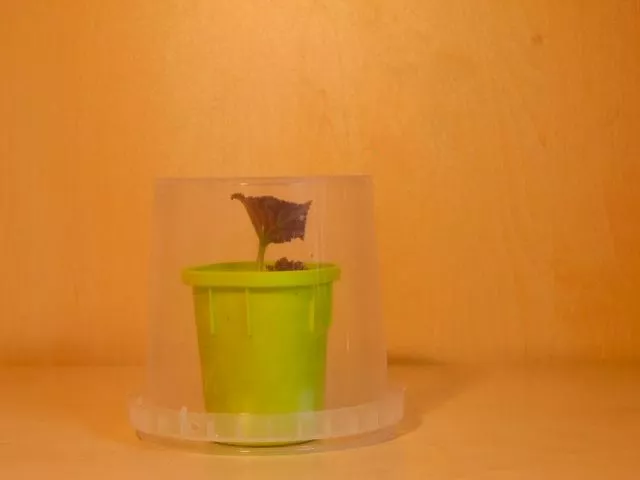
- Cover the cup with a transparent plastic container to create greenhouse conditions.

Tubers
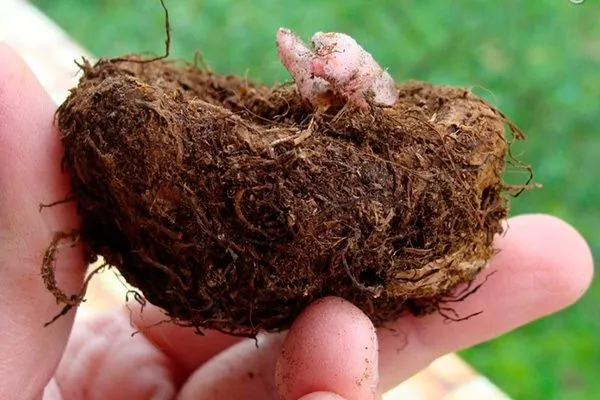
This method is suitable exclusively for tuberous begonias. They are typically grown outdoors, but they also thrive indoors. The main advantage of propagating from tubers is that this part of the plant contains a very high concentration of nutrients and energy.
All of this is redirected to the bud, from where a new bush grows. The only requirement for tuberous plants is repotting them every two to three years. This is necessary because the tuber grows and develops, which causes the pot to become overcrowded.
There are two ways out of this situation: transplant into a larger container or divide the planting material for propagation purposes.
The main conditions for reproduction:
- the presence of buds on the tuber - so that there are at least 1-2 buds on each planted tuber;
- You can divide it not only into 2 parts, but also into more;
- the age of the mother bush is 3 years or more;
- the condition of both the underground and aboveground parts is satisfactory (no signs of disease, fractures, rot, dryness);
- The reproduction period is spring, immediately after the formation of primary shoots begins.
The procedure for dividing and further planting tubers is as follows:
- Remove the tuber from the pot.
- Inspect it carefully for defects and the presence of growth points (buds).
- Prepare the pots by adding a drainage layer, then the substrate. Keep in mind that tuberous plants require more peat moss to ensure the soil is as loose as possible.
- Cut the tubers into the desired number of pieces. Dry in the open air for about 10-15 hours.
- Treat all cut areas with crushed wood or activated carbon.
- Let it dry. This takes about 1-2 hours.
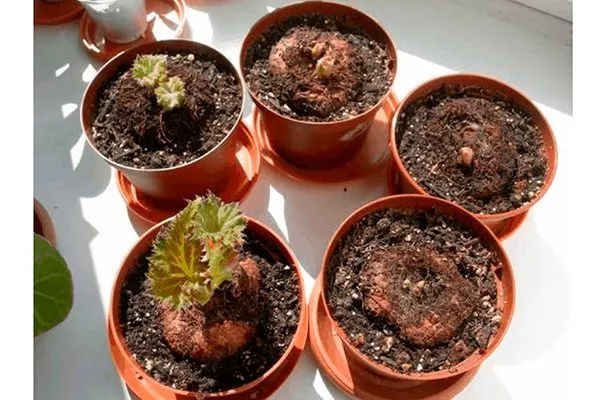
- Place the tuber in the soil mixture so that a third is buried and the rest is above the surface of the substrate.
- Moisten the soil with a liquid of Fitosporin diluted according to the instructions.
- Cover the pot with a plastic bag, creating a mini greenhouse.
By dividing the bush
This method is intended for rooted ornamental foliage begonias and is considered the most simplified, so it is often recommended for novice gardeners. The main goal is to divide the root system into fragments so that each has a growing point.
Rules for the procedure:
- Place pebbles, expanded clay, or other drainage material at the bottom of the pot. The layer should be 1 to 2 cm thick, depending on the height of the container and the age of the plant.
- Place the substrate on top.
- Take a pot containing a mother begonia that is at least 3 years old. Moisten the soil and allow the water to soak in.
- Remove the bush carefully so as not to damage the root shoots.
- Inspect the roots – select areas with buds, trim off any unsuitable parts, and rinse the root system. Dust the cut areas with powdered charcoal.
- Remove any stems that are too long, large leaves, and be sure to cut off any flower stalks.
- Cut the bush into pieces. Dust with ash again.
- After this, place the roots in a solution with a rooting agent (Kornevin, Heteroauxin, etc.).
- Place the propagation part in a new pot, spreading the root shoots evenly along the sides.
- Sprinkle with soil mixture and compact lightly with your hands.
- Pour water with room temperature.
- Cover the pot with clear plastic or polyethylene.
How to propagate begonia by division is also shown in the video below:
Layering
Begonias are known for producing offsets. These occur in both root and tuberous plants. If the leaf axils are too deeply buried in the soil, offsets will also grow from them. You can separate the offsets when repotting the houseplant. In this case, proceed in the same way as dividing the bush.
If there is no need to remove the flower from the substrate, then the work is simplified:
- Grasp the cutting by the very base.
- Dip your fingers slightly into the soil.
- Loosen the shoot.
- Pull it towards you or just twist it (like mushrooms).
- Inspect the root system. If roots are present, immediately plant them in the substrate as usual. If not, place them in water to encourage rooting (as with cuttings). Be sure to trim the stem to length and remove the foliage, leaving 2-3 leaves.
- Cover the pot with a plastic bag or a cut-off plastic bottle to create a greenhouse effect.
Seeds
This method of begonia propagation is not particularly fast and does not preserve varietal characteristics. However, this has the major advantage of allowing you to develop numerous new varieties and become a renowned breeder.
Peculiarities:
- sow indoor begonias in mid-December – this way the shoots will have time to form and get stronger before winter;
- optimal containers are plastic cups and containers with sides 8-10 cm high, peat tablets and pots;
- mandatory requirement for a hole in the bottom for the drainage system;
- the container will need to be covered to create greenhouse conditions;
- If you buy seeds in a store, pay attention to the expiration date;
- If you are using granulated planting material, sow it in peat tablets.
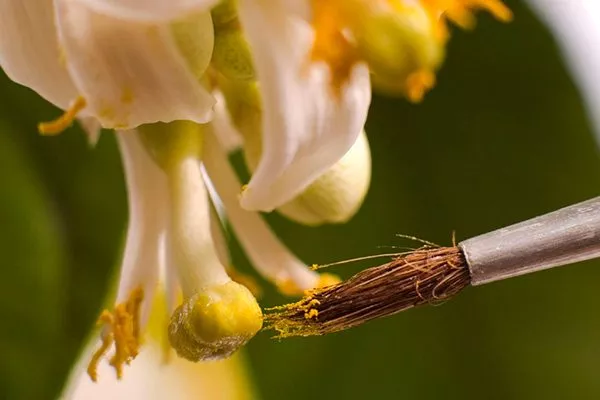
Seed propagation occurs in stages. The first step is to collect the planting material, but to do this, high-quality pollination is essential, as the number of seeds produced by free pollination is insignificant.
Step-by-step instructions:
- Identify male and female flowers easily: the former are larger than the latter, have elongated stamens and pollen, and bloom earlier. The latter are not double, but have expanded pistils and ovaries beneath the petals.
- Using a brush (you can use a watercolor brush), remove pollen from the male anthers.
- Transfer it to the female stigmas.
Leave the planting material until December, after which you can begin sowing:
- First, disinfect the seeds. To do this, prepare a light pink solution of potassium permanganate. Dip the begonia seeds in it and leave them there for about half an hour.
- Now disinfect the previously prepared substrate - water it with a weak solution of potassium permanganate.
- Place a 0.5 cm layer of drainage material on the bottom of the container – small pebbles, expanded clay, etc.
- Fill with substrate.
- Level its surface, removing any large elements (leaf fragments, chips, clod of soil, etc.).
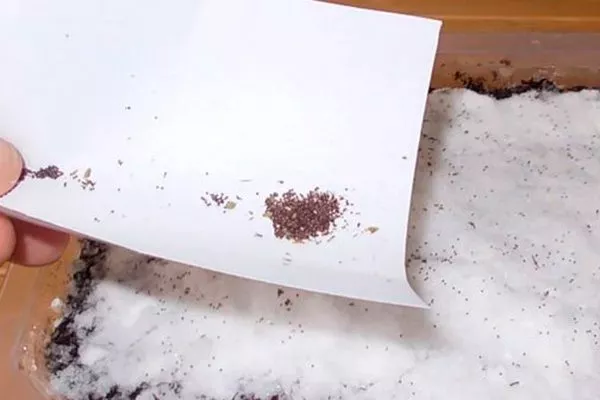
- Use a spray bottle to moisten the soil mixture with warm water. Alternatively, you can easily see the seed placement by adding a light layer of snow (easy to remove in winter).
- Sift river sand and combine it with small seeds in a ratio of 4-5:1.
- Sprinkle the planting material onto the snowy surface. The easiest way to do this is to fold a piece of paper into a corner and sprinkle the seeds into it. Sprinkle the seeds first along the container, then across, keeping a distance of 1 cm.
- Cover the container with plastic or glass. The snow will melt immediately and act as a humidifier for the substrate.
Rules for growing seedlings:
- As the seedlings emerge, moisten the soil mixture periodically, but only with a spray bottle. Otherwise, the seeds may become dispersed and fail to germinate.
- Open the mini-greenhouse daily for ventilation. First for 10 minutes, then for 15, and so on.
- During the first week, keep the seedlings at a temperature of +24-25 degrees, and when the primary shoots form, reduce the temperature to +18 degrees.
- After the first 2-4 leaves have formed, transplant the plants. Tweezers are helpful for this. Transplant into boxes with identical substrate, spacing the plants in a 2x2 or 4x4 cm pattern, depending on the size of the seedlings and the variety.
It is allowed to immediately transfer the plants into individual containers (afterwards, transplanting them into permanent pots will be easier).
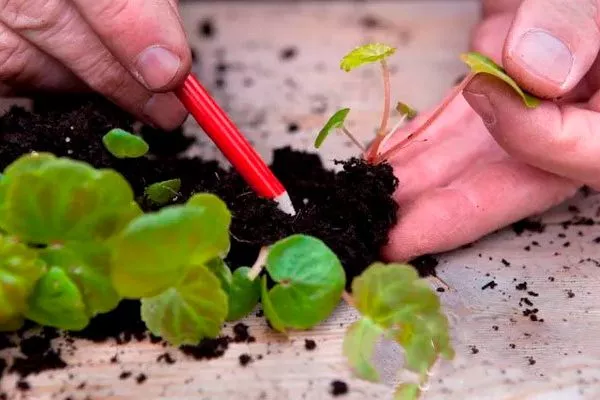
How to dive:
- Using a teaspoon or a wooden stick, remove the plant from the mass along with the root ball.
- Make indentations in the new container and insert the sprout into them. The pot should be much higher than the previous one.
- Water with a solution of Fitosporin.
- Make a plastic cover again.
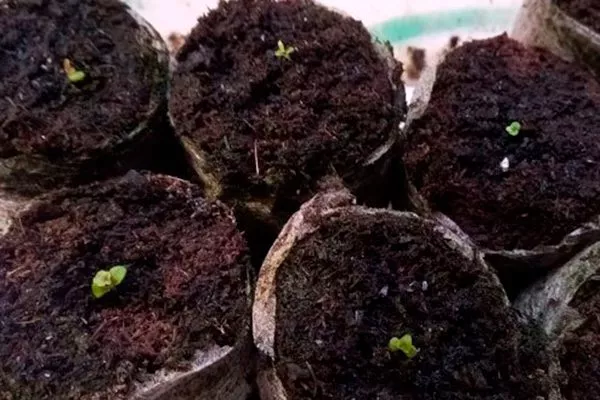
Experienced gardeners recommend that beginners sow seeds in peat pellets, especially if they purchased pelleted seeds from a flower shop. How to plant for propagation:
- Prepare a deep tray (1-2 cm higher than the peat tablets) - disinfect it and fill it with warm water.
- Place peat tablets inside so that they do not touch each other, as they will increase in size as they swell.
- When the tablets swell, place the seeds in them and spray with water from a spray bottle.
Further care for the seedlings is standard. The only difference is that watering is done into the tray, through which the liquid penetrates the tablets.
How to grow a flower from seeds is also described in the video below:
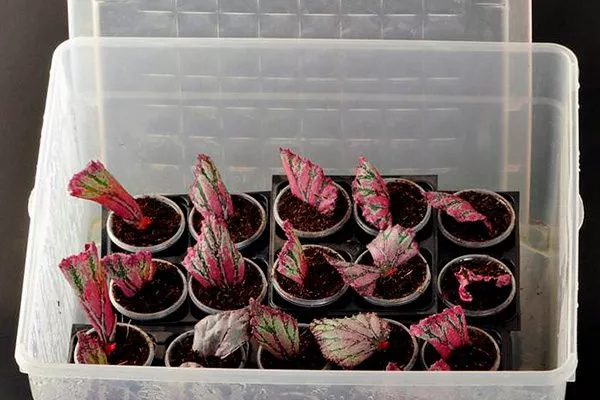
Leaf
If you don't have time for more complex propagation methods, use leaf blades. They can be propagated whole or by cuttings or fragments. This can be done in both substrate and water.
This method has many features:
- varietal characteristics are preserved;
- the plant is not damaged;
- no skills or experience required;
- from one leaf you can get several bushes;
- root growth rate.
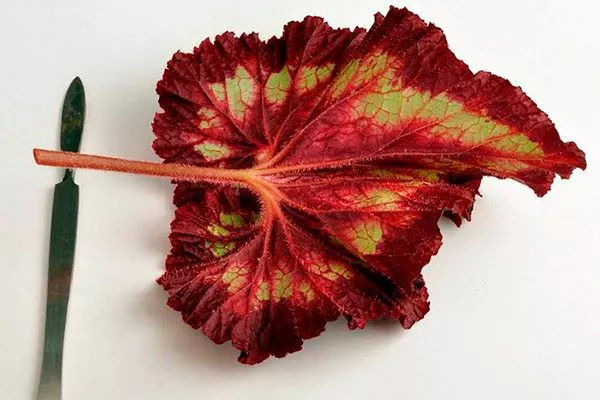
The most important thing when propagating from leaves is choosing the right planting material. Remember that leaves should only be taken from a healthy mother plant. The material should not be wilted, dry, or rotted.
- ✓ The leaf should be fully formed, without signs of yellowing or wilting.
- ✓ The presence of obvious veins on the back of the leaf increases the chances of successful root formation.

Whatever the method, you need to do the following:
- Select a sheet.
- Treat the blade or knife with an antiseptic.
- Cut with or without the cutting.
- Leave to dry for 30 minutes.
- Dilute any root growth stimulator and insert the leaf into it.
- Plant vertically in the substrate or in water first. In the latter case, wait until roots form before transplanting the seedling into the soil mixture.
- Cover the planting with polyethylene or a plastic container or bottle.
- When 3-4 young leaves have grown, transplant them into another container with similar soil.
- Next, pinch the top of the plant, which will encourage branching.
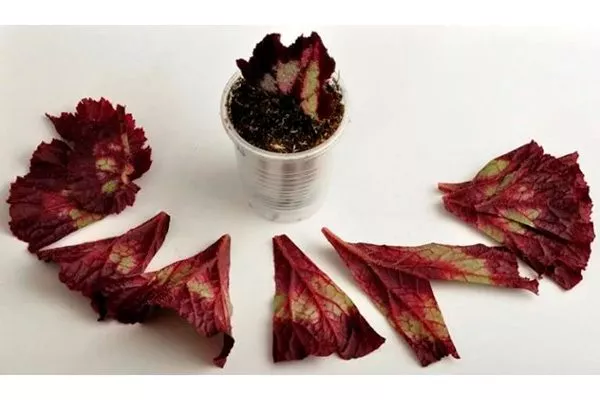
Features of planting in fragments:
- for this method, the largest and healthiest leaf blades are usually taken;
- a leaf is placed on the surface of the cutting board and straightened out;
- after this, it is cut into several pieces across the large veins;
- it is necessary to dry it for half an hour;
- then vertical planting is carried out (as a whole leaf and with a cutting).
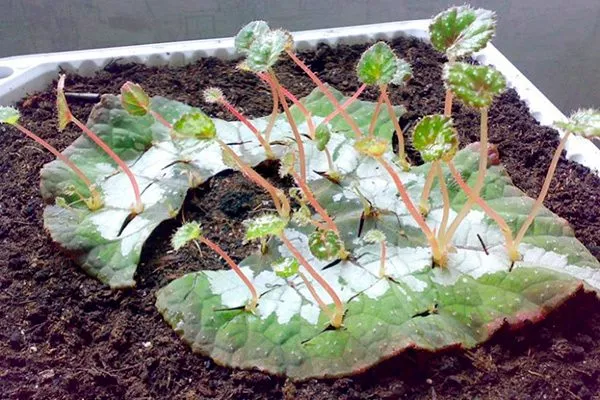
How to plant a whole leaf, but with cuts:
- Place the selected sheet face down on the table surface.
- Using a sharp blade, make through cuts along the main veins of the back side, leaving 2 cm between each other.
- Turn the sheet over and place it on the surface of the substrate, carefully pressing the planting material into the soil.
- Secure the leaf around the perimeter with pieces of wire or toothpicks.
- Water with a solution of Fitosporin.
How to care for the procedure afterward?
Regardless of the begonia propagation method, it's important to provide the houseplant with proper care and maintenance. This ensures active growth of both the root system and the above-ground mass. To ensure this, follow these key points and rules:
- make sure that the growth point does not go deep into the substrate, but is located above the soil surface;
- When watering, do not allow water droplets to fall on the green part of the plant - this can lead to rotting processes;
- do not lower the leaves and petioles more than 1/4 - the plant will rot;
- use root formation activators - they will reduce the rooting time;
- 2-4 days after planting, place the pots in partial shade - completely exclude bright and especially direct sunlight;
- Place flowers on the windowsill with open glass after adaptation;
- Always lay a drainage layer - without it, waterlogging occurs, which leads to the rapid death of the bush;
- choose a wide and shallow pot, since begonias have a superficial root system;
- The optimal type of irrigation is tray irrigation.
If you've decided to propagate begonias, be sure to research all the methods, choose the best one for you, and devote a lot of your attention to the process. Only then will your houseplant reward you with lush blooms, rapid rooting, and vibrant health.